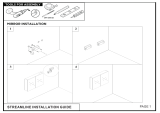
Page is loading ...

1
© 2011 Midmark Corp. | 60 Vista Drive Versailles, OH 45380 USA | 1-800-643-6275 | 1-937-526-3662 |
DA2133i
003-1956-00 Rev. G (7/25/13)
FCC10672 (72”) shown
Free Standing Center Console Installation
Applies to Models:
FCC6272 (72”)
FCC6290 (90”)
FCC10672 (72”)
FCC10690 (90”)
FCC11272 (72”)
FCC11290 (90”)
NextNext
midmark.com
Style A

2
© 2011 Midmark Corp. | 60 Vista Drive Versailles, OH 45380 USA | 1-800-643-6275 | 1-937-526-3662 |
DA2134i
UPPER UNIT
EQUIPMENT BASE
MIDSECTION
SINK BASE
FCC10672 (72”) shown
Dispenser Unit
Supports Upper Unit and
MidSection shelving and
privacy panels.
Mounting for
Exam Lights
UNIT IDENTIFICATION
Note
The Free Standing Center Console
can contain various configurations
of the different units.
DISPENSER
UNIT
EQUIPMENT UPPER
(Shows Bi-Fold Door option)
CENTER
COLUMN
Sink Base
Contains various plumbing
and electrical connections.
Center Column
Contains electrical outlets.
Lights can be mounted to it.
Upper Unit
May contain Task Lights.
Equipment Base
Must be installed and leveled with
Center Column and Sink Base.
Equipment Upper
Can be congured with bi-fold
doors, split storage, open
storage, etc.
MidSection
Can be congured in different
variations with privacy panel,
and shelving.
NextNext
BackBack
midmark.com
Style A

3
© 2011 Midmark Corp. | 60 Vista Drive Versailles, OH 45380 USA | 1-800-643-6275 | 1-937-526-3662 |
Complete FCC Hardware Kit
NextNext
BackBack
midmark.com
Style A

4
© 2011 Midmark Corp. | 60 Vista Drive Versailles, OH 45380 USA | 1-800-643-6275 | 1-937-526-3662 |
2.5" (6.4 cm)
(max.)
2" (5.1 cm)
(min.)
5/8" (1.6 cm)
O.D.
2.5" (6.4 cm)
(max.)
2" (5.1 cm)
(min.)
1/2" (1.3 cm) NPT
Finished Floor
FLOOR LAYOUT (as applicable)
Equipment Alert
• Free Standing Console must be connected to a dedicated
circuit breaker rated at 25 amps, 120 VAC.
• All electrical and plumbing connections must be made by a licensed
electrician and plumbing contractor following applicable local, city,
and national codes.
• The unit contains 7 duplex outlets, which are rated at a combined 20
amps. This rating must be taken into account plugging
devices(s) into the available outlets.
• Assure floor is of such construction that the unit(s) will be
adequately supported and anchored. If necessary, contact a licensed
contractor to reinforce the flooring.
Note
A full size, pre-installation Floor
Templates is available upon request.
P/N 003-1967-00.
53 1/4”
(135.3 cm)
Air
(Optional)
Optional
Loop Vent
Hot
Water
Electrical
supply
Drain
Cold Water
(Tee off for
delivery unit).
Sink Base Unit
20”
(50.8 cm)
44 13/32”
(107.7 cm)
13-3/4”
(34.9 cm)
19-1/4”
(48.9 cm)
27-1/4”
(69.2 cm)
30-3/4”
(78.1 cm)
34-3/4”
(88.3 cm)
Electrical
supply for
X-Ray Unit
0
0
12-3/16”
(30.9 cm)
16-15/16”
(43.0 cm)
NextNext
BackBack
midmark.com
Style A

5
© 2011 Midmark Corp. | 60 Vista Drive Versailles, OH 45380 USA | 1-800-643-6275 | 1-937-526-3662 |
DA115800i
PLUMBING SPECIFICATIONS
Note
All plumbing must be made by a licensed plumber
following the applicable local, city, and national codes.
Note
Conduit size (diameter) is dependent on size of wiring,
and / or tubing that will be routed through it.
It may also be specified by related codes.
Note
Refer to Tapmaster Instructions (included)
for correct Installation procedures.
Sink
P-Trap
Clean Out Plug
Clean Out Adapter
Cabinet Bottom Shelf
3”
(76 mm)
6-3/4”
(171 mm)
Finished Floor
Tapmaster®
Controller
Hot
Water
Air
Drain
Cold
Water
Finished Height
1” (25.4 mm)
Finished
Floor
Finished
Floor
Rough-in Height
3” (76 mm)
28” (71 cm)
Inside Height
to bottom of
counter top.
NextNext
BackBack
midmark.com
Style A

6
© 2011 Midmark Corp. | 60 Vista Drive Versailles, OH 45380 USA | 1-800-643-6275 | 1-937-526-3662 |
Equipment Alert
Do not over-tighten
special hex head bolts.
Torque to 50-55 inch / lbs.
maximum.
BASE & COLUMN SECTIONS
Note
Full size template may be used to locate and drill
mounting holes prior to positioning assemblies.
Note
Open Equipment Base mounts to
Center Console with 3 screws.
On Side Delivery Units, the shipping
leg must be removed first.
Note
Use the 1/2” hex head bolts
as a jack to align center column
to Equipment and Sink Base.
Step 1: After finding high spot on the
floor, position the sink base,
center column, and equipment
base and level together.
(Refer to Leveling and securing
Base Units.)
Step 2: After securing sink and equipment
base to center column remove the
1/2” hex bolts from the “L” brackets.
Note: For temporary installations a Floor Bracket
and Cord Kit (002-0723-00) is available.
Step 3: Loosen the 3/8” hex bolts, and
secure “L” brackets to floor.
Step 4: Remove & discard shipping strap, then remove
top cap from Center Column and place in position.
Shipping
Leg
on Side
Delivery
Units
Open
Equipment
Base
3/8” Hex
Bolt
Center
Column
1/2” Hex
Bolt
Top Cap
Equipment
Base
Special
Hex Screw
Sink
Base
False
Panel
End Panel
(lift up to
remove)
Shipping Strap
NextNext
BackBack
midmark.com
Style A

7
© 2011 Midmark Corp. | 60 Vista Drive Versailles, OH 45380 USA | 1-800-643-6275 | 1-937-526-3662 |
LEVELING AND SECURING BASE UNITS
Step 1: Place hold-down clips as close
as possible to corners without
interfering with leveling screws.
Step 2: Loosely install
hold-down clips
and bolts.
Step 3: Insert shims beneath
area near hold-down
clip and tighten bolt.
Trim off excess shim.
Equipment Alert
Do not adjust leveling screws more than
1/2” (1.3cm) to prevent loss of stability.
Note
Level to highest
Point on floor.
Note
The bolts for the hold-down clips
should be placed as close as
possible to sub-base lip.
Sub-base
Hold-down
Clip
2”
(5.1 cm)
3/8”
Diameter
9/32”
Diameter
Concrete
Non-Concrete
Shim
Lower Raise
1/2” (1.3 cm)
Sub-base
NextNext
BackBack
midmark.com
Style A

8
© 2011 Midmark Corp. | 60 Vista Drive Versailles, OH 45380 USA | 1-800-643-6275 | 1-937-526-3662 |
SECURING ELECTRICAL BOX
DA2208i
A) Installer must secure electrical box
to the inside of the cabinet base
with provided screws.
NextNext
BackBack
midmark.com
Style A

9
© 2011 Midmark Corp. | 60 Vista Drive Versailles, OH 45380 USA | 1-800-643-6275 | 1-937-526-3662 |
Step 1: Start #10-24 x 5/8” phillips head, mounting
screws into nutserts of Center Column
and Dispenser Unit.
Step 2: Place the Dispenser Unit in position,
aligning the mounting holes in the Sink
Base with the nutserts in the Dispenser
Unit. Start the 1/4”-20 x 2 1/4” bolts,
lockwashers, and flat washers.
Step 4: Tighten all mounting
hardware.
Step 5: Install shelving.
Mounting
Screw
Dispenser
Unit
Center
Column
Sink
Base
Upper
Unit
UPPER UNIT AND DISPENSER
Mounting
Screw
Step 3: Place Upper Unit onto mounting
screws of the Center Column and
Dispenser Unit.
Note: May need to tip Dipenser Unit slightly and use
privacy panel to support Upper Unit during install.
Center
Column
Dispenser
Unit
NextNext
BackBack
midmark.com
Style A

10
© 2011 Midmark Corp. | 60 Vista Drive Versailles, OH 45380 USA | 1-800-643-6275 | 1-937-526-3662 |
DA2148i
PRIVACY PANEL
Step 1: Place Privacy Panel in position
and secure with special hex
head and #10-24 x 5/8” screws.
Equipment Alert
Do not over-tighten
special hex head bolts.
Torque to 50-55 inch / lbs.
maximum.
Special
Hex Head
#10-24 x
5/8”
Privacy
Panel
Cover
Panel
Note
Install Privacy Panel before
Shelves and Task Light.
Note
Install any privacy panels or
shelves in MidSection before
installing Cover Panel.
Step 2: Remove cover from adhesive strips and
place Cover Panel in position, pressing
firmly to adhere strips.
NextNext
BackBack
midmark.com
Style A

11
© 2011 Midmark Corp. | 60 Vista Drive Versailles, OH 45380 USA | 1-800-643-6275 | 1-937-526-3662 |
DA2149i
DA2150i
TASK LIGHT INSTALLATION
Note
Assure channel in bottom of Upper Unit is not
obstructed by power cord(s) from Task Light.
A Privacy Panel may need to fit into channel.
Step 1: Remove the lens
cover and bulb.
Step 3: Install the mounting screws
and lockwashers through
keyhole slots in Task Light.
Step 5: Route power cord(s) to the side of
Upper Unit that will face the Center
Console.
Do not obstruct channel in Upper
Unit.
Step 2: Place Task Light in
position on bracket.
Step 4: Install the lens
cover and bulb.
Step 6: Secure power cord
with a cable tie.
#10-24 x 3/8”
screws &
lockwashers
Bottom of
Upper Unit
Keep Channel
Clear
NextNext
BackBack
midmark.com
Style A

12
© 2011 Midmark Corp. | 60 Vista Drive Versailles, OH 45380 USA | 1-800-643-6275 | 1-937-526-3662 |
DA2139i
TASK LIGHT INSTALLATION - (continued)
Step 7: Remove the end
panels from
Center Column.
Step 10: Plug Task Light power cord into
the outlet that is on the same
side of the Center Console as
the light.
Step 8: If installed, remove
hole plug(s) and install
grommet(s).
Step 9: Insert power cord through
grommet.
Do not obstruct channel in
bottom of Upper Unit.
Step 11: Install the end
panels onto the
Center Column.
Note
Before installing the Upper Unit, remove
the hole plug(s) and install the grommet(s).
NextNext
BackBack
midmark.com
Style A

13
© 2011 Midmark Corp. | 60 Vista Drive Versailles, OH 45380 USA | 1-800-643-6275 | 1-937-526-3662 |
Step 3: Install Cover Panel.
MIDSECTION SHELF
Cover
Panel
Step 1: Install shelf brackets onto
side of Center Column
and Dispenser with
#10 x 5/8” screws.
Note
Install any privacy panels or
shelves in MidSection before
installing Cover Panel.
Step 2: Thread screws into shelf, then place
shelf in position, fitting the four
bottom screws into the keyholes of
the shelf brackets and tighten screws.
Note
For Laminate shelves, use #10 x 5/8” partical board screws.
For Quartz or Corian shelves use #10 x 3/8” machine screws.
Center
Column
Dispenser
NextNext
BackBack
midmark.com
Style A

14
© 2011 Midmark Corp. | 60 Vista Drive Versailles, OH 45380 USA | 1-800-643-6275 | 1-937-526-3662 |
DA2152i
BI-FOLD DOORS
Step 2: Place End Panel in position, fitting
the six bottom screws into the
keyholes of the Equipment Base
and tighten screws.
Step 1: Install six #10 x 5/8”
particle board screws.
NextNext
BackBack
midmark.com
Style A

15
© 2011 Midmark Corp. | 60 Vista Drive Versailles, OH 45380 USA | 1-800-643-6275 | 1-937-526-3662 |
STANDARD BI-FOLD
DOOR INSTALLATION
Step 1: On 42” doors, install door
stop bracket (one per door).
Use #10-24 X 5/8” screws.
Step 4: •Supportingdoor,alignhinges.
•Presstolockhingeto
hinge clip plate.
Note
The 90° Units with 60”
doors have a top cap.
Top
Cap
Hinge
Clip
Plate
Press to
Release
Hinge
Hinges
Step 5: Loosen screw. Line up
door with trolley.
Door
Stop
Bracket
Note
If necessary remove the nut
from bottom of channel to turn
slide around.
Step 3: Loosen screws on mount
hinge clip plate to end panels.
End
Panel
Column
Step 2: Install # 10x 5/8”
screws into column
end and panel.
Step 6: Adjust door hieght so
that the door/trolley
tracks smoothly.
Step 7: Retighten all screws.
NextNext
BackBack
midmark.com
Style A

16
© 2011 Midmark Corp. | 60 Vista Drive Versailles, OH 45380 USA | 1-800-643-6275 | 1-937-526-3662 |
DA2209i
C
B
C
B
A
A
A
A
A
LEAD LINED BI-FOLD
DOOR INSTALLATION
BI-FOLD DOOR
HINGE ADJUSTMENT
Step 1: •Loosenmountingscrews
to aid in alignment.
•Snapendpanelhingeto
hinge on door.
Step 2: Remove screw on one
or both center hinges.
Step 3: •Connecthingeflapontopand
bottom center hinges and
secure with screw.
•Connectremainingcenter
hinge and secure with screws.
Step 4: On 90º models with top caps,
adjust top cap by moving up or
down until a slight drag is on
door slide.
Tighten all mounting screws.
Step 5: To secure door to the
top cap, close door
and push the door
slide roller up.
A) Slide Adjustment
Turn screws “A” until door
is in desired position.
Note: Center hinges should be adjusted
for a 1/16” gap between doors.
B) Height Adjustment
•Loosen Screw “B”.
• Reposition Door.
• Tighten screw.
C) Depth Adjustment
•Loosen Screw “C”.
• Reposition Door.
• Tighten screw.
Center
Hinge
Side
Hinge
Slide
Roller
Top Cap
(Located on
90° Units)
1/16”
Side
Hinge
Center
Hinge
Hinge
Flap
Side
Hinge
Center
Hinge
Center
Hinge
Side
Hinge
NextNext
BackBack
midmark.com
Style A

17
© 2011 Midmark Corp. | 60 Vista Drive Versailles, OH 45380 USA | 1-800-643-6275 | 1-937-526-3662 |
Equipment Alert
Do not over-tighten
special hex head bolts.
Torque to 50-55 inch / lbs.
maximum.
Full Privacy
Panel
PRIVACY PANELS FOR EQUIPMENT UPPER UNIT
Step 1: Place Privacy Panel in position,
aligning nutserts in panels with
counter top holes.
Step 2: Install four #10-24 x 2”
Phillips head screws
with washers.
Step 3: Install one or two 1/4” hex
head #10-24 x 5/8” mounting
screws, depending on panel
size, through Center Console.
Partial
Privacy
Panel
NextNext
BackBack
midmark.com
Style A

18
© 2011 Midmark Corp. | 60 Vista Drive Versailles, OH 45380 USA | 1-800-643-6275 | 1-937-526-3662 |
SPLIT STORAGE
Step 1: Open Bi-Fold doors and install
the screws (#10-24 x 5/8”) into
Hinge Panels for mounting Shelf
Panels.
Note: Shelf panel for Center Column has
a cut-out for the electrical outlet.
Step 3: Install Back Panel (1) using
#10-24 x 5/8” screws.
Note: Opening to front storage area can
be on Side A or B.
Step 2: Position Shelf Panels
on mounting screws
and tighten screws.
Step 4: Install Center Panel using
#10-24 x 5/8” screws.
Step 5: Install other Back Panel (2)
using #10-24 x 5/8” screws.
Step 6: Install two stiffener
screws (#8 x 5/8”
particle board), one
on each back panel.
Step 7: Install shelf brackets
and shelves.
Note
Install the Bi-Fold Doors (refer
to Bi-Fold Door Installation).
Hinge
Panel
Screws
Shelf
Panels
Back
Panel 1
Back
Panel 2
Center
Panel
Shelf
Bracket
SIDE A
SIDE B
Stiffener
Screws
NextNext
BackBack
midmark.com
Style A

19
© 2011 Midmark Corp. | 60 Vista Drive Versailles, OH 45380 USA | 1-800-643-6275 | 1-937-526-3662 |
OPEN STORAGE
SIDE A
SIDE B
Shelf
Panels
Shelf
Bracket
Note
Install the Bi-Fold Doors (refer
to Bi-Fold Door Installation).
Step 1: Open Bi-Fold doors and install
the screws (#10-24 x 5/8”) into
Hinge Panels for mounting Shelf
Panels.
Note: Shelf panel for Center Column has
a cut-out for the electrical outlet.
Step 2: Install shelf brackets
and shelves.
Hinge
Panel
Screws
NextNext
BackBack
midmark.com
Style A

20
© 2011 Midmark Corp. | 60 Vista Drive Versailles, OH 45380 USA | 1-800-643-6275 | 1-937-526-3662 |
TOP EXTENSION (for 90” tall units)
Note
The Top Extension adds up to an additional 5” height for filler between the top of the
unit and ceiling. It can be cut down to a minimum of 2” if required.
After cutting, the corner braces from the discarded sections should be relocated,
when applicable, to the additional center holes inside the remaining extension.
Step 1: Place extension in position and
secure with four #10-24 x 5/8’ screws.
DA119301i
DA2213i
NextNext
BackBack
midmark.com
Style A
/