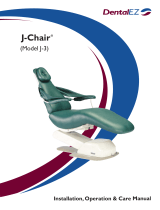
Midmark Procenter Systems Installation guide

Type
Installation guide

Midmark Procenter Systems offer a comprehensive range of features for efficient dental procedures. These systems are designed for easy integration with dental chairs and provide convenient access to essential utilities like air, water, and electricity. With options for hand control and foot pedal operation, Procenter Systems enhance workflow and streamline dental procedures. Their modular design allows for customization to meet specific needs, making them a versatile choice for dental professionals seeking reliable and user-friendly equipment.

Midmark Procenter Systems offer a comprehensive range of features for efficient dental procedures. These systems are designed for easy integration with dental chairs and provide convenient access to essential utilities like air, water, and electricity. With options for hand control and foot pedal operation, Procenter Systems enhance workflow and streamline dental procedures. Their modular design allows for customization to meet specific needs, making them a versatile choice for dental professionals seeking reliable and user-friendly equipment.

1
© 2010 Midmark Corp. | 60 Vista Drive Versailles, OH 45380 USA | 1-800-643-6275 | 1-937-526-3662 |
Procenter Delivery, LR Mounted on an Elevance Chair
Installation Guide
Language of origin: English
Electrical Supply Requirements
Have an electrician install a 1/2 in. (13 mm) conduit box with quad or equal
receptacle. Top of box must be no higher than 4-1/2 in. (114 mm) above finished
surface of floor.
Water Supply Requirements (optional)
Use 1/2 in. (13 mm) pipe protruding 2 in. (51 mm) above finished surface of floor.
Manual shut-off valve is to be installed by a plumber.
Water pressure must be 30-50 (max.) PSI at the shut-off valve. Flush water
plumbing clean before making final connections to dental equipment.
Recommended water supply hardness level <60 ppm of calcium carbonate.
Equipment Alert
Do not remove wraps or packaging from the delivery flex arm assembly until it is mounted on the console.
Air Supply Requirements
Use 1/2 in. (13 mm) pipe protruding 2 in. (51 mm) from finished surface of floor.
Manual shut-off valve is to be installed by a plumber.
Air pressure must be 70-100 (max.) PSI at the shut-off valve. Flush air
plumbing clean before making final connections to dental equipment.
Air supply to be filtered, dry and oil-free per NFPA 99 requirements or equivalent
local codes.
Drain Requirements (optional)
Not less than 1-1/2 in. (38 mm) I.D. pipe from downpipe to trap, decreasing to
3/4 in. (19 mm) pipe from trap to connection box. Terminate with
3/4 in. (19 mm) NPT pipe protruding 1 in. (26 mm) above finished surface of
floor. Install adapter for 5/8 in. (16 mm) drain tubing. Place trap in line and vent
to conform with local codes.
Vacuum Requirements (optional)
Plumbing to J-Box box should be specified by central vacuum supplier and
terminated in J-Box with 3/4 in. (19 mm) O.D. tube protruding 1 in. (26 mm)
above finished surface of floor.
Equipment Alert
When installing 115~ (VAC) receptacle in the J-Box, position it so that all
the other components needed in the box will also fit.
Grounding reliability can only be achieved if this equipment is connected to an
equivalent receptacle marked Hospital Grade (NEMA 5-15R, HOSPITAL GRADE).
Attention!
The electrical and plumbing supply connectors inside the J-Box (Junction Box) must be installed by an electrician and plumber in compliance with local building codes.
All required hardware is to be supplied by contractor.
J-Box must be installed within reach of the chair umbilical [4 or 8 foot (1.2 or 2.4 m)].
003-2028-00 Rev. F (5/4/15)
Style G
midmark.com
2
© 2010 Midmark Corp. | 60 Vista Drive Versailles, OH 45380 USA | 1-800-643-6275 | 1-937-526-3662 |
003-2028-00
4
0
6
0
80
100
2
0
0
1
2
3
5
6
7
4
0
40
6
0
80
100
20
0
1
2
3
5
6
7
4
0
J-Box Connections
Water
Air
17.8 “
(43.3 cm)
6.5"
(16.5 cm)
4.75"
(12.7 cm)
Step 1: Verify proper installation of J-Box.
A) J-Box frame is properly secured to floor.
B) J-Box lid completely covers plumbing and electrical connections.
C) J-Box is within reach of the umbilical provided (4 or 8 foot [1.2 or 2.4 m]).
midmark.com
Color Page
3
© 2010 Midmark Corp. | 60 Vista Drive Versailles, OH 45380 USA | 1-800-643-6275 | 1-937-526-3662 |
003-2028-00
DA2408i
2
4
1
3
Step 4: Assemble the lower arm mounting
components in the order shown, from the
bottom up: LR arm casting, encased
bearing, lower arm weldment, encased
bearing, cap, and bolt.
Note: Either side of the encased bearing can be installed face up,
there is no up or down side.
Flex Arm
Delivery
Encased
Bearings
Cap
Lower Arm
Weldment
Elevance
Chair
LR Arm
Casting
Mounting
Bolts
Level adjustment
set screws (3)
Step 5: Insert tube into water bottle and screw bottle into the lower arm weldment.
Note: The water bottle is a component in a pressurized system, be sure it is screwed in securely.
Step 3: Level the LR arm casting.
A) Loosen all four mounting bolts one or two turns.
B) Turn the three level adjustment set screws to level the LR arm casting.
C) Tighten the four mounting bolts to secure.
Note: Level the LR arm casting FIRST, before you install components onto it.
If the LR Arm Casting is not level, components mounted onto it may drift.
Step 2: Raise chair to a comfortable
working height. (Base
Casting should be at least
10"- 15“ above floor.)
Mounting Bolt
Install Flex Arm and Delivery
midmark.com
4
© 2010 Midmark Corp. | 60 Vista Drive Versailles, OH 45380 USA | 1-800-643-6275 | 1-937-526-3662 |
003-2028-00
DA2409i
2
4
1
3
Level Flex Arm and Delivery
Bottom Cover
Step 7: Level flex arm and delivery unit
A) Loosen 3 button head screws 1 or 2 turns.
B) Use the 3 leveling screws to level the delivery unit.
C) Tighten the 3 button head screws to secure.
Step 6: Remove bottom cover on
the delivery unit (4 screws).
Leveling
screws (3)
Button head
screws (3)
Step 8: Install bottom cover on
the delivery unit (4 screws).
Step 9: Turn mounting bolt to increase or
decrease drag on flex arm assembly.
Mounting Bolt
midmark.com
5
© 2010 Midmark Corp. | 60 Vista Drive Versailles, OH 45380 USA | 1-800-643-6275 | 1-937-526-3662 |
003-2028-00
Access Tubing and Electrical Connections
Seat Shroud (RH)
Seat Frame
Step 11: Remove seat shrouds and seat frame.
A) Remove three screws / washers and RH seat shroud.
B) Repeat for LH seat shroud (not shown).
C) Remove two shoulder bolts / washers and lift seat frame.
WARNING
Always disconnect power before removing covers. Failure to do
so may result in personal injury.
Step 10: Remove seat upholstery.
A) Rotate lock knob.
B) Lift seat upholstery to remove tabs from slots.
midmark.com
6
© 2010 Midmark Corp. | 60 Vista Drive Versailles, OH 45380 USA | 1-800-643-6275 | 1-937-526-3662 |
003-2028-00
Tubing and PC Board Connections
Step 12: Route delivery umbilical into chair frame.
A) Remove two screws and lift off the PC board cover.
B) Loosen two screws in the slotted mounting holes holding the mounting
bracket in place. Remove bracket.
C) Route the tubing and electrical harnesses up into the chair casting
through the access hole.
Note: To best fit the limited space, route the tubing and the hand control connector to the
right side of the chair and the power connector to the left side.
Right side
Left side
PC Board
Interface
Hand Control
Unit
Power
Ground
Wire
J6
J10
J9
J4
J1
J2
BL BL
Step 13: Connect delivery system umbilical to chair umbilical and PC Board.
A) Plug hand control connector into J1 (or J2) on PC Board.
B) Plug unit power connector into J6 (or J10) on the PC Board.
C) Plug power connector into jumper.
D) Plug communication line into J4 on PC Board.
E) Screw ground wires into the chair frame.
F) Install tubing adapter on the yellow tubing and connect the 1/8 and 1/4" tubes.
G) Connect like colored tubing. Leave any unused tubing capped.
PC Board
Cover
Note
If outlets on the PC Board are identical, either can be used to
connect a mating plug.
Tubing
Adapter
Power
Delivery Umbilical
Chair Umbilical
Jumper
Note
Not all connectors are
used in every installation.
Communication Line
Caution
Connect ground wire to ensure system ground continuity.
Failure to do so may result in electric shock.
RD
PR
OR
YL
GN
BL
CL
Instrument Water
Master Air
Pilot Air
Pilot Water
Coolant Air
Drive Air
Supply Air
Equipment Alert
Connect brown tubing from adapter
to delivery umbilical.
midmark.com
Color Page
7
© 2010 Midmark Corp. | 60 Vista Drive Versailles, OH 45380 USA | 1-800-643-6275 | 1-937-526-3662 |
003-2028-00
For Units Having Deluxe Rheostat with Chip Air Foot Controls Only:
Make Chip Air Connection in Delivery Head.
A) Cut green 1/8" Coolant Air Supply tubing.
B) Locate clear 1/8” tubing coming into the unit head.
C) Use barbed tee and sleeves to tee the 1/8" clear tubing into the 1/8" green coolant air tubing.
Chip Air
Procenter Delivery Unit
Deluxe Rheostat with Chip Air
Unit Foot Control
midmark.com
8
© 2010 Midmark Corp. | 60 Vista Drive Versailles, OH 45380 USA | 1-800-643-6275 | 1-937-526-3662 |
003-2028-00
Reassemble the Chair
Seat Shroud (RH)
Seat Frame
Step 14: Reassemble the Chair...
A) Place a tie around the tubing to keep it bundled together and out of the way of the moving parts.
B) Mount PC Board mounting bracket to chair frame and tighten the two screws in the slotted holes to secure.
C) Place the PC Board cover over the PC Board and secure with two screws.
D) Connect power to the chair and cycle the back full up and full down to make certain the tubing and wiring remain clear of all moving components.
Note: Make adjustments as needed to secure tubing and wiring in areas free of interference from moving components.
E) Place the seat frame on the chair.
F) Align bolts and washers with the holes in chair frame casing and screw in to secure.
G) Install seat shrouds and secure each with three screws.
H) Install the seat upholstery.
midmark.com
9
© 2010 Midmark Corp. | 60 Vista Drive Versailles, OH 45380 USA | 1-800-643-6275 | 1-937-526-3662 |
003-2028-00
Remove Shipping Stabilizer
Test Verify the following:
1 Flex arm and delivery are level.
2
Flex arm and delivery unit move easily and stay in
place. Turn mounting bolt to adjust drag as needed.
3
Tubing and electrical connections to PC Board are
tight.
4
PC Board is secure inside the mounting box and is
properly grounded to the chair base casting.
5
PC Board cover and mounting bracket are securely
mounted to chair base casting.
6
No wires or tubing are pinched by covers or
mountings.
7
All wires and tubing are wire tied together and cannot
be “caught” or “rubbed” moving components.
8 Test hand controls to verify operation.
Installation Checklist
Step 15: Remove the flex arm end
cap (1 screw) and slide the
cover back.
DA2414i
2
4
1
3
End
Cap
Shipping
Stabilizer
Step 16: Remove the wire tie (shipping
stabilizer) from the lock pawls.
Slide the cover back in place and
install the end cap (1 screw).
midmark.com
  • Page 1 1
  • Page 2 2
  • Page 3 3
  • Page 4 4
  • Page 5 5
  • Page 6 6
  • Page 7 7
  • Page 8 8
  • Page 9 9

Midmark Procenter Systems Installation guide

Type
Installation guide

Midmark Procenter Systems offer a comprehensive range of features for efficient dental procedures. These systems are designed for easy integration with dental chairs and provide convenient access to essential utilities like air, water, and electricity. With options for hand control and foot pedal operation, Procenter Systems enhance workflow and streamline dental procedures. Their modular design allows for customization to meet specific needs, making them a versatile choice for dental professionals seeking reliable and user-friendly equipment.

Ask a question and I''ll find the answer in the document

Finding information in a document is now easier with AI