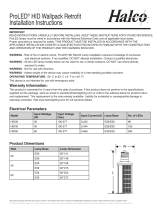
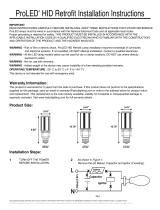
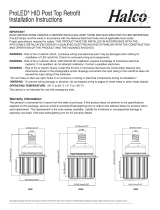
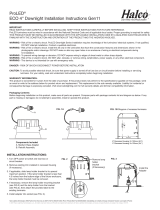
Page is loading ...

© 2014 Halco Lighting Technologies, LLC. All rights reserved. ‘where there’s light, there’s halco’, Halco and ProLED are registered trademarks of Halco Lighting Technologies.
All sizes and specications are subject to change.
Halco Lighting Technologies | 2940 Pacic Drive | Norcross, GA 30071 | Toll Free 800.677.3334 | Phone 770.242.3612 | Fax 800.880.0822 | halcolighting.com | Atlanta | Carlstadt | Cleveland | Houston | Los Angeles | Phoenix
ProLED
®
Ballast Compatible Direct T8
Installation Instruc
tions
IMPORTANT
READ INSTRUCTIONS CAREFULLY BEFORE INSTALLING. KEEP THESE INSTRUCTIONS FOR FUTURE
REFERENCE.
This product must be installed in accordance with the applicable installation code by a qualied electrician who is familiar
with the construction and operation of the product and the hazards involved.
These lamps are direct replacements for 32W T8 lamps only. Do NOT use with dimmers. Operates on Instant Start
Electronic Ballasts only.
WARNING - Risk of re or electric shock. ProLED Ballast Compatible Direct T8 installation requires knowledge of
uorescent lighting luminaires and electrical systems.
WARNING - Risk of re or electric shock. Do NOT install this lamp in a preheat luminaire.
WARNING - Risk of re or electric shock. Use only in dry locations.
WARNING - This device is not intended for use with emergency exits.
Installation steps:
STEP 1: Make sure the power is turned off before removing the existing lamp.
STEP 2: Remove the lens cover from the xture.
STEP 3: Remove the uorescent lamp from the xture.
STEP 4: Insert ProLED Ballast Compatible Direct T8 lamp into the lamp holders.
STEP 5: If multiple lamps are required, repeat steps 2-4 as needed for additional lamps.
STEP 6: Close the lens cover and secure into place.
STEP 7: Turn the power back on.
IMPORTANT SAFETY INFORMATION:
CAUTION: If the lamp or luminaire exhibits undesirable operation (buzzing, ickering etc.), immediately turn off the power,
remove lamp from luminaire and contact the manufacturer.
CAUTION: Risk of re. Do NOT install a preheat luminaire.
This lamp only operates on electronic ballasts. If lamp does not light when the luminaire is energized, remove lamp from
luminaire and contact a qualied electrician. This device is NOT intended for use with emergency exit xtures or
emergency exit lights.
Lamps must be operated within an ambient xture temperature of -30°C and 56°C (-22°F and 133°F) to ensure UL
compliance.
Warranty Information:
This product is warranted for 5 years from the date of purchase, based on 10 hours of use per day. If this product does not
perform to the specications supplied on this package, send an email or write to the address below for product return and
replacement. This replacement is the sole remedy available. Liability for incidental or consequential damage is expressly
excluded. Visit www.halcolighting.com for full warranty details and compatibility information.
®
/
