Page is loading ...

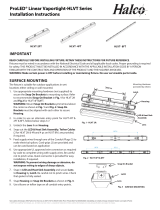
LED Strip Light
Read this instruction carefully before installation. Keep it for further reference. Make electrical and grounded connections in
accordance with the national electrical code and any applicable code. Always turn off the power supply before installation.
This product must be installed in accordance with the applicable installation code by a qualified electrician who is
familiar with the construction and operation of the product and the hazards involved.
WARNING:
Risk of fire or electric shock. Suitable for wet locations. Always turn off the power supply before installation.
Risk of fire or electric shock. Suitable for non-insulated surface and frame. DO NOT cover fixture with
insulation liner or similar material.
DO NOT install fixture on unstable, loose or easily breakable surface.
DO NOT exert force on the surface of the fixture.
Risk of fire or electric shock. Fixture installation requires knowledge of luminaires electrical systems. If not
qualified, DO NOT attempt installation. Contact a qualified electrician.
CCT&Wattage selectable
SAFETY PRECAUTIONS:
INSTALLATION:
12
MOUNTING POINTS
JUNCTION
BOX
MOUNTING
SCREW
INSTALLTION INSTRUCTIONS
Selectable Strip Fixtures
Page 1/9 Rev Date: 11/09/21 Halco Lighting Technologies 2940 Pacific Drive | Norcross, GA 30071 | Toll Free 800.677.3334 | Phone 770.242.3612 | Fax 800.880.0822 | halcolighting.com | Atlanta | Chicago |
Cleveland | Houston | Los Angeles | Phoenix © 2020 Halco Lighting Technologies, LLC. All rights reserved. Halco and ProLED are registered trademarks of Halco Lighting
Technologies. All sizes and specifications are subject to change

(1 set)
(1 set)

4. Turn off the power and make wiring by using wire nuts according to wiring diagram
5.Secure the fixture to the wall with the correct
mounting hardware
7.The installation is completed and energize the luminaire
to verify operation.
8.Swing open fixture by pushing in/squeezing both buttons
located on opposite endsif need to disassemble the fixture
6. Press upward the cover and lock it with springs tightly
which located into the fixture.
B. Suspending installation
Parts List
Suspending installation -4FT(included)
Parts:
(2) Safety Rope
(2) Anchors
(2) Screw
Parts:
(4) Safety rope
(4) Anchors
(4) Screw
Suspending installation -8FT (inlcuded)
Page 3/9 Rev Date: 11/09/21 Halco Lighting Technologies 2940 Pacific Drive | Norcross, GA 30071 | Toll Free 800.677.3334 | Phone 770.242.3612 | Fax 800.880.0822 | halcolighting.com | Atlanta | Chicago |
Cleveland | Houston | Los Angeles | Phoenix © 2020 Halco Lighting Technologies, LLC. All rights reserved. Halco and ProLED are registered trademarks of Halco Lighting
Technologies. All sizes and specifications are subject to change
SAFETY PRECAUTIONS:
INSTALLATION:
12
MOUNTING POINTS
JUNCTION
BOX
MOUNTING
SCREW
INSTALLTION INSTRUCTIONS
Selectable Strip Fixtures

1.Fixing the hook and suspending the lamp.
LF
Installation intructions
4.Turn off the power and make wiring by using wire nuts according to wiring diagram
3. Adjusting the safety rope making the LED Srtip
in a horizontal state.
2. Adjusting the safety rope length.
Page 4/9 Rev Date: 11/09/21 Halco Lighting Technologies 2940 Pacific Drive | Norcross, GA 30071 | Toll Free 800.677.3334 | Phone 770.242.3612 | Fax 800.880.0822 | halcolighting.com | Atlanta | Chicago |
Cleveland | Houston | Los Angeles | Phoenix © 2020 Halco Lighting Technologies, LLC. All rights reserved. Halco and ProLED are registered trademarks of Halco Lighting
Technologies. All sizes and specifications are subject to change
SAFETY PRECAUTIONS:
INSTALLATION:
12
MOUNTING POINTS
JUNCTION
BOX
MOUNTING
SCREW
INSTALLTION INSTRUCTIONS
Selectable Strip Fixtures

(4)

7. Fix the lamp body on the wall by screws, complete the installation; repeat the previous procedure to install the
3rd strip light, 4th strip light etc.
1. Turn off the power.
3. Drill holes at a suitable position on the wall and drive
the anchor into the wall.
5. Fix the connection bracket on the wall. 6. Insert the strip light into the connection bracket, then
drill holes at a suitable position in the wall for installing
the next strip light.
4. Use a screwdriver to tighten the screws to fix the
lamp body on the wall.
2. Screwed off the knockout hole at the end of lamp body.
Installation instructions
8. Wiring diagram
9.Take the black/white/green wire harness and connect to the existing wire connectors on the input wires
of the driver
connection to driver. Please make wiring connection using the wiring diagram in Step 8.
respectively.When using the dimming function, take the purple and pink wire harness and make
Next lightPrevious light
Page 6/9 Rev Date: 11/09/21 Halco Lighting Technologies 2940 Pacific Drive | Norcross, GA 30071 | Toll Free 800.677.3334 | Phone 770.242.3612 | Fax 800.880.0822 | halcolighting.com | Atlanta | Chicago |
Cleveland | Houston | Los Angeles | Phoenix © 2020 Halco Lighting Technologies, LLC. All rights reserved. Halco and ProLED are registered trademarks of Halco Lighting
Technologies. All sizes and specifications are subject to change
SAFETY PRECAUTIONS:
INSTALLATION:
12
MOUNTING POINTS
JUNCTION
BOX
MOUNTING
SCREW
INSTALLTION INSTRUCTIONS
Selectable Strip Fixtures


Installation instructions
1. Turn off the power. 3. Fix the connectiion bracket at the end of one lamp with
screw.
5. drill holes on the wall as well as lock the accessories
orderly (as shown).
6.Adjust the length of safety rope rope after locked.
4. As shown, the drawing of connecting finished.
.nwohs sa noitallatsni epor ytefas dehsiniF.8.pmal eht ot skooh eht netsaf ,thgil eht pu tfiL .7
2. Screwed off the knockout hole at the end of lamp body.
9.install all lamps which need suspending as step above. 10.Press the button on both sides of light and remove LED Cover
11.Wiring diagram.
Page 8/9 Rev Date: 11/09/21 Halco Lighting Technologies 2940 Pacific Drive | Norcross, GA 30071 | Toll Free 800.677.3334 | Phone 770.242.3612 | Fax 800.880.0822 | halcolighting.com | Atlanta | Chicago |
Cleveland | Houston | Los Angeles | Phoenix © 2020 Halco Lighting Technologies, LLC. All rights reserved. Halco and ProLED are registered trademarks of Halco Lighting
Technologies. All sizes and specifications are subject to change
SAFETY PRECAUTIONS:
INSTALLATION:
12
MOUNTING POINTS
JUNCTION
BOX
MOUNTING
SCREW
INSTALLTION INSTRUCTIONS
Selectable Strip Fixtures

Page 9/9 Rev Date: 11/09/21 Halco Lighting Technologies 2940 Pacific Drive | Norcross, GA 30071 | Toll Free 800.677.3334 | Phone 770.242.3612 | Fax 800.880.0822 | halcolighting.com | Atlanta | Chicago |
Cleveland | Houston | Los Angeles | Phoenix © 2020 Halco Lighting Technologies, LLC. All rights reserved. Halco and ProLED are registered trademarks of Halco Lighting
Technologies. All sizes and specifications are subject to change
12.Take the black/white/green wire harness and connect to the existing wire connectors on the input wires of the driver respect
When using the dimming function, take the purple and pink wire harness and make connection to driver. Please make wiring connection using the wiring diagram in Step 11.
ively.
13.Insert the electronic wire into the
wire nut. 15.Once wiring is completed, take wire harness and run it thought the knockouts of the
connecting fixture. Use self-adhesive cable ties to eliminate any cable tangles and clutter.
16. Secure the LED Cover to the housing by pressing upward and lock it into the fixture.
Energize the luminaire to verify operation.
14.The same type of electronic
wires are inserted into the same
wire nut and combined into a parallel
circuit.
The Installation must be carried out by a qualified electrician.
SAFETY PRECAUTIONS:
INSTALLATION:
12
MOUNTING POINTS
JUNCTION
BOX
MOUNTING
SCREW
INSTALLTION INSTRUCTIONS
Selectable Strip Fixtures
/
