Page is loading ...

15 Kingbrook Parkway, Suite 100 Simpsonville, KY 40067 p. 877.866.3331 f. 502.719.8888 oxfordgarden.com
Ver. 06.30.20
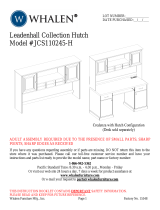
TRAVIRA MODULAR HUTCH
ASSEMBLY INSTRUCTIONS
COMPONENTS
HARDWARE CONNECTING HARDWARE
NOTE
To protect the finish surface of your unit from scratches, always assemble on top of provided cardboard box or a clean blanket.
Connector Bolt
Quantity: 1
Metal Washer
Quantity: 1
Lock Nut
Quantity: 1
Allen Wrench
Quantity: 1
D
E
F
G
Machine Bolts
Quantity: 14
Metal Washers
Quantity: 14
Allen Wrench
Quantity: 1
A
B
C

Ver. 06.30.20
INSTRUCTIONS
CONNECT LEFT SIDE TO BACK PANEL
Attach LEFT SIDE PANEL to BACK PANEL using 3 washers
& bolts. NOTE: Leave bolts slightly loose to help with
alignment of top.
A
B
A
B
A
B
CONNECT RIGHT SIDE TO BACK PANEL
Attach RIGHT SIDE PANEL to BACK PANEL using
3 washers & bolts. NOTE: Leave bolts slightly loose to help
with alignment of top.
AB
AB
AB
CONNECT TOP TO SIDE ASSEMBLY
Attach TOP to unit using 4 washers and bolts. Front of top
DOES NOT HAVE connector hole. NOTE: At this time firmly
tighten ALL INSTALLATION BOLTS on the unit.
Connector Hole
faces unit side
A
B
A
B
A
B
A
B
INSTALL SLOTTED SHELF
Return unit to its upright position. Insert the optional
SLOTTED SHELF which rests firmly on the mid-support bars.
The completed Hutch unit must be firmly attached to the Base
unit using the 4 bolts and washers included.
CONNECTING HUTCH TO BASE
AB

Ver. 06.30.20
CONNECTING TWO OR MORE MODULAR UNITS
To secure 2 or more units together use both the preinstalled
CONNECTING BRACKETS found on the bottom of the base, and
the long connector bolt, washer, and lock nut included in the
hardware pack.
Lay units to be connected on their back on a clean, flat surface,
such as provided cardboard box or blanket, to protect the
surfaces from scratches. Remove one bolt from each bracket
and loosen the other bolt to rotate bracket 90 degrees. Align
brackets with holes on base of second unit and secure with
washer & bolt.
Join the top sections of the units together by inserting the
long connector bolt through the adjoining holes of two units.
Secure tightly using a washer and locking nut. Return joined
units to their upright standing position.
NOTE: For stability and safety, is essential that all units be
secured to each other at both top and bottom locations.
Outside ViewInside View
Connector Hole
SUGGESTED CONFIGURATIONS
Receptacle Base +
Shelf Base
Receptacle Base +
Shelf Base +
Hutch, L- Stack
2 Shelf Bases +
Hutch, L- Stack
Receptacle Base + Shelf
Base + 2 Hutch Units,
Double Stack
2 Shelf Bases +
2 Hutch Units,
Double Stack
2 Receptacle Bases +
2 Hutch Units,
Double Stack
Shelf Base +
Shelf Base
Receptacle Base +
Receptacle Base
Receptacle Base +
Hutch, Single Stack
Shelf Base +
Hutch, Single Stack
/