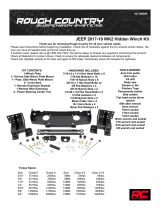
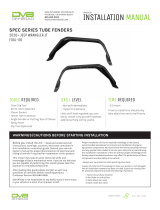
Rough Country 10580 Installation guide
- Category
- Car kits
- Type
- Installation guide

Thank you for choosing Rough Country.
Rough Country recommends a certified technician install this system. In addition to these instructions, professional
knowledge of disassemble/reassembly procedures as well as post installation checks must be known. Attempts to install
this system without this knowledge and expertise may jeopardize the integrity and/or operating safety of the vehicle.
Please read instructions before beginning installation. Check the kit hardware against the parts list. Be sure you have all
needed parts and know where they go. Also please review tools needed list and make sure you have needed tools.
NOTICE TO DEALER AND VEHICLE OWNER
Any vehicle equipped with any Rough Country product should have a “Warning to Driver” decal installed on the inside of
the windshield or on the vehicle’s dash. The decal should act as a constant reminder for whoever is operating the vehi-
cle of its unique handling characteristics.
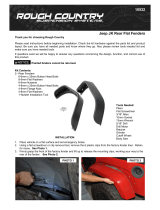
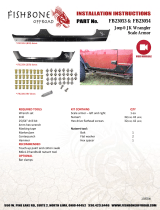
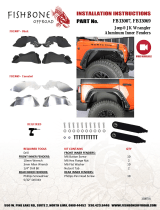
JEEP 97-01 XJ Front Quarter Panel Armor
921105760
*10574BA6*
10576BAG
Tools Needed:
6mm Allen
10mm Socket & Wrench
1/4” Deep Well Socket
7/16” Wrench
1/2” Wrench
Heat Gun
3/16” Drill
Painters Tape
25/64” or W size Drill
Drill Motor
5/32” Allen
Torque Wrench

10576
Qty Description
1 Dr Frt Quarter Panel Armor
1 Pass Frt Quarter Panel Armor
1 10576Bag (Instructions)
1 10576Bag1
10576BAG1
Qty Description
8 1/4” x 5/8” Button Head Bolts
6 1/4” Nylock Nuts
2 1/4” Nutserts
7 1/4” Flat Washers
1 1/4” x 1” Bolt
1 5/16” Nut

FRONT INSTALLATION INSTRUCTIONS
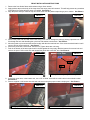
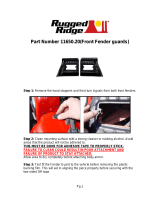
1. Remove the front fender flares and brackets using a 10mm wrench.
2. Apply painters tape to the body of the Jeep where the armor panel will contact it. This will help prevent any scratches
in the paint from rusting after the armor is installed. See Photo 1.
3. Align the panel while you mark the top two corner holes onto the painters tape using a pen or marker. See Photo 2.
4. Remove the panel and drill ONE of the holes using a 1/4” drill bit. Realign the panel by placing a provided 1/4-20 x
5/8 through the hole and threading the nylock nut and washer onto the back. See Photo 3.
5. Allow the panel to pivot around this bolt and realign with the other marked hole. If the second marked location is still
correct, drill out the second hole. See Photo 3.
6. Secure the panel with a second 5/8” bolt and nut. Tighten these two until snug.
7. Push in the bottom of the armor panel until it sits flat against the Jeep body. Mark the bottom front corner hole and
remove the panel. Drill out this hole and reinstall the panel with a third 5/8” bolt. See Photo 4.
8. In the final corner hole, in the bottom rear, use a “W” or 25/64” sized drill bit to drill a hole in the marked location.
See Photo 5.
9. Place a supplied 1/4-20 nutsert into this hole and secure using the proper nutsert crimping tool. See Photo 6.
PHOTO 3 PHOTO 4
PHOTO 5
PHOTO 2 PHOTO 1
PHOTO 6
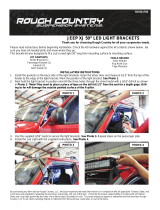
Remove interior panel screws. Pull back interior panel.
Remove decals from fender. Use painters tape to protect the paint.
Mark upper hole to drill. Align panel with body lines and tail light.
Rear
1/4”
“W”

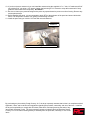
10. If you do not have a nutsert tool you can install the nutserts using the supplied 1/4” x 1” bolt, 1/4” washer and 5/16”
nut hold the 5/16” nut using a 1/2” wrench, tighten the bolt using a 7/16” wrench to crimp the nutsert until it firmly
grabs the sheet metal of the Jeep body. See Photo 7.
11. Be sure to clean up any metal shavings and to paint any exposed metal to prevent rust from forming. Remove any
excess painters tape.
12. Before installing the panel, it is recommended to apply RTV to the perimeter of the panel and around all the bolt
holes. This will prevent moisture from getting in and causing corrosion.
13. Install the panel using all 1/4-20 x 5/8” bolts with nuts and washers.
PHOTO 7
By purchasing any item sold by Rough Country, LLC, the buyer expressly warrants that he/she is in compliance with all
applicable , State, and Local laws and regulations regarding the purchase, ownership, and use of the item. It shall be
the buyers responsibility to comply with all Federal, State and Local laws governing the sales of any
items listed, illustrated or sold. The buyer expressly agrees to indemnify and hold harmless Rough
Country, LLC for all claims resulting directly or indirectly from the purchase, ownership, or use of the
items.
Drill using 1/4” drill.
-
 1
1
-
 2
2
-
 3
3
-
 4
4


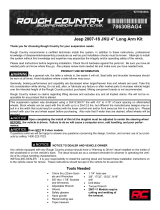
Rough Country 10580 Installation guide
- Category
- Car kits
- Type
- Installation guide
Ask a question and I''ll find the answer in the document
Finding information in a document is now easier with AI
Related papers
-
 Rough Country 10581 Installation guide
-
 Rough Country 70046 Installation guide
-
 Rough Country 10580 Installation guide
-
 Rough Country 70072 Installation guide
-
 Rough Country 70525 Installation guide
-
 Rough Country 99037 Installation guide
-
 Rough Country 10510 Installation guide
-
 Rough Country 10533 Installation guide
-
 Rough Country 10602 Installation guide
-
 Rough Country 4in Long Arm Suspension Lift Kit Installation guide


Other documents
-
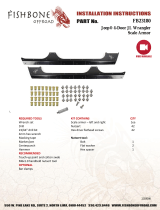 Fishbone Offroad FB23180 Installation guide
-
 Fishbone Offroad FB23054 Installation guide
-
 EVO Manufacturing EVO-1070-2DAL Installation guide
-
 Paramount Automotive 81-10105 Installation guide
-
 Road Armor 507ARG4B Installation guide
-
 Rugged Ridge 11650.20 Installation guide
-
 Fishbone Offroad Rear Elite Fenders Installation guide
-
 Fishbone Offroad FB33007 Installation guide
-
 DV8 OFFROAD FDGL-06 Installation guide
-
 DV8 OFFROAD FDJL-06 Installation guide


