Page is loading ...

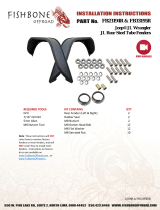
Jeep JK Rear Flat Fenders
Thank you for choosing Rough Country
Please read instructions before beginning installation. Check the kit hardware against the parts list and product
layout. Be sure you have all needed parts and know where they go. Also please review tools needed list and
make sure you have needed tools.
If questions exist we will be happy to answer any questions concerning the design, function, and correct use of
this product.
Painted fenders cannot be returned.
INSTALLATION
1. Place vehicle on a flat surface and set emergency brake.
2. Using a flat screwdriver or clip removal tool, remove the 6 plastic clips from the factory fender liner. Retain
for reuse. See Photo 1.
3. Firmly grasp the front of the factory fender and lift up to release the mounting clips, working your way to the
rear of the fender. See Photo 2.
Kit Contents:
2– Rear Fenders
8-6mm x 25mm Button Head Bolts
8-6mm Flat Washers
8-6mm Nutserts
4-8mm x 25mm Button Head Bolts
4-8mm Flange Nuts
4-8mm Flat Washers
1-Nutsert Installation Tool
Tools Needed:
Pliers
Flat Screwdriver
3/16” Allen
10mm Socket
13mm Wrench
5/16” Drill
Drill Motor
Ratchet
Grinder
Cutoff Wheel
Body Saw
PHOTO 1 PHOTO 2
10532

4. Using pliers or a removal tool, remove the factory mounting clips from the body and discard.
5. Install 4 of the supplied 6mm nutserts using the supplied nutsert installation tool. See Photos 3 & 4.
6. Skip to step 12 if you are not going to use the factory fender liners.
7. Insert the factory fender liner in the wheel well. Using the body as a guide mark the fender liner. See Pho-
tos 5 & 6.
8. Using a cutoff wheel or body saw, cut the factory fender liner on the marks made in step 7.
9. Test fit the fender liner and trim as needed to get the desired fit.
10. Install the fender liner using the factory clips.
11. Sand or file the cut edges for a cleaner finished look.
12. Install the supplied flat fender using the supplied 6mm x 25mm bolts and 6mm washers in the holes with the
nutserts and the supplied 8mm x 25mm bolts and washers in the 2 upper middle holes. See Photo 7.
13. Tighten the 6mm hardware using a 4mm Allen and the 8mm hardware using a 5mm Allen and 13mm
wrench.
PHOTO 5 PHOTO 6
PHOTO 7
POST INSTALLATION INSTRUCTIONS
1. Check and retighten hardware at 50 miles and again at 500 miles. Periodically check all hardware for
tightness.
By purchasing any item sold by Rough Country, LLC, the buyer expressly warrants that he/she is in compliance with all
applicable , State, and Local laws and regulations regarding the purchase, ownership, and use of the item. It shall be
the buyers responsibility to comply with all Federal, State and Local laws governing the sales of
any items listed, illustrated or sold. The buyer expressly agrees to indemnify and hold harmless
Rough Country, LLC for all claims resulting directly or indirectly from the purchase, ownership, or
use of the items.
PHOTO 3 PHOTO 4
Use 8mm x 25mm Hardware.
/