Page is loading ...

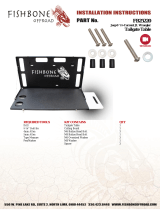
81-10105
TOOLS NEEDED
Ratchet
13mm Socket
Allen Wrench Set
COMPONENTS & HARDWARE
#
QTY
#
QTY
A
1
Mounting Plate
B
1
Tailgate Table
C
2
M8x1.25x25mm Hex Head Bolt
D
2
M8x1.25 Nylon Lock Nut
E
4
M8 Flat Washers
F
6
M6x1.25 Nutserts
G
6
M6x1.25x25mm Button Head Bolt
H
6
M6 Flat Washer
I
2
Rubber Bump Stop
J
2
Spacer
K
1
M6x35mm Hex Head Bolt
L
1
M6 Flat Washer (for Nutsert Tool)
M
1
Spacer
California Proposition 65 Warning!
This product may contain one or more chemicals known to the State of California to cause cancer and birth
defects or other reproductive harm. For more information go to www.P65Warnings.ca.gov.
A
B
C
D
E
F
G
H
I
J
K
L
M
Please take a few minutes to read and thoroughly familiarize yourself with the installation procedures
outlined in this manual. Following the steps as outlined will save you time and help reduce mistakes.
Once the instructions are reviewed, if you feel that you are not capable of safely installing the parts
seek the help of a qualified installation expert to help you complete the job. The manufacture is in no
way responsible for any personal injury or vehicle damage that may occur during the installation.
Installation Instructions
Tailgate Table
Part#: 81-10105
FITS:
07-18 Jeep Wrangler JK
Page 1

81-10105
Step 2.
Using a 11/32 " drill bit drill the previous marked
holes. Repeat step for remaining marks.
Step 1.
Open vehicle tailgate. Place supplied mounting plate
onto the jeep tailgate.
Make sure the mounting plate is centered and is
clear from hitting against rear cargo mat.
Once satisfied with the fit of the mounting plate, mark
the holes on the mounting plate with a white marker
for drilling fig 1.
Installing Tailgate Table
Step 1.
Assemble nutsert tool as shown supplied M6x35 hex
head bolt with supplied M6 flat washer with supplied
spacer and into supplied M6 nutsert.
Step 2.
Place supplied nutsert into the previously drilled
holes.
Using the Nutsert Tool
Page 2
Fig 1

81-10105
Step 4.
Once the nutsert is installed, loosen the spacer by
turning the wrench counter clock wise then remove it
and the rest of the tool from the nutsert. Inspect the
nutsert to make sure it is properly seated against the
vehicle sheet metal fig 1. Repeat step 1-4 for
remaining nutserts.
Step 3.
Using wrenches hold the supplied bolt in place while
turning the supplied spacer clockwise with a wrench.
As you turn the wrench, the bolt will draw the far end
of the nutsert towards the inside of the sheet metal,
gripping it with the knurled outside edge of the
nutsert as it deforms. Continue to turn the wrench
until the nutsert is fully pressed against the sheet
metal.
Note: DO NOT over tighten nutsert as you can
damage the nutsert and cause it to lose its grip.
Using the Nutsert Tool Continued
Step 3.
Place mounting plate onto the vehicle as shown. Line
up the slots on the mounting plate with the previous
installed nutserts.
Step 4.
While holding the mounting plate into position, place
a supplied M6x25mm button head bolt with supplied
M6 flat washer through the slot on the mounting plate
and onto the nutserts. Finger tighten only. Repeat
step for remaining lower button head bolts as shown
above.
Installing Tailgate Table Continued
Page 3
Fig 1

81-10105
Step 6.
Place supplied tailgate table onto the mounting plate
as shown. Line up the lower holes on the tailgate
table with the holes on the lower holes in the
mounting plate.
Step 5.
Place a supplied M6x1.25x25mm button head bolt
with supplied M6 flat washer and with supplied
rubber bump stop through the top slot on the
mounting plate and onto the nutserts. Repeat step for
remaining button head bolt. Tighten down all bolts
using a allen wrench.
Installing Tailgate Table Continued
Step 7.
Place a supplied M8x1.25x25mm hex head bolt with
a supplied M8 flat washer through the lower hole on
the mounting plate. Place a supplied spacer between
the tailgate plate and tailgate table fig 1. Place the
hex head bolt through the hole in the spacer and
through the hole in the tailgate table. Place supplied
M8 flat washer at the end of the bolt. Start a supplied
M8x1.25 nylon nut at the end of the bolt. Tighten
down using a 13mm socket. Repeat step for other
side bolt and spacer.
Step 8.
This completes the installation
Page 4
Fig1
Fig2
/


