Page is loading ...

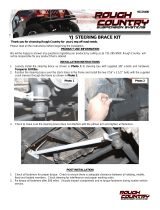
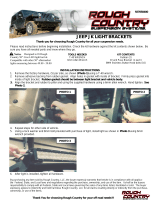
Thank you for choosing Rough Country for all your vehicle needs.
Please read instructions before beginning installation. Check the kit hardware against the kit contents shown below. Be
sure you have all needed parts and know where they go.
If question exist, please call us @1-800-222-7023. We will be happy to answer any questions concerning this product.
Check all fasteners for proper torque. Check to ensure for adequate clearance between all components.
Check and retighten wheels at 50 miles and again at 500 miles. Periodically check all hardware for tightness.
Torque Specs:
Size Grade 5 Grade 8 Size Class 8.8 Class 10.9
5/16” 15 ft/lbs 20ft/lbs 6MM 5ft/lbs 9ft/lbs
3/8” 30 ft/lbs 35ft/lbs 8MM 18ft/lbs 23ft/lbs
7/16” 45 ft/lbs 60ft/lbs 10MM 32ft/lbs 45ft/lbs
1/2” 65 ft/lbs 90ft/lbs 12MM 55ft/lbs 75ft/lbs
9/16” 95 ft/lbs 130ft/lbs 14MM 85ft/lbs 120ft/lbs
5/8” 135ft/lbs 175ft/lbs 16MM 130ft/lbs 165ft/lbs
3/4” 185ft/lbs 280ft/lbs 18MM 170ft/lbs 240ft/lbs
JEEP 2017-19 WK2 Hidden Winch Kit
921106060
KIT CONTENTS:
1-Winch Plate
1– Drivers Side Winch Plate Mount
1– Pass. Side Winch Plate Mount
2– Cross Bars
1- Remote Extension Bracket
1-Remote Wire Extension
2– Power Steering Cooler Ties
TOOLS NEEDED:
Auto trim puller
Drill motor
3/4 drill
Body saw
Sander or file
Painters Tape
Permanente marker
Side cutters
Flat head screw driver
ratchet
9/64 allen wrench
8mm wrench
10mm socket
13mm socket
14mm socket
19mm wrench and socket
7/16 wrench and socket
9/16 wrench and socket
5/8 wrench and socket
HARDWARE INCLUDED:
7/16-14 x 1 1/4 Hex Head Bolts x 8
7/16 flat Washers x 16
7/16-14 Nylock Nuts x 8
3/8-16 x 1 Hex Head Bolts x2
3/8 Flat Washers x 4
3/8-16 Nylock Nuts x 2
1/4-20 x 3/4 Hex Head Bolts x 2
1/4 flat washers x 2
1/4-20 Nylock Nuts x 2
Black Cable Ties x 4
10-1.5mm Nuts x 4
10mm Flat Washers x 4

1. Remove the 2 push pin clips on each side of the fender well trim, use an auto trim puller. See Photo 1 and 2.
Save hardware.
2. Starting at the bottom, pull the fender well trim out releasing the clips, use care not to brake any of the clips off of the
trim. See Photo 3. Repeat this step on the opposite side of the vehicle.
3. Remove the bolt from each side of the top of the grille support, use a 10mm wrench. See Photo 4. Save hardware.
4. Using an auto trim puller, remove the push pins from the top of the grille support. See Photo 5. Save hardware.
5. Remove the 2 bolts in the rear of the skid plate, using a 14mm socket. See Photo 6. Save hardware.
INSTALLATION INSTRUCTONS
Photo 1 Photo 2
Photo 3 Photo 4
Photo 5 Photo 6
Remove the push pin clips. Remove push pin clips from each side.
Remove the fender well trim. Remove the top 2 bolts.
Remove the push pins. Remove the lower skid plate bolts.

6. Remove side the bolts, on each side of the skid plate, using a 10mm socket. See Photo 7. Save hardware.
7. Remove the 2 front bolts from the skid plate, using a 10m socket. See Photo 8. Save hardware.
8. Remove the skid plate from the vehicle, set a side this will be reinstalled in a later step. See Photo 9.
9. Remove the 2 twist clips from the bottom of the bumper cover. See Photo 10. Save twist clips for later use.
10. Disconnect the fog light wiring harness on each side of the vehicle. See Photo 11.
11. Using care releasing the bumper cover clips from under the headlight on each side of the vehicle. See Photo 12.
Photo 7 Photo 8
Photo 9 Photo 10
Photo 11 Photo 12
Remove the side bolts from skid plate. Remove the front skid plate bolts.
Remove splash guard. Remove the 2 twist clips.
Disconnect the fog lights. Release the bumper cover.

12. Remove the bumper cover from the vehicle, set aside in a safe place for later modification. See Photo 13.
13. Remove the ambient temperature sensor from the air deflector on the drivers side of the vehicle. See Photo 14.
14. Remove the air deflector from the driver and passengers side of the vehicle. See Photos 15 and 16.
15. Release the wiring from the center of the crash bar.
16. Remove the lower cross brace bolts on both sides of the vehicle, use an 10mm wrench. See Photo 17.
17. Remove the upper cross brace bolts on both sides of the vehicle, use a 13mm socket. See Photo 18. Retain hard-
ware for later use.
Photo 13 Photo 14
Photo 15 Photo 16
Photo 17 Photo 18
Remove the bumper cover. Remove the ambient temperature sensor.
Remove the right side air deflector. Remove the left side air deflector.
Remove the lower cross brace bolts. Remove the upper cross brace bolts.

18. Remove the nut from the rear of the tow hook, using a 30mm socket. See Photo 19. Save hardware.
19. Remove the tow hook bolts from the bottom of the bumper. Use a 16mm socket to remove. See Photo 20. Retain
hardware for later use.
20. Remove the tow hook from the vehicle, set aside for reuse. See Photo 21.
21. Remove the bolts pointed out on the crash bar shown in Photo 22.
22. Remove the 2 bolts on each side of the crash bar, use a 13mm socket. See Photo 23. Retain hardware for later use.
23. Remove crash bar, set a side this will not be reused.
24. Remove the 2 bolts on each side of the radiator support. See Photo 24. Retain hardware for later use.
Photo 19 Photo 20
Photo 21 Photo 22
Photo 23 Photo 24
Remove the tow hook bolts. Remove the nut from the tow hook
Remove the tow hook from the vehicle.
Remove the bolts from the radiator support. Remove the bolts from the crash bar.
Remove the pointed out bolts in this photo.

25. Locate the driver and passengers side winch plate brackets, install the brackets using the OE hardware removed
from the inner structure and the crash bar. See Photos 25 and 26. Snug the bolts onto the brackets were they can
still be moved when install in the winch plate.
26. Install the winch plate in between the brackets, align the top holes of the winch plate and the brackets. Secure using
the 7/16-14 x 1 1/4 hex bolts, 7/16 flat washers and 7/16 nuts in the 4 holes on each side of the vehicle. See Photo
27 and 28.
27. Torque the 4 bolts installed into the winch plate and the brackets to 45 ft-lbs, use a 5/8 wrench and socket. See Pho-
to 29.
28. Torque the OE hardware installed into the winch plate brackets to 32 ft-lbs, use a 13mm socket. See Photo 30.
Photo 25 Photo 26
Photo 27 Photo 28
Photo 29 Photo 30
Install the drivers side bracket. Install the driver and passengers side brackets.
Install the winch plate. Align the top of the holes in the brackets.
Tighten the installed hardware. Tighten OE hardware.

29. Install the OE tow hook into the core support of the vehicle.
30. Install the 2 spacers in between the tow hook and the winch plate brackets, using the OE bolts through the tow hook,
1” spacers and the winch plate bracket, secure using the supplied 10mm-1.5 nylock nuts and the 10mm flat wash-
ers. See Photo 31.
31. Torque the installed hardware in tow hook to 32 ft-lbs. using a 17mm wrench and a 16mm socket. See Photo 32.
32. Install the nut on the back side of the tow hook, tighten using a 30mm socket. See Photo 33.
33. Install the cross braces on each side with the notch on the cross brace facing outward of the vehicle, use the re-
moved OE hardware on the top side, tighten using a 13mm socket. See Photo 34.
34. Install the supplied 3/8-16 x 1 hex head bolt, 3/8 flat washers and 3/8-16 nylock nuts on the winch bracket. See Pho-
tos 35. Torque to 30 ft-lbs. using a 9/16 wrench and socket.
35. Install the winch into the winch plate, use the hardware included in the winch kit. See Photo 36.
Photo 31 Photo 32
Photo 33 Photo 34
Photo 35 Photo 36
Install tow hook and spacers. Tighten installed hard ware.
Tighten the rear nut, using a 30mm socket. Install the cross braces.
Install the bolts in the lower cross brace. Install the winch into the plate.
Notch on
cross
brace.

36. Install the supplied (2) 1/4-20 x 3/4 bolts and 1/4” flat washers in the radiator support. See Photo 37.
37. Install the winch cable extension bracket onto the radiator support, secure using the supplied 1/4-20 nylock nuts and
1/4” flat washers, tighten using a 7/16 wrench and socket. See Photo 38.
38. Install the winch cable extension into the bracket installed onto the radiator support, using the supplied #8-32 x 1
socket head bolt , #8 flat washer and a #8-32 nut. See Photo 43. Tighten using a 9/64 allen wrench and a 8mm
wrench.
39. Connect the winch cable extension into the winch. See Photo 44.
40. Secure the winches power wires and the Extension lead, using the supplied wire tie into the hole on the cross brace.
See Photo 41.
41. Install the ambient temperature sensor onto the cross brace. See Photo 42.
Install the winch cable Extension.
Photo 39
Connect the winch cable extension.
Photo 40
Install the bolts in the radiator support.
Photo 37 Photo 38
Photo 41
Install the ambient temperature sensor.
Photo 42
Secure the power wires to the cross brace.
Install the winch cable extension bracket.

42. Route the winch power wires through the radiator support to the remote battery jump studs, use a 13mm wrench to
remove studs and connect winch wiring. See Photo 43 and 44.
43. Locate the 2 license plate mount dimples in the front of the bumper. See Photo 45.
44. Align the template over the license plate mount dimple holes, use tape to hold the template onto the bumper. See
Photo 46.
45. Drill the hawse fair lead holes 10” apart in the center of the bumper, use a 3/4 drill. Drill a starting hole in the side of
the fairlead rope hole and trim using a body saw to remove the trimmed area. See Photo 47.
46. Using a sander or file, smooth around the trimmed areas. See Photo 48.
Connect winch power to the positive terminal. Connect winch power to the negative terminal.
Photo 43 Photo 44
Photo 45 Photo 46
Photo 47 Photo 48
Locate the dimples in the bumper. Align the template onto the bumper.
Drill holes 10” apart. Smooth around the trimmed areas.

47. Place the winch rope through the fairlead cut out and install the bumper onto the vehicle. See Photo 49.
48. Install the winch rope through the fairlead, install onto the bumper and winch plate behind the bumper, using the
supplied hardware in the winch kit. See Photo 50. Use a 19mm socket and wrench to tighten.
49. Install the hook and retaining pin, secure it with the supplied cotter pin. See Photo 51.
50. Reverse steps 1-11 to complete the installation of the bumper cover.
Photo 49 Photo 50
Photo 51
Install winch rope and bumper. Install the fairlead onto the bumper.
Install the hook onto the rope end.


By purchasing any item sold by Rough Country, LLC, the buyer expressly warrants that he/she is in compliance with all
applicable , State, and Local laws and regulations regarding the purchase, ownership, and use of the item. It shall be
the buyers responsibility to comply with all Federal, State and Local laws governing the sales of any
items listed, illustrated or sold. The buyer expressly agrees to indemnify and hold harmless Rough
Country, LLC for all claims resulting directly or indirectly from the purchase, ownership, or use of the
items.
/