– 1 – – 2 – – 3 –
P/N: 1802072700021
MC-7270-MP-T Series
Quick Installation Guide
First Edition, September 2014
Overview
Standard Moxa MC-7270-MP-T marine computers are powered by
the third generation Intel
®
Core
™
i CPU processor. With eight NMEA
0183 ports, four DB9 serial ports, four Gigabit Ethernet ports, six
USB 2.0 ports, two Super Speed USB 3.0 ports, and eight digital
I/O terminal blocks, this computer offers a full range of I/O
connectivity in a powerful, compact package. In addition, it also
has two PCI slots alongside a PCIe Gen 3 slot (x16), allowing even
more versatile peripheral expansion opportunities for industrial
applications.
Package Checklist
Before installing the MC-7270-MP-T, verify that the package
contains the following items:
• 1 MC-7270-MP-T marine computer
• 2 removable storage protection keys
• Wall mounting kit, with 8 screws
• 1 2-pin terminal block for DC power input
• 1 2-pin terminal block for Power ON/OFF switch
• 2 6-pin digital input terminal blocks
• 2 8-pin digital output terminal blocks
• 8 5-pin terminal blocks for NMEA 0183 ports
• Documentation and driver CD
• Quick installation guide
NOTE: Please notify your sales representative if any of the above
items are missing or damaged.
MC-7270-MP-T I/O Layout
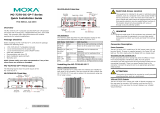
The following figures show the I/O layout of the MC-7270-MP-T.
MC-7270-MP-T Front View
MC-7270-MP-T Rear View
LED Indicators
The following table describes the LED indicators of the
MC-7270-MP-T.
LED Name
LED Color
LED Function
Power
(on front panel)
Green
Power is on and functioning normally
Off Power is off or there is an error
Storage
(on front panel)
Red (on)
Storage drive is functioning properly
Red
(blinking)
Drive is accessing or writing data
Off No activity
LAN
(on connectors)
Green
100 Mbps Ethernet mode
Yellow
1000 Mbps (Gigabit) Ethernet mode
Off
No activity or 10 Mbps Ethernet
mode
Storage
(on storage tray)
Red (on)
Storage disk is functioning properly
Red
(blinking)
Storage disk is being accessed
Red (off)
No activity
Blue (on)
w/ SATA power
Installing the MC-7270-MP-T
Wall or Cabinet Mounting
The MC-7270-MP-T has brackets for both wall and cabinet
mounting. Attach one bracket on each side of the MC-7270-MP-T
and then use suitable screws to attach the brackets to the wall or
cabinet.
Restricted Access Location
This equipment is intended to be used in restricted access
locations, such as a computer room, with access limited to
service personnel or users who have been instructed on
how to handle the metal chassis of equipment that is so hot
that special protection may be needed before touching it.
The location shou
ld only be accessible with a key or
through a security identity system.
W
ARNING
External metal parts of this equipment are extremely hot!!
Before touching the equipment, you must take special
precautions to protect your hands and body from serious
injury.

– 4 – – 5 – – 6 –
www.moxa.com/support
The Americas:
+1-714-528-6777 (toll-free: 1-888-669-2872)
Europe:
+49-89-3 70 03 99-0
Asia-Pacific:
+886-2-8919-1230
China:
+86-21-5258-9955 (toll-free: 800-820-5036)
2014 Moxa Inc. All rights reserved.
Connector Description
Power Connector
The MC-7270-MP-T comes with a 100 to 240 VAC power input, and
has another 24 VDC terminal block power input. If power is
supplied properly, the Power LED will light up.
Grounding the MC-7270-MP-T
Proper grounding and wire routing help to limit the effects of noise
from electromagnetic interference (EMI). Run the ground
connection from the ground screw to the grounding surface prior to
connecting the power. There is a ground symbol next to the
connector. Connect the EG wire to an appropriate grounded metal
surface.
ATTENTION
This product is intended to be mounted to a well
-
grounded
mounting surface, such as a metal panel.
VGA and DVI-D Outputs
For connecting display monitors, the MC-7270-MP-T comes with a
female D-sub 15-pin (DA-15) VGA interface on the rear panel, and
has an additional pair of DVI-D interfaces on the rear panel.
Ethernet Ports
The four 10/100/1000 Mbps Ethernet ports use RJ45 connectors.
Pin
10/100 Mbps
1000 Mbps
1
ETx+
TRD(0)+
2
ETx-
TRD(0)-
3
ERx+
TRD(1)+
4
–
TRD(2)+
5
–
TRD(2)-
6
ERx-
TRD(1)-
7
–
TRD(3)+
8
–
TRD(3)-
PCI and PCIe Slots
The MC-7270-MP-T comes with 2 universal PCI slots (3.3/5/12 V)
that can connect to various peripheral cards, such as radar or
Profibus cards. A third generation PCIe x16 slot is also available for
connecting an additional VGA graphics card (or other peripherals).
To insert a peripheral card, remove the screws and open the
chassis cover, then remove the covering plates and insert the
peripheral card into the slot.
Serial Ports
The serial ports use DB9 connectors. COM1 and COM2 support
RS-232, and COM3 and COM4 support RS-232/422/485.
Pin
RS-232
RS-422
RS-485
(4-wire)
RS-485
(2-wire)
1
DCD
TxDA(-)
TxDA(-)
–
2
RxD
TxDB(+)
TxDB(+)
–
3
TxD
RxDB(+)
RxDB(+)
DataB(+)
4
DTR
RxDA(-)
RxDA(-)
DataA(-)
5
GND
GND
GND
GND
6
DSR
–
–
–
7
RTS
–
–
–
8
CTS
–
–
–
Removable Storage Tray
The MC-7270-MP-T computer has two removable HDD/SSD trays
on the front panel, and an internal storage drive expansion slot
inside the chassis. To provide better system safety, protection
keys are provided to lock the removable tray.
NMEA 0183 Ports
The MC-7270-MP-T comes with 8 NMEA 0183 ports on the rear
panel. See the following figure for the NMEA pin outs.
Digital Input/Output Channels
The MC-7270-MP-T comes with 8 digital input and 8 digital output
channels on the rear panel. These input/output channels can be
connected via the terminal blocks included in the package. See the
following figure for the pin assignments.
Power ON/OFF Switch
The MC-7270-MP-T comes with a power ON/OFF switch on the
front panel. Users can boot up the computer by the 2-pin terminal
block on the power ON/OFF switch.
USB Hosts
The MC-7270-MP-T has six USB 2.0 and two SuperSpeed USB 3.0
type A ports, respectively, supported by EHCI and xHCI for full
high speed bandwidth. The USB ports support peripherals like
keyboards, mice, and other devices such as portable HDDs or
DVD-ROMs.
Audio Interface
The MC-7270-MP-T comes with an audio line-in, an audio line-out,
and a microphone input, allowing users to connect a speaker
system, an earphone, or a microphone.
Real Time Clock
The MC-7270-MP-T’s real time clock (RTC) is powered by a lithium
battery. We strongly recommend that you do not replace the
lithium battery without help from a qualified Moxa support
engineer. If you need to change the battery, contact the Moxa RMA
service team at http://www.moxa.com/rma/about_rma.aspx.
ATTENTION
There is a risk of explosion if the battery is replaced with an
incorrect type of battery.
Powering on the MC-7270-MP-T
To power on the MC-7270-MP-T, you may connect a 24 VDC power
source to the MC-7270-MP-T’s DC terminal block (located on the
rear panel), or plug in the AC power cord. It takes about 30
seconds for the system to boot up. Once the system is ready, the
Power LED will light up.
-
 1
1
-
 2
2
Moxa Technologies MC-7270-MP-T Quick Installation Manual
- Type
- Quick Installation Manual
- This manual is also suitable for
Ask a question and I''ll find the answer in the document
Finding information in a document is now easier with AI
Related papers
-
 Moxa Technologies MC-7200-DC-CP-T Series Quick Install Guide
-
 Moxa Technologies MC-7200-DC-CP-T Series User manual
-
 Moxa Technologies MD-124 Series Quick Install Guide
-
Moxa Technologies MC-1200 Series Quick Install Guide
-
Moxa Technologies UC-2114-T-LX Quick Install Guide
-
Moxa Technologies MD-200 Series Quick Install Guide
-
Moxa Technologies MPC-2240 Series Quick Install Guide
-
Moxa Technologies MC-7400 Series User manual
-
 Moxa Technologies DA-681C Series Quick Install Guide
-
Moxa Technologies DA-820C Series Quick Install Guide
Other documents
-
Moxa MC-7200-MP-T Series User manual
-
Moxa MC-7400 Series Quick setup guide
-
Moxa MD-119 Series Quick setup guide
-
Moxa MC-7400 Series Quick setup guide
-
Moxa V2426A Series Quick setup guide
-
Moxa V2426A Series User manual
-
Moxa MD-224 Series Quick setup guide
-
Moxa MC-1100 Series Quick setup guide
-
Moxa MC-1100 Series Quick setup guide
-
Moxa MPC-2260 Series Quick setup guide


