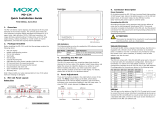
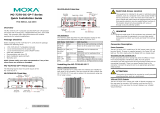
Moxa Technologies MC-7400 Series User manual

Category
Server barebones
Type
User manual
MC-7400 User’s Manual
Edition 1.0, March 2019
www.moxa.com/product
© 2019 Moxa Inc. All rights reserved.
MC-7400 User’s Manual
The software described in this manual is furnished under a license agreement and may be used only in accordance with
the terms of that agreement.
Copyright Notice
© 2019 Moxa Inc. All rights reserved.
Trademarks
The MOXA logo is a registered trademark of Moxa Inc.
All other trademarks or registered marks in this manual belong to their respective manufacturers.
Disclaimer
Information in this document is subject to change without notice and does not represent a commitment on the part of
Moxa.
Moxa provides this document as is, without warranty of any kind, either expressed or implied, including, but not limited
to, its particular purpose. Moxa reserves the right to make improvements and/or changes to this manual, or to the
products and/or the programs described in this manual, at any time.
Information provided in this manual is intended to be accurate and reliable. However, Moxa assumes no responsibility for
its use, or for any infringements on the rights of third parties that may result from its use.
This product might include unintentional technical or typographical errors. Changes are periodically made to the
information herein to correct such errors, and these changes are incorporated into new editions of the publication.
Technical Support Contact Information
www.moxa.com/support
Moxa Americas
Toll
-free: 1-888-669-2872
Tel:
+1-714-528-6777
Fax:
+1-714-528-6778
Moxa China (Shan
ghai office)
Toll
-free: 800-820-5036
Tel:
+86-21-5258-9955
Fax:
+86-21-5258-5505
Moxa Europe
Tel:
+49-89-3 70 03 99-0
Fax: +49-89-3 70 03 99-99
Moxa Asia
-Pacific
Tel:
+886-2-8919-1230
Fax: +886-2-8919-1231
Moxa India
Tel:
+91-80-4172-9088
Fax
: +91-80-4132-1045
Table of Contents
1. Introduction ...................................................................................................................................... 1-1
Overview ........................................................................................................................................... 1-2
Package Checklist ............................................................................................................................... 1-2
Product Features ................................................................................................................................ 1-2
Hardware Specifications ...................................................................................................................... 1-3
Hardware Block Diagram .............................................................................................................. 1-3
2. Hardware .......................................................................................................................................... 2-1
Appearance ........................................................................................................................................ 2-2
Dimensions ........................................................................................................................................ 2-4
LED Indicators .................................................................................................................................... 2-5
Real Time Clock .................................................................................................................................. 2-5
3. Hardware Connection Description ..................................................................................................... 3-1
Installing the MC-7400 ........................................................................................................................ 3-2
Wall Mounting ............................................................................................................................. 3-2
Wiring Requirements ........................................................................................................................... 3-3
Connecting the Power ......................................................................................................................... 3-3
Grounding the MC-7400 ...................................................................................................................... 3-4
Connecting Data Transmission Cables ................................................................................................... 3-4
Connecting to the Network ........................................................................................................... 3-4
Connecting to a Serial Device ....................................................................................................... 3-5
Connecting a PS/2 Keyboard and Mouse ................................................................................................ 3-6
Connecting to the USB Device .............................................................................................................. 3-6
Connecting to Digital Input and Output Channels .................................................................................... 3-7
Connecting to a DVI-I/DVI-D Monitor .................................................................................................... 3-8
Connecting to a DisplayPort Monitor ...................................................................................................... 3-9
Installing the Removable SATA Storage Drive ....................................................................................... 3-10
4. BIOS Setup ........................................................................................................................................ 4-1
Entering the BIOS Setup ...................................................................................................................... 4-2
Main Information ................................................................................................................................ 4-4
Advanced Settings .............................................................................................................................. 4-4
Boot Configuration....................................................................................................................... 4-5
SATA Configuration ..................................................................................................................... 4-5
Internal Graphics Device .............................................................................................................. 4-6
Miscellaneous Configuration .......................................................................................................... 4-7
SIO ITE8768E ............................................................................................................................. 4-8
Console Redirection ..................................................................................................................... 4-9
Smart Recovery Info .................................................................................................................. 4-10
Security Settings .............................................................................................................................. 4-10
Set Supervisor Password ............................................................................................................ 4-10
Power Settings ................................................................................................................................. 4-11
Auto Wake on S5 ...................................................................................................................... 4-11
Wake on LAN ............................................................................................................................ 4-12
Boot Settings ................................................................................................................................... 4-12
Boot Type ................................................................................................................................. 4-12
PXE Boot to LAN ........................................................................................................................ 4-12
Add Boot Options ...................................................................................................................... 4-12
Boot Delay Time ........................................................................................................................ 4-13
Automatic Failover ..................................................................................................................... 4-13
Boot Order Priority .................................................................................................................... 4-13
Legacy Normal Boot Menu .......................................................................................................... 4-13
Boot Type Order ........................................................................................................................ 4-13
EFI .......................................................................................................................................... 4-13
Exit Settings .................................................................................................................................... 4-14
Exit Saving Changes .................................................................................................................. 4-14
Save Change Without Exit .......................................................................................................... 4-14
Exit Discarding Changes ............................................................................................................. 4-14
Load Optimal Defaults ................................................................................................................ 4-14
Load Custom Defaults ................................................................................................................ 4-14
Save Custom Defaults ................................................................................................................ 4-14
Discard Changes ....................................................................................................................... 4-14
Upgrading the BIOS .......................................................................................................................... 4-15
A. Regulatory Approval Statement ........................................................................................................ A-1
B. Adjusting the Audio Mixer Function................................................................................................... B-1
1
1. Introduction
The chapter describes the product overview, package checklist, product features, and hardware specifications
of the MC-7400 marine computer.
The following topics are covered in this chapter:
Overview
Package Checklist
Product Features
Hardware Specifications
Hardware Block Diagram
MC-7400 Series HW UM Introduction
1-2
Overview
The MC-7400 marine computer is powered by the 6th generation Intel Core™ i processor, delivering a full range
of I/O connectivity, including NMEA 0183 ports, serial ports, Gigabit Ethernet ports, as well as USB 2.0/3.0
ports and a miniPCI slot for extensions. The MC-7400 is designed to provide outstanding PC performance,
bringing a new level of flexibility and control to marine applications.
Package Checklist
Each model ships with the following items:
1 MC-7400 computer
Wall mounting kit, with 8 screws
1 3-pin terminal block for DC power input (DC model only)
1 2-pin terminal block for power ON/OFF switch
4 5-pin terminal blocks for NMEA 0183 ports (MC-7420 model only)
1 6-pin digital input terminal block (MC-7420 model only)
1 8-pin digital input terminal block (MC-7420 model only)
Quick installation guide
Warranty card
NOTE
Please notify your sales representative if any of the above items are missing or damaged.
Product Features
The MC-7400 embedded computer has the following features:
6th Gen. Intel® Core™ i5 processor
DDR4 SO-DIMM memory up to 32 GB
3 independent displays (1 x DVI-I, 1 x DVI-D, 1 x DisplayPort)
Various I/O interfaces including 9 x USB ports, 5 x LAN ports and 4 x COM ports
2 Removable 2.5” SSD storage bay
AC or DC power model available
Supports Win 10 IoT and Debian 9 operating systems
Supports Moxa Proactive Monitoring utility for system status monitoring
MC-7400 Series HW UM Introduction
1-3
Hardware Specifications
NOTE
The latest specif
ications for Moxa’s products can be found at https://www.moxa.com.
Hardware Block Diagram
2
2. Hardware
The MC-7400 computer is compact, well-designed, and built rugged enough for industrial applications. LED
indicators help you monitor performance and identify trouble spots, multiple serial ports allow you to connect
different devices, and the reliable and stable hardware platform lets you devote your attention to developing
your applications.
The following topics are covered in this chapter:
Appearance
Dimensions
LED Indicators
Real-time Clock
MC-7400 Series HW UM Hardware Introduction
2-2
Appearance
MC-7410 AC Model
MC-7410 DC Model
MC-7400 Series HW UM Hardware Introduction
2-3
MC-7420 AC Model
MC-7420 DC Model
MC-7400 Series HW UM Hardware Introduction
2-4
Dimensions
MC-7410 AC Model MC-7410 DC Model
MC-7420 AC Model MC-7420 DC Model
MC-7400 Series HW UM Hardware Introduction
2-5
LED Indicators
LED Name LED Color LED Function
Power Green Power is on and the device is functioning normally
Off Power is off or error powering the device
Storage Yellow Blinking: Data transmission
Off No data transmission
LAN (1 to 5) Green 100 Mbps Ethernet mode
Yellow 1000 Mbps (Gigabit) Ethernet mode
Off No activity or 10 Mbps Ethernet mode
Tx 1/2/3//4 Green Blinking: Data is being transmitted
Off No data transmission
Rx 1/2/3//4 Yellow Blinking: Data is being received
Off No data
Real-time Clock
The embedded computer’s real-time clock is powered by a lithium battery. We strongly recommend that you do
NOT replace the lithium battery yourself. If the battery needs to be changed, contact the Moxa RMA service
team at http://www.moxa.com/rma/about_rma.aspx
.
ATTENTION
Used batteries are environmentally hazardous; dispo
se of them in the proper manner.
WARNING
There is a risk of explosion if the wrong type of battery is used. To avoid this potential danger, be sure to use
the correct type of battery. Contact the Moxa RMA service team if you have any questions about replacing your
battery
.
3
3. Hardware Connection Description
In this chapter, we show how to connect the embedded computers to the network and to various devices.
The following topics are covered in this chapter:
Installing the MC-7400
Wall Mounting
Wiring Requirements
Connecting the Power
Grounding the MC-7400
Connecting Data Transmission Cables
Connecting to the Network
Connecting to a Serial Device
Connecting a PS/2 Keyboard and Mouse
Connecting to the USB Device
Connecting to Digital Input and Output Channels
Connecting to a DVI-I/DVI-D Monitor
Connecting to a DisplayPort Monitor
Installing the Removable SATA Storage Drive
MC-7400 Series HW UM Hardware Connection Description
3-2
Installing the MC-7400
Wall Mounting
The MC-7400 can be installed on a wall by using the wall-mounting kit that is included in the package.
STEP 1: Use eight screws for each bracket and attach the brackets to the rear of the MC-7400.
STEP 2: Use two screws (Ø3.7 mm, 60 mm in length) per side to attach the MC-7400 to a wall.
MC-7400 Series HW UM Hardware Connection Description
3-3
Wiring Requirements
Read and follow these common safety precautions before proceeding with the installation of any electronic
device:
Use separate paths to route wiring for power and devices. If power wiring and device wiring paths must
cross, make sure the wires are perpendicular at the intersection point.
NOTE
Do not run signal or communication wiring together with power wiring in the same wire conduit. To avoid
interference, wires with different signal characteristics should be routed separately.
Use the type of signal transmitted through a wire to determine which wires should be kept separate. The
rule of thumb is that wiring that shares similar electrical characteristics can be bundled together.
Keep input wiring and output wiring separate.
It is advisable to label the wiring on all devices in the system.
ATTENTION
Safety First!
Be sure to disconnect the power cord before installing and/or wiring your
MC-7400.
Wiring Caution!
Calculate the maximum possible current in each power wire and common wire. Observe a
ll electrical codes
dictating the maximum current allowable for each wire size.
If the current goes above the maximum ratings,
the wiring could overheat, causing serious damage to your equipment.
Temperature Caution!
Be careful when handling
the unit. When the unit is plugged in, the
internal components generate heat, and
consequently the outer casing may feel hot to the touch.
Connecting the Power
The MC-7400 Series comes with a 100 to 240 VAC power input for AC power model, or a 24 VDC power input
(via the terminal block) for DC power model. If power is supplied properly, the Power LED will light up.
For safety reasons, please use DC terminal block cables with the following specifications:
Wire range: 14-22 AWG
NOTE
The DC model should be supplied by
a UL-
listed power source, whose output meets the ES1 standard and is
rated at 24 VDC, 4.06 A (min.)
. If you need further assistance selecting a power source, contact a Moxa
representative
.
MC-7400 Series HW UM Hardware Connection Description
3-4
Grounding the MC-7400
Grounding and careful wire routing help limit the effects of noise due to electromagnetic interference (EMI).
Run the ground connection from the ground screw to the grounding surface prior to connecting the power.
ATTENTION
This product is intended to be mounted
on a well-grounded surface, such as a metal panel.
The location of the earthing/grounding wire on the terminal block power connector is shown in the diagram
below. Connect the wire to an appropriately grounded metal surface.
Connecting Data Transmission Cables
This section describes how to connect the MC-7400 computer to the network and/or serial devices.
Connecting to the Network
Plug your network cable into the computer’s Ethernet port. The other end of the cable should be plugged into
your Ethernet networking device. When the cable is properly connected, the LEDs on the embedded computer’s
Ethernet port will glow to indicate a valid connection.
The 10/100/1000 Mbps Ethernet LAN ports use 8-pin RJ45 connectors. The following diagram shows the
pinouts for these ports.
The LED indicator
s on the right-top (for the upper LAN connector) and right-bottom
(for the
lower LAN connector) corners glow a solid green color when the cable is properly connected
to a 100 Mbps Ethernet network. The LED will flash on and off when Ethernet packets are
being transmitted or received.
The LED indicator
s on the left-top and left-bottom corners glow a solid yellow
color when
the cable is properly connected to a 10
00
Mbps Ethernet network. The LED will flash on and
off when Ether
net packets are being transmitted or received.
Pin 10/100 Mbps 1000 Mbps
1 ETx+ TRD(0)+
2 ETx- TRD(0)-
3 ERx+ TRD(1)+
4 TRD(2)+
5 TRD(2)-
6 ERx- TRD(1)-
7 TRD(3)+
8 TRD(3)-
MC-7400 Series HW UM Hardware Connection Description
3-5
Connecting to a Serial Device
The serial ports use DB9 connectors. COM1 and COM2 support RS-232. COM3 and COM4 support RS-232,
RS-422, or RS-485. The AP from the CD can be used to configure both COM1 and COM2. For detailed
instructions, please refer to Appendix C. The pin assignments are shown in the following table:
Port
RS
-232/422/485 Pinouts
Pin RS-232 RS-422 RS-485 (4-wire) RS-485 (2-wire)
1 DCD TxDA(-) TxDA(-)
2 RxD TxDB(+) TxDB(+)
3 TxD RxDB(+) RxDB(+) DataB(+)
4 DTR RxDA(-) RxDA(-) DataA(-)
5 GND GND GND GND
6 DSR
7 RTS
8 CTS
Additionally, there are four NMEA 0183 ports with terminal blocks on the front panel of the computer. Refer to
the following figures for the location of the NMEA ports and the pin assignments.
MC-7400 Series HW UM Hardware Connection Description
3-6
Connecting a PS/2 Keyboard and Mouse
Your MC-7400 computer comes with 2 PS/2 mini-DIN connectors on the rear panel to connect to a PS/2
keyboard and PS/2 mouse.
This 6-pin mini-DIN connector has the pin assignments shown below.
PS/2 Connector
Pin No. Signal Definition
1 PS/2 Keyboard Data
2 PS/2 Mouse Data
3 GND
4 VCC
5 PS/2 Keyboard Clock
6 PS/2 Mouse Clock
Connecting to the USB Device
The MC-7400 comes with two USB 2.0 hosts on the front panel, four USB 2.0 hosts, and two SuperSpeed USB
3.0 hosts on the rear panel. The USB ports support peripherals such as a keyboard or mouse, or storage
devices such as a portable HDD or DVD-ROM. Please note that USB 3.0 interfaces are not supported by the
Windows XP platform.
MC-7400 Series HW UM Hardware Connection Description
3-7
Connecting to Digital Input and Output
Channels
The MC-7400 comes with four digital input and four digital output channels on the front panel. These
input/output channels can be connected with the terminal blocks that have been included in the package.
MC-7400 Series HW UM Hardware Connection Description
3-8
Connecting to a DVI-I/DVI-D Monitor
The MC-7400 computer come with one DVI-I and one DVI-D connectors that can connect to DVI monitors. Use
the cable to connect one end to the DVI-I connector and the other end to the monitor. See the following table
for DVI-I/DVI-D connector pin assignments.
Pin No.
Signal Definition
1
T.M.D.S. Data2-
2
T.M.D.S. Data2+
3
T.M.D.S. Data2/4 Shield
4
N/C
5
N/C
6
DDC Clock
7
DDC Data
8
Analog Vertical Sync
9
T.M.D.S. Data1-
10
T.M.D.S. Data1+
11
T.M.D.S. Data1/3 Shield
12
N/C
13
N/C
14
+5V Power
15
Ground
(return for +5V, HSync, and VSync)
16
Hot Plug Detect
17
T.M.D.S. Data0-
18
T.M.D.S. Data0+
19
T.M.D.S. Data0/5 Shield
20
N/C
21
N/C
22
T.M.D.S. Clock Shield
23
T.M.D.S. Clock+
24
T.M.D.S. Clock-
C1
Analog Red
C2
Analog Green
C3
Analog Blue
C4
Analog horiz. Sync
C5
Analog GND
MC-7400 Series HW UM Hardware Connection Description
3-9
Connecting to a DisplayPort Monitor
The MC-7400 computer come with one DisplayPort connector to connect to monitor which support 4K
resolution.
Pin No.
Signal Definition
1
ML_Lane 0 (p)
2 GND
3 ML_Lane 0 (n)
4
ML_Lane 1 (p)
5 GND
6 ML_Lane 1 (n)
7
ML_Lane 2 (p)
8 GND
9 ML_Lane 2 (n)
10
ML_Lane 3 (p)
11
GND
12
ML_Lane 3 (n)
13
CONFIG1
14
CONFIG2
15
AUX CH (p)
16
GND
17
AUX CH (n)
18
Hot Plug
19
Return
20
DP_PWR
  • Page 1 1
  • Page 2 2
  • Page 3 3
  • Page 4 4
  • Page 5 5
  • Page 6 6
  • Page 7 7
  • Page 8 8
  • Page 9 9
  • Page 10 10
  • Page 11 11
  • Page 12 12
  • Page 13 13
  • Page 14 14
  • Page 15 15
  • Page 16 16
  • Page 17 17
  • Page 18 18
  • Page 19 19
  • Page 20 20
  • Page 21 21
  • Page 22 22
  • Page 23 23
  • Page 24 24
  • Page 25 25
  • Page 26 26
  • Page 27 27
  • Page 28 28
  • Page 29 29
  • Page 30 30
  • Page 31 31
  • Page 32 32
  • Page 33 33
  • Page 34 34
  • Page 35 35
  • Page 36 36
  • Page 37 37
  • Page 38 38
  • Page 39 39
  • Page 40 40
  • Page 41 41

Moxa Technologies MC-7400 Series User manual

Category
Server barebones
Type
User manual

Ask a question and I''ll find the answer in the document

Finding information in a document is now easier with AI