MULTIPLEX S SV SVI NGF Owner Instruction Manual

Type
Owner Instruction Manual
Part Number 020003996 3/15
S, SV, SVi, NGF, & Quickdraw™
Beverage/Ice Dispensers
Installation, Operation and Maintenance Manual
Original Instructions — This manual is updated as new information and models are released. Visit our website for the
latest manual. www.manitowocbeverage.com/us
Safety Notices
As you work on Manitowoc equipment, be sure to pay close
attention to the safety notices in this manual. Disregarding
the notices may lead to serious injury and/or damage to the
equipment.
Throughout this manual, you will see the following types of
safety notices:
n
Warning
Text in a Warning box alerts you to a potential personal
injury situation. Be sure to read the Warning statement
before proceeding, and work carefully.
,
Caution
Text in a Caution box alerts you to a situation in which
you could damage the equipment. Be sure to read
the Caution statement before proceeding, and work
carefully.
Procedural Notices
As you work on Manitowoc equipment, be sure to read the
procedural notices in this manual. These notices supply
helpful information which may assist you as you work.
Throughout this manual, you will see the following types
of procedural notices:
Important
Text in an Important box provides you with information
that may help you perform a procedure more efficiently.
Disregarding this information will not cause damage or
injury, but it may slow you down as you work.
NOTE: Text set off as a Note provides you with simple, but
useful, extra information about the procedure you are
performing.
Read These Before Proceeding
n
Warning
PERSONAL INJURY POTENTIAL
Do not operate equipment that has been misused,
abused, neglected, damaged, or altered/modified from
that of original manufactured specifications.
n
Warning
The installer is responsible to provide a suitable plug
meeting all requirements, or a means for disconnection
must be incorporated in the wiring according to the
wiring rules.
n
Warning
This appliance is intended to be used indoors in kitchens
or back rooms of food/restaurant establishments.
n
Warning
This appliance is not intended for use by persons
(including children) with reduced physical, sensory
or mental capabilities, or lack of experience and
knowledge, unless they have been given supervision
concerning use of the appliance by a person responsible
for their safety. Do not allow children to play with this
appliance.
,
Caution
Proper installation, care and maintenance are essential
for maximum performance and trouble-free operation
of your Manitowoc equipment. Read and understand
this manual. It contains valuable care and maintenance
information. If you encounter problems not covered
by this manual, do not proceed, contact Manitowoc
Foodservice Group.
Important
Routine adjustments and maintenance procedures
outlined in this manual are not covered by the warranty.
Table of Contents
Part Number 020003996 3/15 3
Section 1
General Information
Read This Manual ...............................................................................................................5
Unit Inspection ................................................................................................................... 5
Serial Number Location .....................................................................................................5
Warranty Information ........................................................................................................5
Model Numbers .................................................................................................................. 5
How to Read a Model Number ..........................................................................................................5
Accessories ..........................................................................................................................6
Variety Valves ...........................................................................................................................................6
Flavor Magic™ Drink Enhancement System ..................................................................................6
Brix & Ratio Cups.....................................................................................................................................6
Quality Assurance Kit ............................................................................................................................6
Beverage System Cleaner ....................................................................................................................6
Cup Dispensers .......................................................................................................................................6
Cold Carbonation Retro-Fit Kit ..........................................................................................................6
Legs .............................................................................................................................................................6
Baffle for Manitowoc® Ice Machines ................................................................................................6
Manual Fill Lid .........................................................................................................................................6
Ice Flow Restrictor ..................................................................................................................................6
Section 2
Installation
General ................................................................................................................................7
Dimensions ......................................................................................................................... 7
Max Noise dB(A) ................................................................................................................. 7
Footprints ...........................................................................................................................8
Location ..............................................................................................................................9
Ways Equipment Should Not be Used ..............................................................................9
Location Requirements for Top Mounted Ice Machine Installations............................10
Pre-installation Checklist ................................................................................................10
Assembly ...........................................................................................................................11
Installing Baffle for Ice Machine Installations ............................................................................ 11
Electrical............................................................................................................................12
General .................................................................................................................................................... 12
Minimum Circuit Ampacity .............................................................................................................. 12
Electrical Requirements .................................................................................................................... 12
Voltage .................................................................................................................................................... 12
Minimum Circuit Amperage Chart ................................................................................................ 12
Grounding Instructions ..................................................................................................................... 12
Pump Deck Wiring .............................................................................................................................. 13
Water Supply ....................................................................................................................14
Recommended Plumbing ................................................................................................................ 14
S/SV150 6 Valve Diagram ................................................................................................15
S/SV175 8 Valve Diagram ................................................................................................16
S/SV200/250/SV-250QD 8 Valve Diagram ......................................................................17
S/SV200/250 10 Valve Diagram .......................................................................................18
NGF-250 & NGF-250QD 8 Valve Diagram .......................................................................19
CO
2
Supply ........................................................................................................................20
Routing Internal Carb Tank Purge Tube....................................................................................... 20
Drains ................................................................................................................................20
Step by Step Installation..................................................................................................21
General .................................................................................................................................................... 21
Specifications Chart ............................................................................................................................ 21
4 Part Number 020003996 3/15
Table of Contents (continued)
Unit Installation .................................................................................................................................... 21
Quickdraw Installations..................................................................................................................... 22
Setting Pressures ................................................................................................................................. 22
ADA Key Pads ....................................................................................................................................... 23
Starting Your Beverage System & Dispenser ............................................................................. 24
Section 3
Operation
General System Overview ............................................................................................... 25
Component Identification ...............................................................................................26
Sequence of Operation ....................................................................................................26
Ice Recommended for Dispensing ................................................................................................26
Ice Storage and Dispensing .............................................................................................................26
Beverage Valves .................................................................................................................................. 26
Rocking Chute Ice Dispensing ........................................................................................................ 26
Carbonation .......................................................................................................................................... 27
Syrup Delivery System ....................................................................................................................... 27
Back Room Package ........................................................................................................................... 27
Racking.................................................................................................................................................... 28
B-I-B .......................................................................................................................................................... 28
Pumps ......................................................................................................................................................28
Auto Bag Selectors .............................................................................................................................. 28
Figal System ..........................................................................................................................................28
Figal Tanks .............................................................................................................................................. 28
Agitation Timer..................................................................................................................................... 28
Operation Checks and Adjustments ...............................................................................29
Rocking Chute Ice Delivery Switch Adjustment....................................................................... 29
Quickdraw Ice Portion Adjustments ............................................................................................. 30
Sensor Beam ........................................................................................................................................ 31
Brix Check ............................................................................................................................................... 32
Section 4
Maintenance
Cleaning & Sanitizing .......................................................................................................33
General .................................................................................................................................................... 33
Daily Cleaning....................................................................................................................................... 33
Cleaning Checklist .............................................................................................................................. 34
Preventative Maintenance ..............................................................................................35
Disassembly ...................................................................................................................... 35
Disassembly for Cleaning & Maintenance ..................................................................................35
Disassemble the Rocking Chute .................................................................................................... 36
Quickdraw Components ................................................................................................................... 37
Non-front Serviceable Gear Motor Removal ............................................................................. 38
Front Serviceable Gear Motor Removal ...................................................................................... 39
Sanitizing ..........................................................................................................................40
Beverage System Cleaning .............................................................................................................. 40
Bag-In-Box System Sanitation ........................................................................................................40
Figal Beverage System ....................................................................................................................... 41
Shipping, Storage and Relocation ..................................................................................41
Section 5
Troubleshooting
Checklist ............................................................................................................................43
Drink Troubleshooting.....................................................................................................44
Pump Troubleshooting ....................................................................................................45
Quickdraw Mechanism Troubleshooting .......................................................................45
Quickdraw Ice Portion Control Program ........................................................................46
Part Number 020003996 3/15 5
Read This Manual
Manitowoc Beverage Equipment (MBE) developed this
manual as a reference guide for the owner/operator and
installer of this equipment. Please read this manual before
installation or operation of the machine. A qualified service
technician must perform installation and start-up of this
equipment, consult Section 5 within this manual for service
assistance.
If you cannot correct the service problem, call your MBE
Service Agent or Distributor. Always have your model and
serial number available when you call.
Your Service Agent _______________________________
Service Agent Telephone Number ____________________
Your Local MBE Distributor _________________________
Distributor Telephone Number ______________________
Model Number __________________________________
Serial Number ___________________________________
Installation Date _________________________________
Unit Inspection
Thoroughly inspect the unit upon delivery. Immediately
report any damage that occurred during transportation
to the delivery carrier. Request a written inspection report
from a claims inspector to document any necessary claim.
Serial Number Location
This number is required when requesting information from
your local distributor. The serial number is listed on the
SERIAL NUMBER DECAL affixed to the dispenser.
Label
Serial Number Location
Warranty Information
Visit www.manitowocbeverage.com for:
Warranty Verification
Warranty Registration
View and download a copy of your warranty
Model Numbers
This manual covers the following models:
Beverage/Ice Dispensers
S-150, S-200, S-250, SV-150, SV-175, SV-200, SV-250, SV-150i,
SV-175i, SV-200i, SV-250i, SV-250QD, NGF-250, NGF-250QD
HOW TO READ A MODEL NUMBER
S - Ice Dispenser
SV - Ice/Beverage Dispenser
i - intelli-carb
QD - Quickdraw
Ice Capacity
Model Prex
Model Sux
Model Base
SV 250 i
Section 1
General Information
6 Part Number 020003996 3/15
General Information Section 1
Accessories
VARIETY VALVES
Variety Valves are a great way of extending your beverage
offerings with non-carbonated drinks without extending
the dispenser footprint! The McCanns Variety Valve is
available in Autofill, Self-Serve, Sanitary Lever and Portion
Control.
FLAVOR MAGIC™ DRINK ENHANCEMENT SYSTEM
The Flavor Magic™ Drink Enhancement System allows you
to offer your fountain beverage customers more flavor
choices without using any additional counter space for
custom drink combinations that drives return business!
BRIX & RATIO CUPS
Ensure that your customers get the best-tasting beverage!
Over time, valves can fall out of their intended calibration.
McCanns Brix and Ratio Cups help you to keep the syrup-
to-water ratio correct, assuring a consistent, refreshing
drink each time.
QUALITY ASSURANCE KIT
The tools required to test fountain drink quality are
included in a single, compact, durable, and economic
package.
BEVERAGE SYSTEM CLEANER
BevClean™ - No Rinse, Bag-In-Box Beverage System Cleaner.
Scheduled cleaning is essential for a properly functioning
beverage dispensing system. Get the peace of mind that
comes with this easy-to-use cleaner that delivers a fresh,
deposit-free system!
CUP DISPENSERS
Servend cup dispensers help keep your hot or cold drink
serving area organized by giving a uniform appearance to
the storage of cups and drink accessory items.
COLD CARBONATION RETRO-FIT KIT
Servend’s new Cold Carbonation Retro-Fit Kit delivers cold
water to the carbonator which results in higher carbonation
levels, better-tasting drinks, and year-round, consistent
water temperature to your fountain beverage center.
LEGS
Legs are optional equipment with most MBE dispensers.
Standard legs are 4" (10.2 cm) tall stainless steel legs. If an
ice machine is installed on top of the dispenser, legs must
not be installed. We do not recommend using legs when an
ice machine is mounted on the dispenser. The combined
weight of the dispenser, ice and ice machine is more evenly
distributed when the base area of the dispenser is in
contact with the countertop.
BAFFLE FOR MANITOWOC® ICE MACHINES
When installing a Manitowoc Ice Machine on a dispenser, a
baffle kit is required for proper installation. The baffle kit is
designed to prevent ice from lying against the front of the
ice machine, and melting down the front of the dispenser.
There are two different baffle kits available for “S” series ice
machines — one kit is for the 30" wide machine, and the
other kit is for the 22" wide machine. There is also a kit for
“Q” series ice machines.
Kits are available through your local distributor. List prices
may be subject to change without notification. Please
call your local parts distributor for current pricing before
ordering.
NOTE: For full information about ice machine installation,
including plumbing lines connections and electrical
requirements, see the ice machine installation manual.
MANUAL FILL LID
If you are top mounting your dispenser with an ice machine,
you will require a lid for the manual fill area at the top, front
of the dispenser.
If you ordered a dispenser and an ice machine at the same
time, the manual fill lid was included with the unit. The
manual fill lid can be ordered from your local distributor.
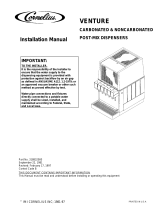
ICE FLOW RESTRICTOR
An optional ice flow restrictor decreases the amount of ice
allowed to enter the ice chute by blocking a small area at
the entrance of the dispenser chute. This in turn restricts the
flow of ice that is dispensed into your cup.
Please refer to the instructions included in kit #5013822 for
more information on how to install.
Ice Flow Restrictor
Part Number 020003996 3/15 7
General
These instructions are provided to assist the qualified
installer. Contact your Manitowoc Beverage Equipment
Service Agent or call Manitowoc Beverage Equipment for
information regarding start-up services.
The unit should be installed and serviced by a suitably
trained person.
Dimensions
B
C
D
G
F
E
I
H
A
Model/Ice
Capacity
A B C D E F G H I
S/SV-150
34.81"
(88.4 cm)
23.00"
(58.4 cm)
9.94"
(17.6 cm)
4.44"
(11.3 cm)
22.63"
(57.5 cm)
28.00"
(71.1 cm)
31.13"
(79.1 cm)
20.00"
(50.8 cm)
20.44"
(51.9 cm)
S/SV-175
34.81"
(88.4 cm)
25.00"
(63.5 cm)
9.94"
(17.6 cm)
4.44"
(11.3 cm)
22.63"
(57.5 cm)
28.00"
(71.1 cm)
31.13"
(79.1 cm)
20.00"
(50.8 cm)
22.44"
(57.0 cm)
S/SV-200
34.81"
(88.4 cm)
30.00"
(76.2 cm)
9.94"
(17.6 cm)
4.44"
(11.3 cm)
22.63"
(57.5 cm)
28.00"
(71.1 cm)
31.13"
(79.1 cm)
20.00"
(50.8 cm)
27.44"
(69.7 cm)
S/SV/NGF-250
39.81"
(101.1 cm)
30.00"
(76.2 cm)
9.94"
(17.6 cm)
4.44"
(11.3 cm)
22.63"
(57.5 cm)
28.00"
(71.1 cm)
31.13"
(79.1 cm)
20.00"
(50.8 cm)
27.44"
(69.7 cm)
S/SV/NGF-
250QD
39.88"
(101.3 cm)
30.00"
(76.2 cm)
9.94"
(17.6 cm)
4.44"
(11.3 cm)
22.63"
(57.5 cm)
28.00"
(71.1 cm)
31.13"
(79.1 cm)
20.00"
(50.8 cm)
27.44"
(69.7 cm)
Max Noise dB(A)
Noise emission from all models does not exceed 70 dB(A).
Important
Failure to follow these installation guidelines may affect
warranty coverage.
Section 2
Installation
8 Part Number 020003996 3/15
Installation Section 2
Footprints
C
A
D
B
Minimum Area
for Cutout
Maximum Area
for Cutout
NOTE: Footprint for S/SV-175 shown.
S & SV
Maximum Minimum
A B C D
150
19.00"
(48.3 cm)
17.81"
(45.2 cm)
8.00"
(20.3 cm)
8.00"
(20.3 cm)
175
21.00"
(53.3 cm)
17.81"
(45.2 cm)
8.00"
(20.3 cm)
8.00"
(20.3 cm)
200
26.00"
(66.0 cm)
17.81"
(45.2 cm)
8.00"
(20.3 cm)
8.00"
(20.3 cm)
250*
26.00"
(66.0 cm)
17.81"
(45.2 cm)
8.00"
(20.3 cm)
8.00"
(20.3 cm)
250QD*
26.00"
(66.0 cm)
17.81"
(45.2 cm)
8.00"
(20.3 cm)
8.00"
(20.3 cm)
*Includes NGF
Part Number 020003996 3/15 9
Section 2 Installation
n
Warning
Cutting the countertop may decrease its strength.
Counter must be braced to support the dispenser
countertop weight plus ice storage capacity and weight
of ice machine, if applicable.
Location
The location selected for the beverage dispenser must meet
the following criteria. If any of these criteria are not met,
select another location.
Dispenser is only to be installed in locations where it can
be overseen by trained personnel.
The air temperature must be at least 50°F (10°C), but
must not exceed 95°F (35°C).
The location must not be near heat-generating
equipment or in direct sunlight and must be protected
from weather.
The countertop must be level. Verify that the countertop
can support the weight of the dispenser, or the
dispenser/ice machine combination plus the weight of
the stored ice.
Water lines, drains and power outlet must be within 6'
(1.8 m) of location.
n
Warning
Carbon Dioxide (CO
2
) displaces oxygen. Exposure to a
high concentration of CO
2
gas causes tremors, which
are followed rapidly by loss of consciousness and
suffocation. If a CO
2
gas leak is suspected, particularly
in a small area, immediately ventilate the area before
repairing the leak. CO
2
lines and pumps must not be
installed in an enclosed space. An enclosed space can
be a cooler or small room or closet. This may include
convenience stores with glass door self serve coolers. If
you suspect CO
2
may build up in an area, venting of the
B-I-B pumps and/or CO
2
monitors must be utilized.
n
Warning
Carbon Dioxide (CO
2
)
ALWAYS
Connect the CO
2
or Gas Cylinder to a reducing valve.
Secure cylinder upright during use.
Keep cylinder away from heat.
Ventilate area after CO
2
leakage.
NEVER
Try to connect cylinder directly to product container.
Interconnect soft drinks, CO
2
or gas cylinder
equipment with other equipment.
Drop or throw cylinders.
Try to unscrew fittings from containers.
This information should be displayed in a position
adjacent to the CO
2
supply cylinders at all times.
Ways Equipment Should Not be Used
This equipment should be used only in accordance with the
instructions. This equipment is designed to be installed on a
counter, dispense ice, and/or carbonate, chill mains potable
water, and chill soft drink syrup. It should not be used for
any other purpose.
Do not use the product coils to chill other products than
those stated above.
Do not operate the equipment in a wet environment.
Any spillage must be wiped dry immediately.
The unit should not be installed in small enclosed
spaces such as cupboards or pantries, where fresh air
flow is restricted and service may not be able to access.
Keep the unit free from excessive heat and cold.
Misuse or use of the equipment for any other purpose
than those identified above will invalidate any warranty
and may constitute a danger to yourself and others.
10 Part Number 020003996 3/15
Installation Section 2
Location Requirements for Top Mounted Ice
Machine Installations
Location — Avoid placing the dispenser and/or ice
machine near heat sources such as radiators, ovens,
refrigeration equipment and direct sunlight.
Clearances — Refer to the ice machine installation manual
for clearances.
Front of ice machine to be flush with front of dispenser
Some ice machines may overhang at the back of the
dispenser.
Drains — A separate drain line is required for the ice
machine, in addition to a drain line for the ice/beverage
dispenser.
Dispensers may require an adapter kit to install some top-
mounted ice machines. Contact your local distributor for
the correct adapter kit.
For full information about ice machine installation,
including clearances, plumbing lines, connections, and
electrical requirements, see the ice machine installation
manual.
Pre-installation Checklist
When installing any system, first make sure the major
components are available. Generally the major components
necessary for an installation are:
Pre-mix System:
CO
2
regulator set
Product connectors for Figal tank
Gas connectors for Figal tank
Beverage dispenser
Beverage tubing
CO
2
tank
Figal beverage tanks
Stepless (Oetiker) clamps
Chain for CO
2
tank
B-I-B System also:
B-I-B connectors
B-I-B regulator set
B-I-B rack
B-I-B syrup boxes
Post Mix System:
CO
2
regulator set
Beverage dispenser
Beverage tubing
CO
2
tank
Carbonator
Stepless (Oetiker) clamps
Chain for CO
2
tank
Bulk Syrup System also:
Syrup connectors for Bulk tank
Gas connectors for Bulk tank
Bulk syrup tanks
Part Number 020003996 3/15 11
Section 2 Installation
Assembly
INSTALLING BAFFLE FOR ICE MACHINE
INSTALLATIONS
S Series Baffle
1. Remove both front panels.
2. Examine the ice machine to see if the machine has four
screws on the lower front plastic panels.
3. If there are screws, remove them from the countersunk
holes on the front surface of the machine, and save the
screws.
4. Install the deflector, using the four screws removed in
step three.
5. Four screws and two backing plates are in the kit.
6. If there are no screws on the ice machine (step 2),
pierce the thin plastic countersunk holes, install the
backing plates and install the deflector using the
screws from the kit.
7. Replace the front panels.
Backing Plate
to Be Inserted
Into Side
Pocket of
Bulkhead
Screws
New Ice
Baffle
Screws
Backing Plate to
Be Inserted Into
Side Pocket of
Bulkhead
S Series Ice Machine
Q Series Baffle
1. Position baffle on top of water well with tab on the
front and the other tab inside the water well.
2. Mount the baffle on the left side of the ice machine
using the hole and screw provided.
0.69"
(1.7 cm)
Ref.
7.22"
(18.3 cm)
Ref.
Baffle
6.32"
(16.0 cm)
Ref.
Q Series Ice Machine
12 Part Number 020003996 3/15
Installation Section 2
Electrical
GENERAL
n
Warning
All wiring must conform to local, state and national
codes. Changes to the mains cable and plug can only be
made by a qualified electrician.
MINIMUM CIRCUIT AMPACITY
The minimum circuit ampacity is used to help select the
wire size of the electrical supply. (Minimum circuit ampacity
is not the beverage/ice machines running amp load.)
The wire size (or gauge) is also dependent upon location,
materials used, length of run, etc., so it must be determined
by a qualified electrician.
ELECTRICAL REQUIREMENTS
Refer to Ice Machine Model/Serial Plate for voltage/
amperage specifications.
VOLTAGE
The standard voltage for S/SV/SVI/NGF Series dispensers is
120VAC-60Hz. A power cord is provided with 120VAC-60Hz
models only. S/SV/SVI/NGF Series dispensers use a 1/7 hp
gearmotor.
MINIMUM CIRCUIT AMPERAGE CHART
Important
Due to continuous improvements, this information
is for reference only. Please refer to the dispenser
serial number tag to verify electrical data. Serial tag
information overrides information listed on this page.
Dispenser Voltage/Cycle
Minimum Circuit
Amps
S-150, S-200,
S-250, SV-150,
SV-175, SV-200,
SV-250, SV-150i,
SV-175i, SV-200i,
SV-250i, SV-250QD,
NGF-250,
NGF-250QD
115/60
2.8
220/50, 220/60,
240/50, 240/60
1.5
220-240/50
5
(with carb deck)
GROUNDING INSTRUCTIONS
n
Warning
The beverage/ice machine must be grounded in
accordance with national and local electrical codes.
This appliance must be grounded. In the event of
malfunction or breakdown, grounding provides a path
of least resistance for electric current to reduce the
risk of electric shock. This appliance is equipped with a
cord having an equipment-grounding conductor and
a grounding plug. The plug must be plugged into an
appropriate outlet that is properly installed and grounded
in accordance with all local codes and ordinances.
n
Warning
Improper connection of the equipment-grounding
conductor can result in a risk of electric shock. The
conductor with insulation having an outer surface that
is green with or without yellow stripes is the equipment
grounding conductor. If repair or replacement of
the cord or plug is necessary, do not connect the
equipment-grounding conductor to a live terminal.
Check with a qualified electrician or serviceman if the
grounding instructions are not completely understood,
or if in doubt as to whether the appliance is properly
grounded. Do not modify the plug provided with the
appliance — if it will not fit the outlet, have a proper
outlet installed by a qualified electrician.
Part Number 020003996 3/15 13
Section 2 Installation
n
Warning
When using electric appliances, basic precautions must
always be followed, including the following:
a. Read all the instructions before using the
appliance.
b. To reduce the risk of injury, close supervision
is necessary when an appliance is used near
children.
c. Do not contact moving parts.
d. Only use attachments recommended or sold by
the manufacturer.
e. Do not use outdoors.
f. For a cord-connected appliance, the following
shall be included:
Do not unplug by pulling on cord. To unplug,
grasp the plug, not the cord.
Unplug from outlet when not in use and
before servicing or cleaning.
Do not operate any appliance with a
damaged cord or plug, or after the appliance
malfunctions or is dropped or damaged in
any manner. Contact the nearest authorized
service facility for examination, repair, or
electrical or mechanical adjustment.
g. For a permanently connected appliance — Turn
the power switch to the off position when the
appliance is not in use and before servicing or
cleaning.
h. For an appliance with a replaceable lamp —
Always unplug before replacing the lamp.
Replace the bulb with the same type.
i. For a grounded appliance — Connect to a
properly grounded outlet only. See Grounding
Instructions.
PUMP DECK WIRING
The supply cord is equipped with a three-prong 5-15P.
When a Ground Fault Circuit Interrupter (GFCI) is required
by code, a breaker type protector must be used. We do
not recommend GFIC outlets as they are known for more
intermittent nuisance trips than panel breakers. To ensure
both the safety and proper operation of this equipment, be
certain that the electrical receptacle is a proper design so as
to accept this plug, ensuring that the carbonator assembly
is properly grounded.
If the pump deck is to be installed in an area or community
whose local codes require permanent wiring, the following
procedure must be followed.
1. The three wires (white, black and green) must be fed
through the cable connector and brought into the
wiring compartment. The cable must be secured into
the connector.
2. The green wire from the cable must be connected to
the green screw that attaches to the inside panel of
the wiring compartment. Be sure to use a ring torque
terminal for connecting the wire to the screw.
3. The white wire from the cable must be joined to the N
terminal of the liquid level control board by a suitable
U.L. listed insulated cable connector.
4. The black wire from the cable must be joined to the L1
terminal of the liquid level control board by a suitable
U.L. listed insulated cable connector.
14 Part Number 020003996 3/15
Installation Section 2
Water Supply
RECOMMENDED PLUMBING
All plumbing must conform to local, state, and national
codes. Manitowoc recommends that a double non-return
valve is fitted before the unit on installation. The unit is not
connected to the water mains by a factory supplied hose
set and it is up to the installer to fit an appropriate food
grade hose, rated to a minimum operating pressure of 145
psi (10 bar, 1000000 Pa). All connections should be made
using a permanent retaining method e.g. Oetiker clip.
The plumbing diagram is printed on a white vinyl label,
located above the inlet tubes for syrup and water. The
plumbing diagram label can be accessed by removing
the splash panel of the dispenser. The plumbing diagram
label explains which inlet coldplate fittings supply which
dispenser valves and water manifolds.
The water supply must first be connected to the carbonator
pump (not shown) before plumbing to connection A
shown on plumbing diagram. The carbonator pump deck
must be within 6' (1.8 m) of the dispenser for optimum
performance. See BIB installation diagram for system
pressure settings.
Important
When installing cold carbonated (Intelli carb) equipment,
never put a tee for the plain water connection in the
line from the pump deck to the cold plate. Putting a tee
in the line will create service problems and bad drink
quality.
NOTE: Valves are read from right to left.
A check valve must be installed in the water supply line
3' (0.9 m) from the non-carbonated water connection
“PW”. Contact factory if not installed.
Diagram & Flex Manifold Locations
Flex Manifold
(for carbonated
units)
Plumbing
Diagram
Part Number 020003996 3/15 15
Section 2 Installation
S/SV150 6 Valve Diagram
Plumbing: 2-1-1-2 Manifolding
VALVES “SYRUP LINES NOT SHOWN”
INTERNAL CARBONATOR TANK
*OPTIONAL*
VARIETY VALVE ON #3
1 – WATER (THRU
COLDPLATE)
2 – SYRUP (AMBIENT)
3 – SYRUP (AMBIENT)
4 – SYRUP (THRU
COLDPLATE)
CO
2
VALVES
CIRCUITS
Manifold: Change to carbonated or non-carbonated water.
1. Rotate plunger 180° using a 5/32" Hex Key wrench
2. Pull plunger up to get non-carbonated water.
3. Push plunger down to get carbonated water.
4. Turn plunger back 180° to lock.
5. Port 5 is not used.
PRE-CHILL OUT TO CARBONATOR
CARBONATOR OUT TO POST-CHILL
Plain Water
(Plain Water
Supply)
Plain Water
(From Pump to
Carbonator)
Syrup Lines
*EXTERNALLY CARBONATED UNITS: CARBONATOR IS REPLACED BY BY-PASS TUBE.
FOR ASSISTANCE CALL (812) 246-7000
#1 #2 #3 #4 #5 #6
COLD PLATE
2 1 1 2
1, 2 3 4 5, 6
6 5 4 3 2 1
2 3
1 4
16 Part Number 020003996 3/15
Installation Section 2
S/SV175 8 Valve Diagram
Plumbing: 3-1-1-1-2 Manifolding
VALVES “SYRUP LINES NOT SHOWN”
INTERNAL CARBONATOR TANK (OPTIONAL)
*OPTIONAL*
VARIETY VALVE ON #4
1 – WATER (THRU
COLDPLATE)
2 – SYRUP (AMBIENT)
3 – SYRUP (AMBIENT)
4 – SYRUP (THRU
COLDPLATE)
CO
2
Manifold: Change to carbonated or non-carbonated water.
1. Rotate plunger 180° using a 5/32" Hex Key wrench
2. Pull plunger up to get non-carbonated water.
3. Push plunger down to get carbonated water.
4. Turn plunger back 180° to lock.
PRE-CHILL OUT TO CARBONATOR
CARBONATOR OUT TO POST-CHILL
Plain Water (Plain
Water Supply)
Plain Water
(From Pump to
Carbonator)
Syrup Lines
*EXTERNALLY CARBONATED UNITS: CARBONATOR IS REPLACED BY BY-PASS TUBE.
FOR ASSISTANCE CALL (812) 246-7000
#3 #4 #5 #6 #7 #8
COLD PLATE
7, 8 6 5 4 1, 2, 3
2 1 1 1 3
8 7 6 5 4 3 2 1
2 3
1 4
VALVES
CIRCUITS
1
#1 #2
Part Number 020003996 3/15 17
Section 2 Installation
S/SV200/250/SV-250QD 8 Valve Diagram
Plumbing: 3-1-1-1-2 Manifolding
NOTE: SYRUP LINES NOT SHOWN
*OPTIONAL*
VARIETY VALVE ON #4
1 – WATER (THRU
COLDPLATE)
2 – SYRUP (AMBIENT)
3 – SYRUP (AMBIENT)
4 – SYRUP (THRU
COLDPLATE)
CO
2
Manifold: Change to carbonated or non-carbonated water.
1. Rotate plunger 180° using a 5/32" Hex Key wrench
2. Pull plunger up to get non-carbonated water.
3. Push plunger down to get carbonated water.
4. Turn plunger back 180° to lock.
PRE-CHILL OUT TO
CARBONATOR
CARBONATOR OUT TO
POST-CHILL
Plain Water (Plain
Water Supply)
Plain Water
(From Pump to
Carbonator)
Syrup Lines
*EXTERNALLY CARBONATED UNITS: CARBONATOR IS REPLACED BY BY-PASS TUBE.
FOR ASSISTANCE CALL (812) 246-7000
#1 #2 #3 #4 #5 #6 #7 #8
1, 2, 3 4 5 6 7, 8
3 1 1 1 2
8 7 6 5 4 3 2 1
2 3
1 4
VALVES
CIRCUITS
VALVES
COLD PLATE
INTERNAL
CARBONATOR
TANK (OPTIONAL)
18 Part Number 020003996 3/15
Installation Section 2
S/SV200/250 10 Valve Diagram
Plumbing: 3-1-1-1-3 Manifolding
NOTE: SYRUP LINES NOT SHOWN
CO
2
Manifold: Change to carbonated or non-carbonated water.
1. Rotate plunger 180° using a 5/32" Hex Key wrench
2. Pull plunger up to get non-carbonated water.
3. Push plunger down to get carbonated water.
4. Turn plunger back 180° to lock.
PRE-CHILL OUT TO
CARBONATOR
CARBONATOR OUT TO
POST-CHILL
Plain Water (Plain
Water Supply)
Plain Water
(From Pump to
Carbonator)
Syrup Lines
FOR ASSISTANCE CALL (812) 246-7000
#1 #2 #3 #4 #5 #6 #7 #8 #9 #10
1, 2, 3 4 5, 6 7 8, 9, 10
3 1 2 1 3
10 9 8 7 6 5 4 3 2 1
VALVES
CIRCUITS
VALVES
COLD PLATE
INTERNAL
CARBONATOR
TANK (OPTIONAL)
Part Number 020003996 3/15 19
Section 2 Installation
NGF-250 & NGF-250QD 8 Valve Diagram
W-WATER
VALVES
CIRCUITS
CARBONATOR OUT TO POST-CHILL
PRE-CHILL OUT TO CARBONATOR
SYRUP #12
SYRUP #11
SYRUP #10
SYRUP #9
SYRUP #7
SYRUP #6
SYRUP #4
SYRUP #8
SYRUP #5
SYRUP #3
SYRUP #2
SYRUP #1
PLAIN WATER
PLAIN WATER TO CARBONATOR
SYRUP #12
SYRUP #11
SYRUP #10
SYRUP #9
SYRUP #7
SYRUP #6
SYRUP #4
SYRUP #8
SYRUP #5
SYRUP #3
SYRUP #2
SYRUP #1
PLAIN WATER
PLAIN WATER
TO CARBONATOR
SYRUP #12
SYRUP #11
SYRUP #10
SYRUP #9
SYRUP #7
SYRUP #6
SYRUP #4
SYRUP #8
SYRUP #5
SYRUP #3
SYRUP #2
SYRUP #1
PLAIN WATER
PLAIN WATER
TO CARBONATOR
SYRUP #12
SYRUP #11
SYRUP #10
SYRUP #9
SYRUP #7
SYRUP #6
SYRUP #4
SYRUP #8
SYRUP #5
SYRUP #3
SYRUP #2
SYRUP #1
PLAIN WATER
PLAIN WATER
TO CARBONATOR
*A & *B ARE AMBIENT SYRUP LINES ADDED FOR THE 3RD VARIETY VALVE..
LINE TO BE PLUGGED WHEN NOT IN USE.
SYRUP LINE (S#) / CARB ONLY LINE (C) / MANIFOLD LINE (W/C)
*EXTERNALLY CARBONATED UNITS: CARBONATOR TANK IS REPLACED BY BY-PASS TUBE.
INTERNAL
CARBONATOR
TANK
(OPTIONAL)
COLD PLATE
W/3 VARIETY VLVS
W/2 VARIETY VLVS
W/2 VARIETY VLVS STANDARD NO VARIETY VLV
VALVES
VALVES
VALVES
020002170
3-FLAVOR
2-FLAVOR
1-FLAVOR
VARIETY VALVE
KEY PAD
VARIETY VALVE
BLOCK
CO
2
MANIFOLD TO CHANGE TO CARBONATED
OR NON-CARBONATED WATER
1) ROTATE PLUNGER 180
O
USING A 5/32”
ALLEN WRENCH
2) PULL PLUNGER OUT TO GET NON-CARB WATER.
PUSH PLUNGER IN TO GET CARB WATER
3) TURN PLUNGER BACK 180
O
TO LOCK
20 Part Number 020003996 3/15
Installation Section 2
CO
2
Supply
ROUTING INTERNAL CARB TANK PURGE TUBE
Some models are equipped with an internal carbonation
tank. These models require that the purge/pressure relief
tubing be routed to a drain.
1. Remove the splash panel.
2. Uncoil tubing and route between the front of the
dispenser and the drain pan.
Drain Pan
SV-200 & 250
3. Depending on drain location, route the tubing through
the tubing bundle cutout or out the back of the
dispenser.
Rear of Unit
To Drain
4. Verify the tubing is not kinked and then secure tubing
to maintain a minimum 1" (2.5 cm) air gap at the drain.
Follow any applicable local or national codes.
Drains
S/SV/SVI/NGF Series dispensers drain through a double connection to the drain pan.
Drainage Through Bottom Drainage Through Back Rear View
Rear Access for Drain Hose and
Beverage Lines
Radiator Clamp
Flexible Tubing
90° Elbow Fitting
Radiator Clamp
Flexible Tubing
Straight Fitting
  • Page 1 1
  • Page 2 2
  • Page 3 3
  • Page 4 4
  • Page 5 5
  • Page 6 6
  • Page 7 7
  • Page 8 8
  • Page 9 9
  • Page 10 10
  • Page 11 11
  • Page 12 12
  • Page 13 13
  • Page 14 14
  • Page 15 15
  • Page 16 16
  • Page 17 17
  • Page 18 18
  • Page 19 19
  • Page 20 20
  • Page 21 21
  • Page 22 22
  • Page 23 23
  • Page 24 24
  • Page 25 25
  • Page 26 26
  • Page 27 27
  • Page 28 28
  • Page 29 29
  • Page 30 30
  • Page 31 31
  • Page 32 32
  • Page 33 33
  • Page 34 34
  • Page 35 35
  • Page 36 36
  • Page 37 37
  • Page 38 38
  • Page 39 39
  • Page 40 40
  • Page 41 41
  • Page 42 42
  • Page 43 43
  • Page 44 44
  • Page 45 45
  • Page 46 46
  • Page 47 47
  • Page 48 48

MULTIPLEX S SV SVI NGF Owner Instruction Manual

Type
Owner Instruction Manual

Ask a question and I''ll find the answer in the document

Finding information in a document is now easier with AI