Page is loading ...

1 of 4 Workrite Ergonomics | (800) 959–9675 www.workriteergo.com
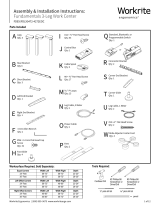
A Slide Kit Tracks
Qty: 2
C #12 × 3/4" Wood Screw
Qty: 16
B "-20 × "" Phillips Pan Head Screw
Qty: 8
Parts Included Hardware Kit
Tools RequiredRequired
Assembly & Installation Instructions:
Gemini Arm Slide Kit, 2421-XXTG
#2 Phillips screwdriver or drill/driver
Drill with " drillbit
Gemini Arm
Attach Gemini Arm
Attach Gemini Arm to Slide Kit
Tracks (A) using eight "-20×"
Phillips Pan Head Screw (B).
Note: These instruction assume that you've purchased the
Gemini Arm and have a secondary work surface or Gemini
Keyboard Platform Adaptor and Keyboard Platform.
17" tracks shown
B
B
B
AA
1
Gemini Arm

2 of 4 Workrite Ergonomics | (800) 959–9675 www.workriteergo.com
1" maximum
1" minimum
Fully extended
90°
90°
X" X"
6
7
5
3
1
2 4 8
>¾"
Position Slide Kit Tracks
Note: If possible, flip the worksurface upside down before mounting the Gemini Slide Kit.
Place the Gemini Arm with Slide Kit Tracks on the underside of the worksurface. Position the tracks so that the
fronts are aligned with each other and are within 1" from the table edge.
Attach Tracks to Worksurface
Use a ⅛" drill bit to drill pilot
holes at the eight locations
shown per track (16 total). You
may wish to mark your drill bit
so you do not drill any more
than ¾" deep and damage your
worksurface top. Do not drill all
the way through worksurface!
Attach both tracks to
worksurface using #12 × "
Wood Screw (C) at all 16 pilot
hole locations.
2
3
a
a
bb
Underside of worksurface
Approximate location of
secondary work surface or
keyboard platform when arm
is fully extended and level
with primary worksurface.
Tracks must be parallel and positioned
so that the secondary worksurface or
keyboard platform are at least 1" from
worksurface when level with worksurface.
Mark drill bit
C
C

3 of 4 Workrite Ergonomics | (800) 959–9675 www.workriteergo.com
Attach the Secondary Worksurface or Keyboard Platform
Mount your secondary worksurface or keyboard platform onto
the Gemini Arm with four #12 × " wood screws (not included).
If installing a Workrite platform, use fasteners supplied with
platform.
4
Secondary
worksurface or
keyboard platform

4 of 4 Workrite Ergonomics | (800) 959–9675 www.workriteergo.com
1500079 Rev C
/


