Page is loading ...

Assembly Instructions
Congratulations on your
purchase of a new
Collaborate Screen!
For assembly assistance, visit haworth.com, call 800 426 8562, or email suppor[email protected]
Ready to assemble your new screen?
Follow all the steps carefully before using your screen.
That’s it! Now you’re ready to get down to business with a
screen that’s just right for you and your space.
Collaborate
OR

Tools Required
Collaborate Assembly Instructions
Customer Service: 800 426 8562 E.C.O. No 5_46395 Part No 6100-0274 Rev 1 Page 2 of 9
Assembly Overview
#2
Scale 1 : 1
0 11/2
1/4 1/4
1/4-28 Square Nut
3/16”(S329)
(S330)
1/4-28 x 2" Button Head Screw
(S-331)
3/8-16 x 1/2" Button Head Screw
3/8” Wrench
9/16” Wrench
A
S332
S332
S328
S328
C
F
G
S330
S331
S329
D
D
F
E
H
B
B
C
5/32” & 7/32”
Allen Wrench
1/4-20 x 3/4" Hex Head Bolt
(S332)
RAILS ARE OPTIONAL

Collaborate Assembly Instructions
Customer Service: 800 426 8562 E.C.O. No 5_46395 Part No 6100-0274 Rev 1 Page 3 of 9
(A) Hard Surface Easel
(C) Rails (Bottom) - Qty. 1 or 2
(B) Rails (Top) - Qty. 1 or 2
(G) Caster (Locking) - Qty. 2
(S328) 1/4-20 x 3/4” Hex Head Bolts - Qty. 4 or 8
(S328) 1/4-28 x 2” Button Head Screws - Qty. 4
(S328) 1/4-28 x Square Nuts - Qty. 4
(H) Casters (Non-Locking) - Qty. 2
(D) Support Legs - Qty. 2 Front, 2 Back
(E) Metal Straps - Qty. 2 (F) Covers - Qty. 4
(S331) 3/8-16 x 1/2” Button Head Screws - Qty. 8
Non-Monitor
Monitor
Pin
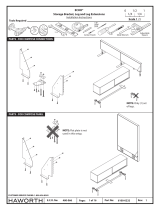
NOTE: Longer leg is used
with Monitor applications.
(L) Glides - Qty. 4
OR
OR
RAILS ARE OPTIONAL
RAILS ARE OPTIONAL
NOTE: Quantities
vary depending
on number of rails
mounted.

Collaborate Assembly Instructions
1Lay easel (A) down and install legs (D)
Install metal straps (E)
2
Customer Service: 800 426 8562 E.C.O. No 5_46395 Part No 6100-0274 Rev 1 Page 4 of 9
1/4-20 Square Nut
3/16”(S329)
(S330)
1/4-20 x 2" Button Head Screw
S329
S330
D
D
D
A
A
(S331)
3/8-16 x 1/2" Button Head Screw
S331
E
E
NOTE: DO NOT install
screws in the slotted
holes in this step.
TIGHTEN
TIGHTEN

Collaborate Assembly Instructions
1
Customer Service: 800 426 8562 E.C.O. No 5_46395 Part No 6100-0274 Rev 1 Page 5 of 9
3Squeeze support legs (D) together and install screws (S331 )
Tighten all screws (S330) and nuts (S329)
4
A
A
S331
S331
D
(S331)
3/8-16 x 1/2" Button Head Screw
NOTE: Gap is expected.
Make sure gap is even.
1/4-28 Square Nut
3/16”(S329)
(S330)
1/4-28 x 2" Button Head Screw
1
1
2
1
2
SQUEEZE
SQUEEZE
SQUEEZE
GAP
TIGHTEN
TIGHTEN
SQUEEZE NOTE: Squeeze with
your hands to help
even out gap.

LOCKING
NON-LOCKING
LOCKING
NON-LOCKING
5Install casters (G & H)
Rotate easel (A) onto casters
6
Customer Service: 800 426 8562 E.C.O. No 5_46395 Part No 6100-0274 Rev 1 Page 6 of 9
G
H
A
A
Collaborate Assembly Instructions
L
G
GLIDE
CASTER
OR
NOTE: Locking Caster (G)
always on accessory side.

7Install all 4 covers (F)
Install all 8 bolts (S328) with 1/4” gap
8
Customer Service: 800 426 8562 E.C.O. No 5_46395 Part No 6100-0274 Rev 1 Page 7 of 9
1/4”
1/4”
A
A
F
S332
S332
S328
S328
Collaborate Assembly Instructions
1/4-20 x 3/4" Hex Head Bolt
(S332)
NOTE: If needed tap with
a plastic hammer only.

9Install 2 top rails (B) and 2 bottom rails (C)
Customer Service: 800 426 8562 E.C.O. No 5_46395 Part No 6100-0274 Rev 1 Page 8 of 9
1
2
1
2
TOP RAIL
BOTTOM RAIL
INSTALL
INSTALL
TIGHTEN
TIGHTEN
B
C
S332
S332
Collaborate Assembly Instructions
1/4-20 x 3/4" Hex Head Bolt
(S332)

Collaborate Assembly Instructions
Customer Service: 800 426 8562 E.C.O. No 5_46395 Part No 6100-0274 Rev 1 Page 9 of 9
10 Install markerboard (M)
CAUTION
M
C
B
NOTE: Always use
markerboards handle
when installing,
moving, and
removing from rail.
1
2
3
/


