Page is loading ...

PARTS
Rev:Page:E.C.O. No:
CUSTOMER SERVICE PHONE: 1-800-426-8562
1629-007 1 of 5 6100-0231Part No:
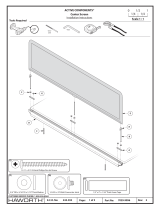
Accessory Frames
Installation Instructions
ECHO®
Scale 1 : 1
0 11/2
1/4 1/4
Tools Required
5/8” Drill
5/32”, 1/4” Hex Drive
A
S289
B
A
S289
S296
B
A
S289
B
C
C
(S289)
1/4-20 x 1" Flat Head Screw
OPEN FABRIC SCREEN FABRIC SCREEN WITH RAIL
FOR SCREENS
60” THRU 84”
FOR SCREENS
24” THRU 54”
D
C
D
1/4-20 x 3/4" Socket Head Bolt
(S296)
DOUBLE STICK TAPE
ISOPROPYL
ALCOHOL

Rev:Page:E.C.O. No:
CUSTOMER SERVICE PHONE: 1-800-426-8562
1629-007 2 of 5 6100-0231Part No:
S289
C
(S289)
1/4-20 x 1" Flat Head Screw
S289
S296
C
INSTALLATION
1Install post (B) to screens base (C)
E
E1
INSTALLATION
2Mark location of holes and drill as shown
E
E
E1
E1
5/8”
Drill
B
NOTE: Make sure the holes
are oriented as shown.
1/4-20 x 3/4" Socket Head Bolt
(S296)
OR

Rev:Page:E.C.O. No: 1629-007 3 of 5 6100-0231Part No:
(S159)
1/4-20 x 3" Carriage Bolt
A
E
S159
3a Install screen (A) as shown
CUSTOMER SERVICE PHONE: 1-800-426-8562
(S161)
1/4-20 Hex Nut
ADHESIVE INSTALLATION
3b Clean bottom of rail before installing tape
1/4" Flat Washer
(S308)
0.125” 1/4" Flat Washer
(S307)
0.167”
S161
S308
STEEL CAP ALUMINUM CAP
S161
S308
S307
EE
OR
B
ISOPROPYL
ALCOHOL
1
2
C2
OR

Rev:Page:E.C.O. No:
CUSTOMER SERVICE PHONE: 1-800-426-8562
1629-007 4 of 5 6100-0231Part No:
B
E
B
E
ADJUSTING SCREENS
4a Loosen nuts (S161) to adjust and center screens (B) as shown
OR
NOTE: Adjust rail centering
with top cap (E), then tighten
bolts to frame.
ADHESIVE INSTALLATION
2
C2
ISOPROPYL
ALCOHOL
1
B
4b install screen (B)
OR

FOR FABRIC WITH RAILS
5
A
B
C
D
7Install steel rails (D)
SIDE VIEW
A
B
D
B
D
NOTE: Make sure center
of rail is engaged into
the post.
NOTE: Make sure
hole in fabric (A)
aligns with holes in
paddle (B) as shown.
NOTE: When installing rail, lift
fabric slightly above slot to
allow rail to rotate easier.
When both rails are installed,
push down on fabric until it
bottoms out.
Install fabric (A) over post (B) 6Adjust screen centering with rail aligning
fabric holes with holes in paddles
NOTE: Center the
screen with rail.
C
L
A
B
7-1/16”
Rev:Page:E.C.O. No:
CUSTOMER SERVICE PHONE: 1-800-426-8562
1629-007 5 of 5 6100-0231Part No:
/


