Page is loading ...

1 OF 4 IG111319-1.0
POWERTRAX™ INSTALLATION GUIDE
®POWERTRAX™ SYSTEM
INSTALLATION GUIDE
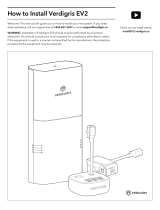
Max Amperage 12V - 5A
24V - 4A
Environment*
Indoor Location
QUICK SPECS / MODELS
*NOT FOR USE IN SUBMERSIBLE APPLICATIONS, OR
WITHIN 5 FEET OF A SWIMMING POOL.
REQUIRED TOOLS
1
2
3
1. Phillips-head Screwdriver
2. Ruler (Recommended)
3. Screws (Appropriate for surface being installed on)
DRY LOCATION
24VDC
12VDC
READ AND FOLLOW ALL SAFETY INSTRUCTIONS
1. Install in accordance with national and local electrical code
regulations.
2. This product is intended to be installed and serviced by a
qualied, licensed electrician.
3. Do not modify or disassemble this product beyond instructions
or the warranty will be void.
4. Do not use if there is any damage to the xture or wiring.
Inspect periodically.
5. Do not submerge PowerTrax™ in liquids or use the product in
the vicinity of standing water or other liquids.
6. All plastics are aected by the elements and may shift in color
and other properties after product installation, particularly with
direct exposure to sun.
7. Do not attempt to x this product in the eld.
8. Failure to follow safety warnings, and installation instructions
will void the warranty for this product.
SAFETY & WARNINGS
-
+
-
+
-
+
-
+
-
+
-
+
-
+
-
+
-
+
-
+
-
+
-
+
-
+
-
+
-
+
-
+
-
+
-
+
-
+
-
+
-
+
-
+
-
+
-
+
-
+
-
+
-
+
-
+
-
+
-
+
-
+
-
+
-
+
-
+
-
+
-
+

2 OF 4 IG111319-1.0
POWERTRAX™ INSTALLATION GUIDE
POWERTRAX™ SYSTEM
INSTALLATION GUIDE
INSTALLATION
TURN POWER OFF AT CIRCUIT
BREAKER
SHOCK HAZARD! May result in serious
injury or death.
Turn power OFF at circuit breaker prior to
installation.
1. Phillips-head Screwdriver
2. Ruler (Recommended)
3. Screws (Appropriate for surface being installed on)
ATTACH MODULES
HOW MANY MODULES CAN BE
ATTACHED?
MOUNT TRACK TO SURFACE
1
3
2
3.1
3.1
Note: Failure to follow installation instructions may void warranty.
Option A: Peel 3M adhesive from back of track, then
press on surface.
Option B: Fasten track to surface utilizing correct screws.
Hold module at 45 degree angle to channel and insert
circular tab into track.
Up to 15 may be attached. Do not to exceed maximum
amperage (12V - 5A, 24V - 4A) of PowerTRAX™ system.
Twist module clockwise to fasten
to track.
Circular tab
a
b

3 OF 4 IG111319-1.0
POWERTRAX™ INSTALLATION GUIDE
POWERTRAX™ SYSTEM
INSTALLATION GUIDE
-
+
-
+
-
+
-
+
-
+
-
+
-
+
-
+
-
+
-
+
-
+
-
+
-
+
-
+
-
+
-
+
-
+
-
+
-
+
-
+
-
+
-
+
-
+
-
+
-
+
-
+
-
+
-
+
-
+
-
+
-
+
-
+
-
+
-
+
-
+
-
+
INSTALLATION (Cont.)
Connect power and light engine to modules using male DC barrel plugs.*
Male DC barrel plug
CONNECT POWER & LIGHT ENGINE
4
IMPORTANT:
Ensure all module
connections are facing
same direction.
Connections facing in
opposite direction will not
function.

4 OF 4
®Toll Free: 877.817.6028 | Fax: 415.592.1596 | www.DiodeLED.com | info@DiodeLED.com
© 2019 Elemental LED Inc. All rights reserved. Specicaons are subject to change without noce.
IG111319-1.0
POWERTRAX™ INSTALLATION GUIDE
POWERTRAX™ SYSTEM
INSTALLATION GUIDE
INSTALLATION (Cont.) TOOLS & RESOURCES
POWERTRAX™ SPECIFICATION SHEET
For full specicaons.
TURN POWER ON AT CIRCUIT BREAKER
6
Traditional ON/OFF System Inline On/O Switch or Dimmer System
SYSTEM DIAGRAMS
AC Power
50/60Hz
Class 2
Plug-In Adapter
AC Power
50/60Hz
Class 2
Plug-In Adapter
Inline On/Off Switch,
or Dimmer
/