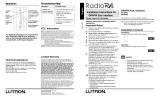
Page is loading ...

A Step-by-Step Guide for Programming Timeclock Functions of
the Lutron RadioRA Chronos System Bridge and Timeclock
RA-SBT-CHR, RB-SBT-CHR
Timeclock Programming Guide For a
RadioRA
® ChronosTM System Bridge and
Timeclock

Setup Guide for the RadioRA® ChronosTM2
Table of Contents
Time Clock Programming
Astronomical Time Clock Programming
Setting the Chronos Date Time............................................................................ 3
Creating Time Clock Scenes ................................................................................ 5
Testing Time Clock Scenes .................................................................................. 9
Erasing Time Clock Scenes.................................................................................. 9
Creating Time Clock Events ................................................................................10
Viewing and Modifying Time Clock Events ........................................................12
Deleting a Time Clock Event ................................................................................12
Setting the Time Clock Home / Away Mode........................................................13

Setup Guide for the RadioRA® ChronosTM 3
Setting the ChronosTM Date and Time
Astronomical Time Clock Programming
Step 1 Go to Time / Date Settings
Step 2 Set the System Time
From Time / Date Settings, select Time.
Use and to change the selected field. Use
and to highlight the next / previous field.
To cancel the changes, press “Cancel” ( button).
To accept the changes, press “Done” ( button).
Time
09 : 14 AM
HH : MM
Cancel Done
Step 3 Set the System Date
From the Time / Date Settings Menu, select Date.
Use and to change the selected field. Use
and to highlight the next / previous field.
To cancel the changes, press “Cancel” ( button).
To accept the changes, press “Done” ( button).
Date
06
/ 17 / 2003
MM / DD / YYYY
Cancel Done
Step 4 Go to Location
From Time / Date Settings, select Location.
Set Location Method
Latitude and Longitude
Cancel Next
State and City
Set Location Method
Latitude and Longitude
Cancel Next
State and City
The location can be set by State and City or by
Latitude and Longitude. Use and to highlight
the selection. To exit without making changes, press
“Cancel” ( button). To proceed to the next step,
press “Next” ( button).
Step 5 Choose Set Location Method
Main Menu
Time Clock Setup
Time / Date Settings

Setup Guide for the RadioRA® ChronosTM4
Step 9 Set Time Format
From Time / Date Settings, select Time Format.
Use and to change between 12 and 24 hour
format.
To cancel the changes, press “Cancel” ( button).
To accept the changes, press “Done” ( button).
Time Format
12
Cancel Done
Hr.
Use and to select the correct value for the
highlighted field. Use and to highlight the
next / previous field. Press “Next” ( button) to
accept the selection.
Use and to highlight the correct state. Press
“Next” ( button) to accept the selection.
A list of cities for the state selected will be shown.
Use and to highlight the nearest city. Press
“Next' ( button) to accept the selection.
Select State
Rhode Island
Previous Next
Pennsylvania
South Carolina
South Dakota
Select City
Philadelphia
Previous Next
Coopersburg
Pittsburgh
State College
Astronomical Time Clock Programming
Step 6a Set Location by State and City
Step 6b Set Location by Latitude and
Longitude
Set Latitude and Longitude
Latitude
Previous Next
4
Longitude
0.5 N 075.4 W
Step 7 Set Time Zone
Use and to select correct Time Zone. Press
“Next” ( button) to accept the selection.
Press “Finish” ( button) to accept all of the loca-
tion settings.
Set Time Zone
Previous Finish
Eastern Time
GMT -04:00
GMT -03:00
GMT -02:00
Step 8
Set Daylight Savings
From Time / Date Settings, select Daylight Savings.
Use and to change the Daylight Savings set-
ting.
To cancel the changes, press “Cancel” ( button).
To accept the changes, press “Done” ( button).
Daylight Savings
Automatically adjust clock
for Daylight Savings?
Yes
Cancel Done

Setup Guide for the RadioRA® ChronosTM 5
From Manage Scenes, select Set Scene Names.
Use and to highlight a scene to name. Press
“Select” ( button) to proceed to the next step.
Use the and keys, or a connected keyboard, to
change the selected character. Use and to
move to the previous / next character. Press
“Cancel” ( button) to cancel changes. Press
“Done” ( button) to accept changes.
Creating Time Clock Scenes
Up to 13 scenes can be programmed for activation by the Astronomical Time Clock.
Astronomical Time Clock Programming
Step 1 Go to Manage Scenes
Select Scene to Name
1. Scene 1
2. Scene 2
3. Scene 3
4. Scene 4
Back Select
Step 2 Set the Scene Names
Set Name
Name: _ _ _ _ _ _ _ _
Cancel Done
Mo r n i n
g
Step 3 Assign Zones
From Manage Scenes, select Assign Zones. The list
of Time Clock scenes is displayed:
Use and to highlight a scene. Press “Select”
( button) to enter Assignment Mode for the select-
ed scene. The following screen will be displayed when
Assignment Mode is initiated:
Once Assignment Mode has been initiated, the follow-
ing screen will be displayed:
Select Scene to Assign
1. Morning
2. Scene 2
3. Scene 3
4. Scene 4
Back Select
Assign Zones
Entering Assignment
Mode...
Assign Zones
Turn on devices to be
assigned to Morning.
Continue
Copy Button
Main Menu
Time Clock Setup
Manage Scenes

Setup Guide for the RadioRA® ChronosTM6
Astronomical Time Clock Programming
Step 4 Assign Zones
Step 5 Complete Zone Assignment
Press “Continue” ( button) to display the list of
Time Clock scenes:
Note: The system is still in Assignment Mode, as indi-
cated by the icon in the upper right hand corner of the
screen. The arrow on the right of the screen indicates
which scene is currently in Assignment Mode.
Use and buttons to highlight a new Time Clock
scene. Press “Select” ( button) to enter
Assignment Mode for the highlighted scene.
Repeat Steps 4 and 5 for any remaining scenes.
Press “Exit” ( button) to exit Assignment Mode.
Assign Zones
1. Morning
2. Scene 2
3. Scene 3
4. Scene 4
Exit Select
Assign Dimmers or Switches to the selected
Time Clock Scene by turning the Controls
ON. Assign all Dimmers and Switches to be
affected by the Scene, including Dimmers and
Switches which are to be turned OFF by the
Scene.
Assign GRAFIK Eye Control Units to the
selected Time Clock Scene by pressing one
of the GRAFIK Eye Control Unit scene but-
tons. Assign all GRAFIK Eye Control Units to
be affected by the Scene, including GRAFIK
Eye Control Units which are to be turned OFF
by the Scene.
Switch
Dimmer
OR
TRON
Notes:
• GRAFIK Eye Control Units will automatically turn on
to Scene 1 once assigned.
• If the wrong Dimmer, Switch, or GRAFIK Eye
Control Unit is assigned to a Time Clock Scene, turn
the Dimmer, Switch, or GRAFIK Eye Control
Unit OFF to unassign it.
GRAFIK Eye
Control Unit

Setup Guide for the RadioRA® ChronosTM 7
Step 6 Enter Level Set Mode
From Manage Scenes, select Set Zone Levels. The
list of Time Clock Scenes is displayed:
Use and to highlight a Time Clock Scene.
Press “Select” ( button) to enter Level Set Mode
for the highlighted button. The following screen will be
displayed while level set mode is initiated:
Once Level Set Mode has been initiated, the following
screen will be displayed:
Set Zone Levels
Entering Level Set
Mode...
Set Zone Levels
Set light levels for
devices assigned to
Morning.
Continue
Copy Button
Step 7 Set light levels and GRAFIK
Eye
® Scenes
Use the dimming rocker to adjust the light
level of any Dimmer(s) assigned to the Time
Clock Scene OR use the toggle button to turn
the Dimmer or Switch off if it is to be turned
OFF when the Time Clock Scene is activated.
Select one of the Scenes on a GRAFIK Eye
Control Unit by turning that scene, OR select
the Off Scene button on the GRAFIK Eye
Control Unit if it is to be turned OFF when the
Time Clock Scene is activated.
Astronomical Time Clock Programming
Select Scene to Set Levels
1. Morning
2. Scene 2
3. Scene 3
4. Scene 4
Back Select

Setup Guide for the RadioRA® ChronosTM8
Step 8 Complete Setting Levels
Press “Continue” ( button) to display the list of
Time Clock scenes:
Note: The system is still in Level Set Mode, as indi-
cated by the icon in the upper right hand corner of the
screen. The arrow on the right of the screen indicates
which scene is currently in Level Set Mode.
Use and buttons to highlight a new Time Clock
scene. Press “Select” ( button) to enter Level Set
Mode for the highlighted scene.
Repeat Steps 7 and 8 for any remaining scenes.
Press “Exit” ( button) to exit Level Set Mode.
• Proceed to Testing Time Clock Scenes on page
9.
Set Zone Levels
1. Morning
2. Scene 2
3. Scene 3
4. Scene 4
Exit Select
Astronomical Time Clock Programming

Setup Guide for the RadioRA® ChronosTM 9
Step 2 Select the Scene to erase
Use and to highlight the Scene to erase. Press
“Select” ( button) to proceed to the next step.
Step 1 Go to Erase a Scene
Select Scene to Erase
1. Morning
2. Scene 2
3. Scene 3
4. Scene 4
Back Select
Are you sure?
Erase Morning?
Cancel Yes
Note: Erasing a Time Clock Scene will erase both the
name and all programming for the scene.
Press “Yes” ( button) to erase all programming for
the selected Time Clock Scene. Press “Cancel”
( button) to cancel the erase operation.
• Erasing Time Clock Scenes is now complete.
Step 3
Erase Scene
Main Menu
Time Clock Setup
Manage Scenes
Erase a Scene
Astronomical Time Clock Programming
Testing Time Clock Scenes
Erasing Time Clock Scenes
Testing Time Clock Scenes: Erasing Time Clock Scenes:
Step 1
Go to Test Scenes
A list of scenes and their current state is displayed.
Use and to select a scene. Press “Toggle” (
button) to toggle the scene ON and OFF.
Repeat for all Time Clock Scenes to be tested.
Press “Back” ( button) to return to Manage
Scenes.
• Testing Time Clock Scenes is now complete.
Test Scenes
1. Morning - ON
2. Scene 2 - OFF
3. Scene 3 - OFF
4. Scene 4 - OFF
Back Toggle
Step 2 View and Toggle Scenes
Main Menu
Time Clock Setup
Manage Scenes
Test Scenes

Setup Guide for the RadioRA® ChronosTM10
Step 1 Go to Add Event
Creating Time Clock Events
Up to 100 Time Clock Events may be programmed to each activate one of 13 programmed Time Clock Scenes.
For details on programming Time Clock Scenes, refer to pages 5 through 8.
Astronomical Time Clock Programming
Set Event Name
Name: _ _ _ _ _ _ _ _
Cancel Next
Wa k e u
p
Use and to change the highlighted character.
Use and to highlight the previous / next charac-
ter. Press “Next” ( button) to proceed to the next
step.
Step 2 Set Event Name
Step 3a Set Event Schedule
Use and to change whether the event should
occur on All Days, Selected Days, Weekdays only,
or Weekends only.
Note: Weekdays = Sunday noon - Friday 11:59 am,
and Weekends = Friday noon - Sunday 11:59 am.
For All Days, Weekdays, or Weekends, press
“Next” ( button) to proceed to Step 4.
For Selected Days, press “Next” ( button) to pro-
ceed to Step 3b.
Event Schedule
All Days
Previous Next
Event occurs every day.
Step 4
Set Event Time
There are three types of Time Clock events:
• Fixed Time
• Sunrise
• Sunset
Fixed Time events are events that will activate at a
specific time. The Time field is used to set the exact
hour and minute at which the event will be activated.
Sunrise and Sunset events will be activated based
on the sunrise or sunset times for the current day. The
Time field is used to specify an offset from sunrise or
sunset. A negative offset will cause the event to hap-
pen prior to sunrise/sunset. A positive offset will cause
the event to activate after sunrise/sunset.
Use and to change the value of the highlighted
field. Use and to highlight the previous / next
field. Press “Next” ( button) to proceed to the next
step.
Event Time
Type Time
Fixed Time
06: 35 PM
Previous Next
(hh:mm)
Event Time
Type Offset
Sunrise
+ 01: 35
Previous Next
(hh:mm)
Main Menu
Time Clock Setup
Manage Timed Events
Add Event
Step 3b Select Days
Use and to highlight the desired box. Use
and to place or remove a checkmark in the box.
Place a checkmark in each box under the days that
the Time Clock Event should occur.
Press “Next” ( button) to proceed to the next step.
Select Days
Previous Next
= Selected
SMTWThFS

Setup Guide for the RadioRA® ChronosTM 11
Step 5 Select Scene to Activate
Use and to highlight a scene to activate. Press
“Next” ( button) to accept the selection.
Select Scene to Activate
1. Morning
2. Scene 2
3. Scene 3
4. Scene 4
Previous Next
Step 6 Set Event Action
The Event Action settings determine what happens
when the event is activated.
Action determines whether the scene is turned ON or
OFF.
Event Type determines whether the event activates
the selected scene based on the Time Clock Mode.
• Normal - The event will activate in both
Home and Away modes.
• Home Only - The event will activate only
when the mode is Home.
• Away Only - The event will activate only
when the mode is Away.
Note: The activation time for an Away event will vary
in order to make the residence appear lived-in. The
Away event will activate within 20 minutes (+/-) of the
scheduled time.
Fade Time determines the fade time of the selected
scene. The options are Default (1 second ON, 3 sec-
onds OFF), 1 second, 3 seconds, 10 seconds, 30 sec-
onds, 1 minute, 4 minutes, and Legacy.
Event Action
Action - - - - - - - - - - - - -
Event Type - - - - - - -
Fade Time - - - - - - -
Switches - - - - - - - -
Previous Finish
Normal
Scene ON
Default
FO/FO
Astronomical Time Clock Programming
If the system contains Dimmers that were
manufactured prior to January 1, 2001, the
Legacy setting MUST be used.
Switches determines whether any switches in the
selected scene operate:
• First On / First Off (FO/FO)
• First On / Last Off (FO/LO).
• Last On / First Off (LO/FO)
• Last On / Last Off (LO/LO).
Repeat Steps 1-6 to create additional Time Clock
Events.
Press “Finish” ( button) to accept the changes.
• Time Clock Event Programming is now complete.

Setup Guide for the RadioRA® ChronosTM12
Step 1 Go to Delete Event
Step 2
Delete an Event
Use and to highlight an event. Press “Back”
( button) to return to Manage Timed Events.
Press “Delete” ( button) to delete the selected
event.
Press “Yes” ( button) to confirm deleting the
event. Press “Cancel” ( button) to cancel the
delete operation.
• Time Clock Event is now deleted.
Delete Event
1. SR +1:35 Wakeup
2. FT 22:00 Goodnite
3. SS - 1:00 Outdoor
4. SS + 1:00 Porch
Back Delete
Are you sure?
Delete Wakeup
Event?
Cancel Yes
Main Menu
Time Clock Setup
Manage Timed Events
Delete Event
Note: Deleting a Time Clock Event will only delete
the event. The Time Clock Scene associated with that
Event will remain programmed.
Step 1 Go to View / Modify Event
Viewing and Modifying Time Clock Events
Deleting a Time Clock Event
Viewing/Modifying Time Clock Events: Deleting a Time Clock Event:
Astronomical Time Clock Programming
Step 2
View an Event
Use and to highlight an event. Press “Details”
( button) to view the highlighted event.
View / Modify Event
1. SR +1:35Hrs. Wakeup
2. FT 22:00 Goodnite
3. SS - 1:00 Outdoor
4. SS + 1:00 Porch
Done Details
View / Modify Event
Name:
Time: Sunrise + 1:35Hr
Schedule: All Days
Scene: Morning
Back Change
Wakeup
Use and to highlight the desired setting. Press
“Back” ( button) to return to the event list. Press
“Change” ( button) to modify the selected setting.
Note: The screen to modify the selected setting will
be the same as the screen for that was used when
creating the event. For details, see “Creating Time
Clock Events” on page 10.
Press “Done” ( button) to return to Manage
Timed Events.
Step 3
Modify an Event
Main Menu
Time Clock Setup
Manage Timed Events
View / Modify Event

Setup Guide for the RadioRA® ChronosTM 13
Step 1 Go to Set Home / Away Mode
Setting the Time Clock Home / Away Mode
The time clock built into Chronos
® has two modes – Home and Away. These allow the timeclock to run certain
events only while the homeowner is out, so that it appears someone is in the house. Convenience events, such
as a morning scene, can be set to only run while someone is there.
Astronomical Time Clock Programming
Use and to change the Time Clock Mode set-
ting. Press “Cancel” ( button) to return to Time
Clock Setup. Press “Done” ( button) to accept
the mode setting.
The Time Clock Home / Away Mode can also be
changed from the Chronos Status screen. This screen
is accessed by pressing (Home Button) from the
Home Screen.
Note: If the Time Clock Mode is being controlled by
one of the Contact Closure Inputs, changes will not be
allowed from this screen. The following message will
be displayed:
• Time Clock Mode is now set.
Set Home / Away Mode
Runs only Home and
Normal Time Clock Events.
Home
Cancel Done
Set Mode
Runs only Home and
Normal Time Clock Events.
Home
Cancel Done
Note: CCI 1 is
currently controlling the
Time Clock Mode.
Press OK to Continue.
Main Menu
Time Clock Setup
Set Home / AwayMode

© 2004 Lutron Electronics Co., Inc.
MADE AND PRINTED IN U.S.A. 2/04 P/N 044-037TCO Rev. A
Limited Warranty
Lutron will, at its option, repair or replace any unit that
is defective in materials or manufacture within one year
after purchase. For warranty service, return unit to
place of purchase or mail to Lutron Electronics Co.,
Inc. at 7200 Suter Rd., Coopersburg, PA 18036-1299,
postage pre-paid.
THIS WARRANTY IS IN LIEU OF ALL OTHER
EXPRESS WARRANTIES, AND THE IMPLIED WAR-
RANTY OF MERCHANTABILITY IS LIMITED TO
ONE YEAR FROM PURCHASE. THIS WARRANTY
DOES NOT COVER THE COST OF INSTALLATION,
REMOVAL OR REINSTALLATION, OR DAMAGE
RESULTING FROM MISUSE, ABUSE, OR DAMAGE
FROM IMPROPER WIRING OR INSTALLATION.
THIS WARRANTY DOES NOT COVER INCIDENTAL
OR CONSEQUENTIAL DAMAGES. LUTRON’S LIA-
BILITY ON ANY CLAIM FOR DAMAGES ARISING
OUT OF OR IN CONNECTION WITH THE MANU-
FACTURE, SALE, INSTALLATION, DELIVERY, OR
USE OF THE UNIT SHALL NEVER EXCEED THE
PURCHASE PRICE OF THE UNIT.
This warranty gives you specific legal rights, and you
may have other rights which vary from state to state.
Some states do not allow the exclusion or limitation of
incidental or consequential damages, or limitation on
how long an implied warranty may last, so the above
limitations may not apply to you. This product may be
covered under one or more of the following U.S.
patents: 4,835,343; 4,954,768; 5,248,919; 5,399,940;
5,637,930; 5,736,965; 5,798,581; 5,838,226;
5,848,054; 5,905,442; 5,982,103; DES 353,798;
DES 378,814; DES 389,461; DES 389,805;
DES 395,037; DES 404,013; DES 422,969;
DES 428,855; DES 436,579; DES 439,220 and corre-
sponding foreign patents. U.S. and foreign patents
pending. Lutron, RadioRA, and GRAFIK Eye are reg-
istered trademarks, and Chronos and FASS are trade-
marks of Lutron Electronics Co., Inc.
© 2004 Lutron Electronics Co., Inc.
Lutron Electronics Co., Inc., reserves the right to
make improvements or changes in its products with-
out prior notice. Although every attempt is made to
ensure that this information is accurate and up to
date, please check with Lutron to confirm product
availability, latest specifications and suitability for your
application.
World Headquarters
Lutron Electronics Co., Inc.
7200 Suter Road
Coopersburg, PA 18036-1299 U.S.A.
TOLL FREE: (800) 523-9466 (U.S.A., Canada,
and the Caribbean)
Tel: (610) 282-3800
Fax: (610) 282-3090
Technical Assistance
If you have questions concerning the installation or
operation of this product, call the Lutron Technical
Support Center. Please provide exact model number
when calling.
(800) 523-9466 (U.S.A., Canada, and the Caribbean)
Other countries call (610) 282-3800
Fax (610) 282-3090
Visit our web site at www.lutron.com
/