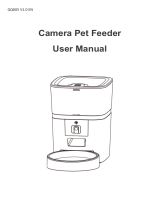
SPF 2300-WB-TY

OWON SPF 2300-WB-TY User guide

  • Hello! I've reviewed the Quick Start Guide for the Pet Feeder SPF 2300-WB-TY. This document provides essential information about setting up, operating, and maintaining your new smart feeder. It covers aspects such as dual power supply options, setting up feeding schedules, and cleaning instructions. I’m ready to assist you with any questions you might have regarding this device, its features, and how to use them.
  • How can I power the device?
    How do I unlock the buttons?
    How can I record a voice message for my pet?
    How do I reset the device and switch the network configuration?
SPF 2300-WB-TY Smart Pet Feeder
Quick Start Guide
Accessory List
*Before installation, pls confirm the accessories.
Main unit *1 Plastic food bowl *1 Food bucket *1
Top cover *1 Manual *1
Manual Desiccant
Desiccant *1
Type C USB cable *1 Adaptor *1 Stainless steel inner bowl *1
(Optional)
Product Introduction
Open button
Top cover
Food bucket
Observable display window
󵛏󵜑󵛐
Stainless steel inner bowl
Plastic food bowl
Food bucket lock
Outlet
Main unit
Product Introduction
󵜑
Speaker
Battery case
Power adapter jack
Desiccant box
Silicone rotor blade
1
Assemble Guidelines
Power on the device (Note: The device supports dual power supply)
It can be powered by a power adapter (insert the adapter plug into the power adapter jack on the base) , or
three D cell batteries, or both.
2
1. Place the main unit on a horizontal surface and install
the plastic food bowl;
2. Place the stainless steel inner bowl in the plastic bowl;
3. After confirming that the bucket is installed in place,
lock the bucket lock;
- Scenario 1: The bucket already contains pet food.
Please place the bucket on the main unit according to
the correct orientation, press the lock button to unlock
the device, then long press the manual feeding button
for 3 seconds, the fault indicator icon will flash " ",
the main unit will start the bucket installation auxiliary
function automatically. In this process of function
operation, please keep the bucket in a right orientation
with your hand and wait for the accurate installation of
the bucket
- Scenario 2: If there is no food in the barrel, but
still cannot be installed in place. You can repeat the
operation in Scenario 1, or please ensure the bucket in
the correct installation position, and at the same time,
turn the silicone rotor blade to let the bucket installed in
place
4. If the bucket is empty, please fill the bucket with pet
food;
5. Put the desiccant into the desiccant box, and cover
the top cover after adding the food to the bucket to
complete the installation
Installation
Pls scan the QR code to
view the installation video.
Display“ ”
Unlock Lock
Operating Panel Introduction
Lock button
Hold for 3 seconds to unlock other
buttons and screens
Recording button
Holding the button for 3 seconds,
when you hear the "beep" sound
once and the recording icon lights
up which means the recording will
start (at most 6 seconds). When
you release the button and hear the
"beep" sound twice, the recording
will be saved.
Manual feeding button
•(Unlocking state) Long press the button
for 3 seconds to start the "food bucket
installation function". The Fault indicator
will flash. After finishing installation,
it will stop flashing automatically.
•(Manual feeding state) Short press 1
time will distribute 1 portion food, 7-10g
per portion; Long press will distribute
food continually.
Wi-Fi button
(Unlocking state) Long press the button
for 5 seconds to reset the devcei and
enter to AP mode network configurating,
the white light will flash slowly; Long
press again 5 seconds to switch the
network configuration to EZ mode, the
white light will flash quickly.
Wi-Fi icon
•Waiting for network configuration:
The icon lashing in white
•Network configuration succeeded:
The icon steadying on in white
•Disconnected:
The icon is off
Food shortage/Food run out icon
Food shortage:Red light flashing
Food run out:White light flashing
Lock icon
Lights up when other keys are locked
Fault indicator icon
•Food stuck: Blue light flashing
Food jam:Red light falshing
Battery power icon
No battery:Blank
Low battery:Red light
High level:White light
Recording indicator icon
Light up when recording
Operating Guideness
1. Download App
Please download the application: Smart Life from
App Store or App Market. Also you can scan below
QR code to download and install.
2. Device Operation Video
Please scan below QR code to watch the
operation video.
3. Manual Feeding Operation
•Long press the lock button for 3 seconds to
unlock the device
•Short press the manual feeding button to
distribute one portion food, 7-10g per portion; Long
press will distribute pet food continually
Cleaning Instruction
1." " means washable fitting, " " means unwashable.
2. Do not wash the main unit, only can be wipped by soft cloth.
3. Pls clean the stainless steel inner bowl every day to keep your pet's health.
4. When changing pet foods, the food bucket and plastic food bowl can be removed for cleaning.
Remove the plastic food bowl from the main unit ( Figure 1)
Unlock the bucket lock, and draw up the food bucket (Figure 2)
Please clean and drain the bucket and stainless steel inner bowl (wipe dry) before installing
and using.
Figure 1 Figure 2
Unlock Lock
Letter to the Users
Thank you for choosing our pet feeder products. Our company is committed to creating a better life for you and
your pet with science and technology.
In order to enable you to correctly use and maintain the product, please read this instruction manual carefully
before operation and keep it properly for reference.
Once installed or used, the following safety instructions have been carefully read and accepted.
Our company is not responsible for any accidents and losses caused by illegal operations and does not assume
any legal liability.
Our company reserves the right of interpretation and modification of this statement.
Safety Notice
*Failure to comply with the following terms may result in the unavailability of the product or other unexpected losses. To reduce the risk of
injury, monitor appliances closely when they are used near children.
•Do not immerse the base in water to avoid damage to the control panel and other electronic components.
•Do not use it outdoors or in damp environment such as toilet. Check and maintain regularly to ensure that the grain is delivered correctly.
•Do not use wet or damp food
•Do not place any foreign objects in the pet feeder
•This product is only suitable for pet food (diameter between 5-15mm), larger pet food may get stuck.
•Do not place the product on a high place. If the product falls down, it may cause damage or pet safety problems.
•Do not use the feeder for other purposes.
•Please use accessories recommended or sold by the manufacturer and do not modify the pet feeder without authorization.
•In addition to maintenance personnel, other people are not allowed to repair this product, so as to avoid causing various accidental
injuries.
•Remove the battery and unplug the power cord when not in use and before cleaning.
•Please use in indoor environment, do not place in the sunlight can be used, it will affect the device work; Keep away from ignition.
•This device is in low voltage mode, but pets biting wires will still cause electricity leakage, please use the correct guidance.
•Keep it horizontal. Do not knock over the device. Otherwise, the device may not work properly.
•If the owner needs to go out, please check the battery in the battery box to ensure sufficient battery power (this product is only suitable
for alkaline batteries).
Specification
Capacity • 3L
Auto Feeding Schedule 󵖡󵜇󵖧󵚧󵛏󵖡󵜇󵖦󵖡󵚧󵛐
Power 󵖦
Backup battery: D cell battery * 3 pcs
 󵖤󵖤󵖨󵖢󵖨󵖪󵖣󵖪󵖡
 󵞓󵖡󵛄󵖦
Color 󵚧
Battery Powered Notification
•In battery-powered state, the APP does not support remote control
•The feeder will distribute the food regularly according to the feeding schedule, and push the feeding message
and update the feeding status
•The feeder will be on standby automatically after each feeding as planned, and all the indicators will be turned
off
FCC Warning
This device complies with part 15 of the FCC Rules. Operation is subject to the following two conditions:
(1) this device may not cause harmful interference, and
(2) this device must accept any interference received, including interference that may cause undesired operation.
Any changes or modifications not expressly approved by the party responsible for compliance could void the user's
authority to operate the equipment.
NOTE: This equipment has been tested and found to comply with the limits for a Class B digital device, pursuant to
Part 15 of the FCC Rules. These limits are designed to provide reasonable protection against harmful interference in a
residential installation. This equipment generates, uses and can radiate radio frequency energy and, if not installed
and used in accordance with the instructions, may cause harmful interference to radio communications. However,
there is no guarantee that interference will not occur in a particular installation.
If this equipment does cause harmful interference to radio or television reception,
which can be determined by turning the equipment off and on, the user is encouraged to try to correct the
interference by one or more of the following measures:
-- Reorient or relocate the receiving antenna.
-- Increase the separation between the equipment and receiver.
-- Connect the equipment into an outlet on a circuit different
from that to which the receiver is connected.
-- Consult the dealer or an experienced radio/TV technician for help.
To maintain compliance with FCC’s RF Exposure guidelines, This equipment should be installed and operated with
minimum 20cm distance between the radiator and your body: Use only the supplied antenna.
/