Page is loading ...

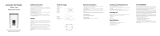
SPF 2300-S Automatic Pet Feeder
Quick Start Guide

Accessory List
*Before installation, pls confirm the accessories.
Main unit *1 Plastic food bowl *1 Food bucket *1
Top cover *1 Manual *1
Manual Desiccant
Desiccant *1
Type C USB cable *1 Adaptor *1
(Optional)
Stainless steel inner bowl *1
(Optional)

Product Introduction
Open button
Top cover
Food bucket
Observable display window
Stainless steel inner bowl
Plastic food bowl
Food bucket lock
Outlet
Main unit

Product Introduction
Speaker
Battery case
Power adapter jack
Desiccant box
Silicone rotor blade

1
Assemble Guidelines
Power on the device (Note: The device supports dual power supply)
It can be powered by a power adapter (insert the adapter plug into the power adapter jack on the base) , or
three D cell batteries, or both.

2
1. Place the main unit on a horizontal surface and install
the plastic food bowl;
2. Place the stainless steel inner bowl in the plastic
bowl;
3. After confirming that the bucket is installed in place,
lock the bucket lock;
- Scenario 1: The bucket already contains pet food.
Please place the bucket on the main unit according to
the correct orientation, press the lock button to unlock
the device, then long press the manual feeding button
for 3 seconds, the screen will show “----", the main
unit will start the bucket installation auxiliary function
automatically. In this process of function operation,
please keep the bucket in a right orientation with your
hand and wait for the accurate installation of the bucket
- Scenario 2: If there is no food in the barrel, but
still cannot be installed in place. You can repeat the
operation in Scenario 1, or please ensure the bucket in
the correct installation position, and at the same time,
turn the silicone rotor blade to let the bucket installed
in place
4. If the bucket is empty, please fill the bucket with pet
food;
5. Put the desiccant into the desiccant box, and cover
the top cover after adding the food to the bucket to
complete the installation
Installation
Pls scan the QR code to
view the installation video.
Display“----”
Unlock Lock

Operating Panel Introduction
Lock button
Hold for 3 seconds to unlock
other buttons and screens
Recording button
Holding the button for 3 seconds,
when you hear the "beep" sound
once and the recording icon lights
up which means the recording will
start (at most 6 seconds). When
you release the button and hear the
"beep" sound twice, the recording
will be saved.
Manual feeding button
•(Unlocking state) Long press the
button for 3 seconds to start the
"food bucket installation function". The
screen displays "----". After 30 seconds,
it will exit the mode automatically.
•(Manual feeding state) Press 1 time
will distribute 1 portion food, 7-10g per
portion.
Increase button
•(Setting state) Increases the value
•(Manual feeding) Increases the number
of feeding portions
Decrease button
•(Setting state) Decreases the value
•(Manual feeding) Decreases the
number of feeding portions
Setting button
•(Setting state)Confirm and proceed to
the next step; Long press for 3 seconds
to exit the setting
•(Time settting state)Press to enter the
setting state

Recording icon
Light up when recording
Food shortage/Food run out icon
Lock icon
Lights up when other keys are locked
Feeding schedule
Clock icon
Light up: Feeding schedule has been set
Time display
Used to display time, feeding times, feeding
portion and device version
Morning
Afternoon
12-hour clock
Fault indicator icon
Battery power icon

Setting Introduction
Before entering the setting, please long press the lock button " " three seconds to unlock other buttons.
Press setting button "
(The setting program will jump in turn, please follow the instructions to set in turn.)
Setting 1:Key tone ON/OFF
Under unlock state, press setting button "
" " to confirm and proceed to the next step. You can press increase button " " or decrease button " " to choose ON or
OFF, then long press setting button “ ” 3 seconds to save the settings and exit.
ON:
OFF:

Setting 3:Feeding Schedule Setting
①
entering the first meal setting. If you want to set other meal numbers, pls press " " or " " to adjust the number, then press the
setting button " " to confirm and enter the "Feeding time setting".
Setting 2:Real-time Setting
Pls check the current time of the pet feeder before using it. Unlock the device, then press setting button " " to confirm and
enter setting state. Press increase button " " and decrease button " " to select clock icon " " to blink, then press setting
button " " to enter the setting of "hour , minute". When the number is flashing, pls press the increase button " " or decrease
button " " to adjust the time you want, then long press the setting button " " 3 seconds to save settings then exit.
Minute setting:
Hour setting:

②Feeding time setting: The first meal's feeding time setting, you will set the hour and minute in turn. When the time digit flashing,
press the " " button or " " button to adjust the digit. AM and PM are automatically switched during the setting. Press the
setting button " " to confirm and proceed to "Feeding portion setting".
③
portion will be 7-10g and portion number setting will from 00 to 50. Press " " or " " to adjust portions and then press setting
button "
to the difference size of different pet food.)
④
times of play can be set from 0 to 5. Press " " or " " button to select playing times. Then short press setting button " " to
enter the next meal number setting; long press setting button " " 3 seconds will save setting and exit.
In any state, long press setting button " " 3 seconds will exit setting,

Setting 4: Recording Setting
Restore factory setting: Press " " and " " at the same time, 5
the keytone is enavled by default and the recording will be cleared.
Clear the schedule: Press " " and " " at the same time, 5 seconds
later, the schedule will be cleared (schedule time set to zero, feeding
portion set to zero, and recording playback times set to zero).
Setting 5: Manual Feeding Setting
1. Voice recording/modification: Under unlock state, long press recording button " " 3 seconds, when you hear "beep" sound
recording has been saved. The maximum recording duration is 6 seconds.
2.Play recording: Short press the recording button " " once, and play the recording once.
Pls press the lock button " " to unlock other buttons, short press the manual feeding button " " and proceed to manual
feeding state. Press increase button " " to add a portion, or press the decrease button " " to reduce the portion. The
maxmium manual feeding portion is 5, and the minimum manual feeding portion is 1.

Cleaning Instruction
1." " means washable fitting, " " means unwashable.
2. Do not wash the main unit, only can be wipped by soft cloth.
3. Pls clean the stainless steel inner bowl every day to keep your pet's health.
4. When changing pet foods, the food bucket and plastic food bowl can be removed for cleaning.
and using.
Figure 1 Figure 2
Unlock Lock

Letter to the Users
Thank you for choosing our pet feeder products. Our company is committed to creating a better life for you and
your pet with science and technology.
In order to enable you to correctly use and maintain the product, please read this instruction manual carefully
before operation and keep it properly for reference.
Once installed or used, the following safety instructions have been carefully read and accepted.
Our company is not responsible for any accidents and losses caused by illegal operations and does not assume
any legal liability.
Our company reserves the right of interpretation and modification of this statement.
Safety Notice
*Failure to comply with the following terms may result in the unavailability of the product or other unexpected losses. To reduce the risk of
injury, monitor appliances closely when they are used near children.
•Do not immerse the base in water to avoid damage to the control panel and other electronic components.
•Do not use it outdoors or in damp environment such as toilet. Check and maintain regularly to ensure that the grain is delivered correctly.
•Do not use wet or damp food
•Do not place any foreign objects in the pet feeder
•This product is only suitable for pet food (diameter between 5-15mm), larger pet food may get stuck.
•Do not place the product on a high place. If the product falls down, it may cause damage or pet safety problems.
•Do not use the feeder for other purposes.
•Please use accessories recommended or sold by the manufacturer and do not modify the pet feeder without authorization.
•In addition to maintenance personnel, other people are not allowed to repair this product, so as to avoid causing various accidental
injuries.
•Please use in indoor environment, do not place in the sunlight can be used, it will affect the device work; Keep away from ignition.
•This device is in low voltage mode, but pets biting wires will still cause electricity leakage, please use the correct guidance.
•Keep it horizontal. Do not knock over the device. Otherwise, the device may not work properly.
•If the owner needs to go out, please check the battery in the battery box to ensure sufficient battery power (this product is only suitable
for alkaline batteries).

Specification
Capacity • 3L
Auto Feeding Schedule •
Power •
• Backup battery: D cell battery * 3 pcs
•
•
Color •
/