WIRING
OPERATION
LED BEACON
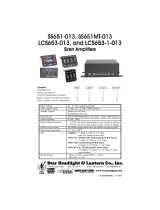
86-B02310-0001.1
Flash Pattern Selection
Simultaneous or Alternating Synchronization Setting
Cruise Mode Activation
1. Enter SETTING MODE by powering up with RED+WHITE wires simultaneously; the beacon
will display short flashes:
• Single flash = Group 1
• Double flash = Group 2
2. Remove WHITE wire from +VDC then momentarily apply to +VDC again to change Groups:
• Beacon of the same Group will flash together.
• Beacon of the different Group will flash alternately.
3. Save and exit SETTING MODE by disconnecting all power.
While Warning Mode has been activated, momentarily apply WHITE wire to +VDC:
Once for next pattern
Quick 3 times to FP#1
While Warning Mode has been activated, apply WHITE wire to -GND, and allow it to run more
than 2 seconds to switch to Cruise Mode.
RED: To +VDC for Warning Mode
BLACK: To Chassis Ground (-)
WHITE: [+] For Flash Patterns Selection
[
-
] For Cruise Mode
[ ] Connect wires of all units together for synchronization.
(All units should be set to the same flash pattern)
Battery
(Fuse @ 3 Amps)
NOTE: Actual approval will be based
on the model ordered.
7
9
8
1
2
3
4
5
6
FP#
10
Quint [SAE]
Ultra [SAE]
Mega
Double [R65]
Single-Quad
Single [2Hz]
Quad [2Hz]
Steady Scene
Single [SAE]
Double [SAE]
Quad [SAE]
Single H/L
11
12
FLASH PATTERNS