Page is loading ...

DP/N: 8N020-180 - v1.3, 11/02/2017
1650 Pacific Avenue, Channel Islands, CA 93033-9901 • Phone 805 247-0226
Fax: 805 247-0669 • www.vortechsuperchargers.com • M-F 7:00 AM - 3:30 PM (PST)
ENGINEERING, INC.
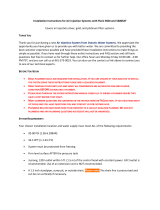
2011-2014 Ford F-150 EcoBoost*
P/N: 8N310-010
®
Vortech® Charge Air Cooler
Installation Instructions
* Legal in California only for racing vehicles which may never be used or registered or licensed for use upon a highway.

P/N: 8N020-180 v1.3, 11/02/2017
©2017 Vortech Engineering, Inc.
All Rights Reserved, Intl. Corp. Secured ii
FOREWORD
Take note of the following before proceeding:
1. Proper installation of this intercooler kit requires general automotive
mechanic knowledge and experience. Please browse through each step
of this instruction manual prior to beginning the installation to determine if
you should refer the job to a professional installer/technician. Please con-
tact your dealer or Vortech Engineering for possible installers in your
area.
2. This product was designed for use on stock (un-modified, OEM) vehicles. The PCM
(computer), engine, transmission, drive axle ratios and tire O.D. must be stock. If the
vehicle or engine has been modified in any way, check with Vortech prior to installation
and use of this product.
3. Use only premium grade fuel with a minimum of 91 octane (R+M/2).
4. Always listen for any sign of detonation (knocking/pinging) and discontinue hard use
(no boost) until problem is resolved.
5. Vortech is not responsible for any clutch, transmission, drive-line or engine damage.
Exclusions from Vortech warranty coverage considerations include, but not limited to:
1. Neglect, abuse, lack of maintenance, abnormal operation or improper installation.
2. Continued operation with an impaired vehicle or sub-system.
3. The combined use of Vortech components with other modifications such as, but not limit-
ed to, exhaust headers, aftermarket camshafts, nitrous oxide, third party PCM program-
ming or other such changes.
©2017 VORTECH ENGINEERING, INC
All rights reserved. No part of this publication may be reproduced, transmitted, transcribed, or translated
into another language in any form, by any means without written permission of Vortech Engineering, Inc.
This manual provides information on the installation, maintenance and service of the
Vortech Intercooler kit expressly designed for this vehicle. All information, illustrations
and specifications contained herein are based on the latest product information avail-
able at the time of this publication. Changes to the manual may be made at any time with-
out notice. Contact Vortech Engineering for any additional information regarding this kit
and any of these modifications at (805) 247-0226 7:00am-3:30pm PST.
STOP

P/N: 8N020-180 v1.3, 11/02/2017
©2017 Vortech Engineering, Inc.
All Rights Reserved, Intl. Corp. Secured
iii
TABLE OF CONTENTS
FOREWORD ....................................................................ii
TABLE OF CONTENTS............................................................iii
TOOLS & SUPPLY REQUIREMENTS ................................................v
PARTS LIST ....................................................................vi
1. PREPARATION & REMOVAL ..................................................1
2. CHARGE AIR COOLER INSTALLATION .........................................5
3. FINAL CHECK ..............................................................9

P/N: 8N020-180 v1.3, 11/02/2017
©2017 Vortech Engineering, Inc.
All Rights Reserved, Intl. Corp. Secured iv
NOTICE
This product is protected by state common law, copyright and/or patent.
All legal rights therein are reserved. The design, layout, dimensions,
geometry, and engineering features shown in this product are the exclu-
sive property of Vortech Engineering, Inc. This product may not be cop-
ied or duplicated in whole or part, abstractly or fundamentally, intention-
ally or fortuitously, nor shall any design, dimension, or other information
be incorporated into any product or apparatus without prior written con-
sent of Vortech Engineering, Inc.

P/N: 8N020-180 v1.3, 11/02/2017
©2017 Vortech Engineering, Inc.
All Rights Reserved, Intl. Corp. Secured
v
2011-2014 FORD F-150 ECOBOOST
CHARGE AIR COOLER INSTALLATION INSTRuCTIONS
Before beginning this installation,
please read through this entire instruction booklet
The Vortech Charge Air Cooler upgrade was designed as a street/strip oriented charge air
cooler, specifically for use on the 2011-2014 Ford F-150 EcoBoost.
As with any power enhancing product, this system is intended for use on healthy, well-main-
tained engines. Vortech Engineering, Inc. is not responsible for engine damage. Installation
on new vehicles will not harm or adversely affect the break-in period so long as factory
break-in procedures are followed.
For best performance and continued durability, please take a note of the following key points:
1. Use only premium grade fuel 91 octane or higher (R+M/2).
2. Always listen for any sign of detonation (pinging) and discontinue hard use (no boost) until problem
is resolved.
TOOL & SUPPLY REQUIREMENTS:
• 5/16 Nut Driver
• 3/16 Allen Wrench
• Flat #2 Screwdriver
• 10mm Socket
• 13mm Socket
• Ratchet
• Ratchet Extension
• Push Pin Removal Tool
Congratulations on selecting the best performing and most
effective charge air cooler today... the Vortech Charge Air Cooler!

P/N: 8N020-180 v1.3, 11/02/2017
©2017 Vortech Engineering, Inc.
All Rights Reserved, Intl. Corp. Secured vi
®
PART NO. DESCRIPTION QTy.
IMPORTANT: Before beginning installation, verify that all parts are included in the kit. Report any shortages or dam-
aged parts immediately.
8N310-010 CAC uPGRD,11-14 F150 ECOBST 1
7C060-013 M6 X 1.0 X 12MM FLG HD CL10.9+ ZINC 1
7C060-022 M6 X 1.0 X 22MM SHCS LYSH SC 1
7PS250-060 ELBOW, 2.50 X 30 SILICONE, BLK 2
7R002-048 #48 SAE TYPE F SS HOSE CLAMP 4
8N007-010 PLUG, BYPASS VALVE, ECOBST F150 1
8N020-180 INSTR. MAN, '11-'14 F150 CAC 1
8PN001-007 CAC CORE, F150, COATED 1
2011-2014 Ford F-150 EcoBoost
Charge Air Cooler upgrade
ENGINEERING, INC PARTS LIST

P/N: 8N020-180 v1.3, 11/02/2017
©2017 Vortech Engineering, Inc.
All Rights Reserved, Intl. Corp. Secured
1
A. Remove the lower rubber splash guard by
removing the 8x plastic push pins & turning the
4x white plastic fasteners counter-clockwise.
(See Fig. 1-a)
B. Remove the 2x 13mm-headed screws securing
the chin spoiler to the vehicle.
(See Fig. 1-b)
C. Loosen the 4x hose clamps on the passenger
side of the OEM charge air cooler. Remove
both OEM silicone couplers & hose clamps.
These will not be reused.
(See Fig. 1-c)
1.
PREPARATION AND REMOVAL
Fig. 1-a: Remove Rubber Splash Guard
Fig. 1-b: Remove Chin Spoiler
(D. Side Shown. Repeat On P. Side)
Fig. 1-c: Remove Passenger Side OEM Silicone
Couplers & Hose Clamps
RUBBER SPLASH GUARD

P/N: 8N020-180 v1.3, 11/02/2017
©2017 Vortech Engineering, Inc.
All Rights Reserved, Intl. Corp. Secured 2
1.
PREPARATION AND REMOVAL, cont'd
D. The driver side discharge tube is secured by a
snap ring. Using a small flathead screwdriver or
pick, release the snap ring from the discharge
tube, then pull the tube away from the OEM
charge air cooler.
(See Fig. 1-d)
E. Locate the bypass valve tube. Turn the gray
locking clip clockwise to release it from the
OEM bypass valve assembly & pull the tube
away from the OEM bypass valve assembly.
(See Fig. 1-e)
F. Remove the 2x 10mm-headed screws from the
upper charge air cooler support bracket.
Remove the upper charge air cooler support
bracket, 2x screws, 2x rubber grommets & set
aside as they will be reused.
(See Fig. 1-f)
Fig. 1-d: Detach Driver Side Discharge Tube
Fig. 1-e: Detach Bypass Valve Tube
Fig. 1-f: Remove Upper Charge Air Cooler
Support Bracket
(D. Side Shown. Repeat On P. Side)
NOTE: Early-model vehicles do not have
the bypass valve assembly attached
to the OEM charge air cooler.
Proceed to the next step.

P/N: 8N020-180 v1.3, 11/02/2017
©2017 Vortech Engineering, Inc.
All Rights Reserved, Intl. Corp. Secured
3
1.
PREPARATION AND REMOVAL, cont'd
G. Unplug the OEM bypass valve connector locat-
ed on the driver side of the cooler.
(See Fig. 1-g)
H. Remove the 2x 13mm-headed screws from the
lower cooler support bracket with the OEM
charge air cooler attached, then lower the
OEM charge air cooler from underneath the
vehicle. Have an assistant help you with this
step or use a floor jack to keep the OEM
charge air cooler in place while you lower the
lower cooler support bracket. Remove the 2x
rubber grommets from the OEM charge air
cooler & set aside as they will be reused.
(See Fig. 1-h)
Fig. 1-g: Unplug Bypass Valve
Fig. 1-h: Remove Lower Cooler Support Bracket
(D. Side Shown. Repeat On P. Side)
NOTE: Early-model F-150 skip to next step.

P/N: 8N020-180 v1.3, 11/02/2017
©2017 Vortech Engineering, Inc.
All Rights Reserved, Intl. Corp. Secured 4
This page was left intentionally blank.

P/N: 8N020-180 v1.3, 11/02/2017
©2017 Vortech Engineering, Inc.
All Rights Reserved, Intl. Corp. Secured
5
A. Early-model vehicles do not have the OEM
bypass valve assembly attached to the OEM
charge air cooler. For this reason, we have
provided a block-off plug with a fastener &
o-ring.
(See Fig. 2-a)
Fig. 2-a: Provided Block-Off Plug
B. Prior to installation of the Vortech charge air
cooler, verify that the o-ring on the provided
block-off plug is in place & free of any damage.
Lightly coat the o-ring with lubricant (white
grease, etc.) prior to installation. Once verified,
install the provided block-off plug to the
Vortech charge air cooler using the supplied
fastener.
(See Fig. 2-b)
C. Remove the OEM bypass valve assembly from
the OEM charge air cooler by removing the
fastener securing the assembly to the OEM
charge air cooler, then turning it counter-clock-
wise to release it from the OEM charge air
cooler. Be sure not to damage the o-ring on
the OEM bypass valve.
(See Fig. 2-c)
Fig. 2-b: Block-Off Plug
(Installed)
Fig. 2-c: Remove OEM Bypass Valve Assembly
From OEM Charge Air Cooler
2.
CHARGE AIR COOLER INSTALLATION
NOTE: Late-model F-150 skip to Step 2-c.
NOTE: Early-model F-150 skip to Step 2-e.

P/N: 8N020-180 v1.3, 11/02/2017
©2017 Vortech Engineering, Inc.
All Rights Reserved, Intl. Corp. Secured 6
D. Remove the provided block-off plate from the
Vortech charge air cooler. Transfer the bypass
valve assembly to the new Vortech charge air
cooler & secure the bottom of the bypass valve
assembly with the provided fastener.
(See Fig. 2-d)
Fig. 2-d: Transfer OEM Bypass Valve Assembly
To Vortech Charge Air Cooler
E. Place 2x rubber grommets on the lower bosses
of the Vortech charge air cooler, then place the
Vortech charge air cooler onto the lower cooler
support bracket. From underneath the vehicle,
raise the Vortech charge air cooler into position
& loosely attach the previously removed lower
cooler bracket screws to the vehicle. You may
need an assistant to help raise the Vortech
charge air cooler, otherwise use a floor jack.
When re-attaching the lower cooler support
bracket, be sure to thread the screws into the 2
rear-most screw holes.
(See Fig. 2-e)
F. Place 2x rubber grommets on the upper bosses
of the Vortech charge air cooler. Position the
upper cooler support bracket, then loosely
attach the 2x previously removed 10mm-head-
ed screws for the upper cooler support bracket.
Once the Vortech charge air cooler is in posi-
tion & clear of any obstructions, secure all of
the screws for both cooler support brackets.
(See Fig. 2-f)
Fig. 2-e: Re-install Lower Cooler Support
(D. Side Shown. Repeat On P. Side)
Fig. 2-f: Re-install Upper Cooler Support
(D. Side Shown. Repeat On P. Side)
2.
CHARGE AIR COOLER INSTALLATION, cont'd
FRONT OF VEHICLE
CHIN SPOILER
MOUNT HOLES LOWER COOLER
SUPPORT MOUNT HOLES

P/N: 8N020-180 v1.3, 11/02/2017
©2017 Vortech Engineering, Inc.
All Rights Reserved, Intl. Corp. Secured
7
G. Locate the driver sider discharge tube. Before
attaching it to the Vortech charge air cooler, be
sure to place the snap ring back into its groove
in the discharge tube. Once in place, you can
slide the discharge tube onto the Vortech
charge air cooler. You will hear the snap ring
click once it's locked in place. Lightly tug on
the tube to verify that it is secure.
(See Fig. 2-g)
H. Reattach the bypass valve tube by simply slid-
ing it back onto the OEM bypass valve assem-
bly. You will hear a click once the tube is
locked in place.
(See Fig. 2-h)
Fig. 2-g: Re-install Driver Side Discharge Tube
Fig. 2-h: Re-install Bypass Valve Tube
2.
CHARGE AIR COOLER INSTALLATION, cont'd
I. Locate the supplied silicone couplers & hose
clamps. These will be used in place of the OEM
silicone couplers & clamps. Install the supplied
silicone coupler closest to the top of the cooler
first. Once in position, tighten both hose
clamps. Repeat this step for the second silicone
coupler.
(See Fig. 2-i)
Fig. 2-i: Install Supplied Silicone Couplers

P/N: 8N020-180 v1.3, 11/02/2017
©2017 Vortech Engineering, Inc.
All Rights Reserved, Intl. Corp. Secured 8
This page was left intentionally blank.

P/N: 8N020-180 v1.3, 11/02/2017
©2017 Vortech Engineering, Inc.
All Rights Reserved, Intl. Corp. Secured
9
WARNING: Do not attempt to operate the
vehicle until all components are
installed and all operations of this
manual are completed, including
the final check.
A. Check all fasteners, silicone couplers and hose
clamps for tightness and leaks.
B. Make sure there are no loose wires or anything
that may get damaged.
C. Test drive the vehicle.
D. Always listen carefully for engine detonation.
Discontinue heavy throttle usage if detonation
is heard.
Fig. 3-a: Vortech Charge Air Cooler
3. FINAL CHECK

DP/N: 8N020-180 - v1.3, 11/02/2017
1650 Pacific Avenue, Channel Islands CA 93033-9901 • Phone: 805 247-0226
Fax: 805 247-0669 • www.vortechsuperchargers.com • M-F 7:00AM - 3:30PM (PST)
ENGINEERING, INC
®
/