Page is loading ...

1
IMPORTANT:
Go to www.extron.com for the
complete user guide
, installation
instructions, and specifications.
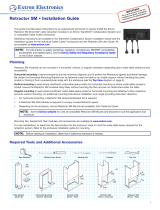
Cable Cubby 500 and 700 • Installation Guide
This guide provides instructions for an experienced installer to install and connect the Extron
Cable Cubby 500 and 700 Cable Access Enclosures.
The Cable Cubby units are furniture-mounted enclosures for cable access,
connections, and AC power. Cables that are not in use can be stored out of the
way while remaining connected to the presentation system.
Cable Cubby 500 and Cable Cubby 500 CCB Cable Cubby 700
Hole Plugs
Connectivity Bracket
Cable Grommet Plate
AAP Frame Plate
Cable Cubby 500
Cable Cubby 700
Zip Ties
Tweeker
AC Power Module
125V~ 12A MAX TOTAL
Retractor Trim
and Screws
Retractor Pin & Clip
#6 Mounting Screws
and Star Washers
#4-40 Module Screws
ii Bk
1 2
Hole Plugs
Connectivity Bracket
Cable Grommet Plate
AAP Frame Plate
Cable Cubby 500
Cable Cubby 700
Zip Ties
Tweeker
AC Power Module
125V~ 12A MAX TOTAL
Retractor Trim
and Screws
Retractor Pin & Clip
#6 Mounting Screws
and Star Washers
#4-40 Module Scr
ews
ii Bk
4 8
Hole Plugs
Connectivity Bracket
Cable Grommet Plate
AAP Frame Plate
Cable Cubby 500
Cable Cubby 700
Zip Ties
Tweeker
AC Power Module
125V~ 12A MAX TOTAL
Retractor Trim
and Screws
Retractor Pin & Clip
#6 Mounting Screws
and Star Washers
#4-40 Module Screws
ii Bk
1 2
1 2
Hole Plugs
Connectivity Bracket
Cable Grommet Plate
AAP Frame Plate
Cable Cubby 500
Cable Cubby 700
Zip Ties
Tweeker
AC Power Module
125V~ 12A MAX
TOTAL
Retractor Trim
and Screws
Retractor Pin & Clip
#6 Mounting Screws
and Star Washers
#4-40 Module Screws
ii Bk
1 2
Hole Plugs
Connectivity Bracket
Cable Grommet Plate
AAP Frame Plate
Cable Cubby 500
Cable Cubby 700
Zip Ties
Tweeker
AC Power Module
125V~ 12A MAX TOTAL
Retractor Trim
and Screws
Retractor Pin & Clip
#6 Mounting Screws
and Star Washers
#4-40 Module Screws
ii Bk
(3) 3/8", (1) 1/4" (6) 3/8", (2) 1/4"
Hole Plugs
Connectivity Bracket
Cable Grommet Plate
AAP Frame Plate
Cable Cubby 500
Cable Cubby 700
Zip Ties
Tweeker
AC Power Module
125V~ 12A MAX TOTAL
Retractor Trim
and Screws
Retractor Pin & Clip
#6 Mounting Screws
and Star Washers
#4-40 Module Screws
ii Bk
1 trim, 2 screws 2 trims, 4 screws
Hole Plugs
Connectivity Bracket
Cable Grommet Plate
AAP Frame Plate
Cable Cubby 500
Cable Cubby 700
Zip Ties
Tweeker
AC Power Module
125V~ 12A MAX TOTAL
Retractor Trim
and Screws
Retractor Pin & Clip
#6 Mounting Screws
and Star Washers
#4-40 Module Screws
ii Bk
1 2
Hole Plugs
Connectivity Bracket
Cable Grommet Plate
AAP Frame Plate
Cable Cubby 500
Cable Cubby 700
Zip Ties
Tweeker
AC Power Module
125V~ 12A MAX TOTAL
Retractor Trim
and Screws
Retractor Pin & Clip
#6 Mounting Screws
and Star Washers
#4-40 Module Screws
ii Bk
4 8
Planning
Check with local and state regulations before starting
the installation:
Ensure that the planned installation complies with building and electrical codes.
Ensure that the planned installation complies with the Americans with Disabilities Act or
other accessibility requirements.
Check all parts and equipment before installation:
Ensure that all parts are present in each kit.
Ensure that necessary tools and equipment are available for the installation.
Kit Contents
“Show Me” Cable Trim Plate

Cable Cubby 500 and 700 • Installation Guide (Continued)
2
23.3"
(59.2 cm)
26.9"
(68.3 cm)
21.7"
(55.0 cm)
11.8"
(30.0 cm)
8.8"
(22.4 cm)
30
30
Table Top
Series/2
Series/2
9.0"
(22.9 cm)
15.2"
(38.6 cm)
21.2"
(53.8 cm)
Series/2 XL
Series/2 XL
3.0"
(7.6 cm)
3.0"
(7.6 cm)
29.3"
(74.4 cm)
Preparing the Table
Cut a hole in the surface where the enclosure will be installed. Read the following information before making a cut.
Determine the best location for the enclosure.
Ensure that the location where the Cable Cubby is to be installed is convenient for as many users as possible.
Ensure that the edge on which the lid opens is oriented correctly.
Ensure that there is ample space under the table for cables.
When installing Retractors in the Cable Cubby, ensure that there is enough space for the Retractor assembly under the table
or furniture (see dimensions for the Retractors below).
Choose a method for cutting the hole in the table.
ATTENTION: The opening in the table for the Cable Cubby should be cut only by licensed and bonded craftspeople.
Exercise care to prevent scarring or damaging the furniture.
ATTENTION : L’ouverture dans la table pour le CableCubby devrait être coupée seulement par des artisans autorisés et
qualiés. Faites attention à ne pas faire de marques sur le meuble et à ne pas l’endommager.
CAUTION: Wear safety glasses when operating power equipment. Failure to comply can result in eye injury.
ATTENTION : Portez des lunettes de sécurité lorsque vous utilisez l’équipement électrique. Ne pas respecter cela peut
conduire à une blessure à l’oeil.
Choose one of the following methods for cutting the hole:
Hand Router and Routing Template Jigsaw and Paper Cut-Out Template CNC Wood Router
If using a CNC wood router or other
precise machinery, use the exact
cut-out dimensions for your model
(see the table below).
Visit www.extron.com for Cable Cubby routing
template part numbers and instructions.
Dimensions and cut-out templates are
available online at www.extron.com.
Cable
Cubby
Model
Cut-out Dimensions
User Access
Width
Side
Dimension
500 5.75" (14.6 cm) 5.75" (14.6 cm)
700 7.125" (18.1 cm) 5.75" (14.6 cm)
500 CCB 5.75” (14.6 cm) 7.125” (18.1 cm)
NOTES:
• To prevent objects from impeding cable retraction, allow at least 3 inches of clearance from the exposed cable side of
the enclosure (see the diagrams below).
• Excess cabling may cause clearance issues. Use zip ties to secure under-table cabling to prevent accidental contact or
entanglement (see Routing and Connecting Cables on page 6).
Cut-Out Template for the Extron
Cable Cubby 500
0.25"
(0.635 cm) R
User Access
5.75"
(14.60 cm)
5.75"
(14.60 cm)
0.25"
Trim Ring
Lip Width
2.0"
Trim Ring’s Outer Edge
(Do not cut this line.)
0.00” (0.00 cm)
0.02 (0.05 cm)
+
Table Clamp
P/N 68-8599-01 Rev. A
SURFACE
CUT-OUT
AREA
1. Confirm the product to be installed.
2. Remove the surface cut-out area
(gray) from the template.
3. Measure the cutout and template.
4. Mark the position on the
furniture where the Cable Cubby 500
will be installed.
5. Double check dimensions and position,
then cut the opening.
Page Size: 11" x 17"
Print Scale 1:1
Do not Shrink
0.25"
(0.635 cm) R
5.75"
(14.60 cm)
5.75"
(14.60 cm)
SURFACE
CUT-OUT
AREA
Cut-Out Template for the Extron
Cable Cubby 500
User Access
0.25"
Trim Ring
Lip Width
2.0"
Trim Ring’s
Outer Edge
(Do not c
ut th
is line.)
0.00
” (
0.00
cm)
0.02
(0.0
5 c
m)
+
Ta
b
le Clamp
P/N
68-859
9-01 Rev. A
1. Confirm the pr
oduct to be installed.
2. Remove the surface cut-out area
(gray) f
r
om the template.
3. M
easure the cutout and template.
4. Mark the position on the
furniture where the Cable Cubby 500
will be installed.
5. Double check
dimensions and position,
then cut the opening.
Page Size: 11" x 17"
Print Scale 1:1
Do not Shrink
Jigsaw
Cut O
Cut-Out T
e
C
Cab

AAP Module
Cable Pass-Through Module
Retractor Trim
3
NOTE: After assembling the
module, proceed to “Step 2 —
Install the modules” below.
NOTE: After assembling the module, proceed to “Step 2 — Install the modules” below.
Secure up to two
single-space AAPs
in the AAP plate.
#4-40 Nut
w/ Captive Washer
Insert cables through the bottom
of the connectivity bracket.
Connect cables to the AAPs.
Secur
e the AAP plate on the
connectivity brackets, using
two of the provided module
screws.
1
2
3
I
2
Connectivity bracket
NOTE:
• Use a screwdriver to secure the Retractor trim with the screws.
• After installing the trim, proceed to “Step 2 — Install the
modules” below to install the power module.
• Retractors are installed after the Cable Cubby is mounted on the
table (see Installing Retractors on page 5).
Preparing the Cable Cubby
Step 1 — Assemble the connectivity modules of your choice.
Connectivity modules allow you to populate the Cable Cubby with a combination of AAPs, cable pass-through modules, or
Retractors.
Step 2 — Install the modules.
Determine where the connectivity modules and power module will be installed
in the Cable Cubby. The modules may be installed at various heights.
NOTE: Ensure that there is enough room above the
modules for the Cable Cubby lid to close completely.
For the power module:
WARNING: Risk of electric shock. To ensure proper
electrical grounding, use at least two of the provided
#6-32 mounting screws with the star washers.
AVERTISSEMENT : Risque de choc électrique.
An d’assurer une mise à la terre correcte, utilisez un
minimum de deux vis de mise à la terre #6-32 et les
rondelles en étoile fournies.
Secur
e the Retractor trim
using the pr
ovided
mounting scr
ews (2).
Insert cables
through the
bottom of the
connectivity
bracket and into
the holes of the
grommet plate.
Secure the
grommet plate
on the connectivity
bracket using two
of the provided
module screws.
Snap the included
hole plugs into
any unused holes.
1
2
3
For Show Me Cables:
Flip grommet plate
upside down and
insert Show Me
Cables into the
grommet plate.
1
Attach the Show Me
Cable Trim Plate to the
top of the module, using
the module screws.
2
Attach the grommet
plate to the bottom
of the module, using
the module screws.
3
Insert the modules
into the Cable Cubby.
125V~ 12A MAX TOTAL
Secure the modules
using the provided
mounting screws and
star washers on the
front and back of
the enclosure.
1
2
125V~ 12A MAX TOTAL
Use top
hole only.
For Show Me Cable
assemblies, only use the
top holes of the bracket.
125V~ 12A MAX TOTAL

4
Step 1 — Mount the Cable Cubby flush with the table.
Mounting the Cable Cubby in the Table
Connecting a Cable Cubby 500 CCB
For Cable Cubby 500 CCB models, follow the instructions below, then proceed to “Mounting the Cable Cubby in the Table.”
The Cable Cubby 500 CCB contains three contact closure buttons to control input selection on Extron switchers and products with
contact closure control ports. Wire the Cable Cubby switches to the control product as shown in the wiring diagram below.
To wire the captive screw connectors:
1. Strip away 3 inches of the outer jacket
from the end of the cable, and
3/16 inch (5 mm) of the inner jacket
from the end of each wire.
2. Secure the wires to the captive screw
connector using an Extron Tweeker
or other small screwdriver. Follow the
wiring diagram at the right.
CAUTION: The anged edges of the top of the
surface enclosure are sharp. These edges are also
soft and may be easily nicked or bent. Exercise
caution when handling the enclosure to prevent
personal injury or damage to the enclosure.
ATTENTION : Les extrémités à brides du haut de la
surface du boîtier sont aiguisées. Ces extrémités
sont aussi lisses et peuvent facilement être
coupées ou pliées. Soyez prudents lorsque vous
manipulez le boîtier an d’éviter de l’endommager
ou de vous blesser.
NOTE: See the table at the right to
determine and select the appropriate
current-limiting resistor, if needed.
Momentary switch
(single pole, double throw)
on captive screw terminal
Blue
1A @
24 VDC /
125 VAC
See
note
below
4.52 K,
1%
13 K,
1%
NOTE: No resistor required for 5 VDC source.
CGT+V
CNONC
Contact (C)
Ground (G)
Tally output (T)
Tally voltage (+V)
RESISTOR
Extron Switcher with
Contact Closure Input
and Tally Output
Lower the Cable Cubby into the hole to test the t.
If necessary, carefully enlarge the opening.
Remove the plastic strips
and lm on the surface of
the Cable Cubby.
Ensure that the
side clamps are
seated against
the enclosure.
1
2
3

5
Cable Cubby 500 and 700 • Installation Guide (Continued)
Step 2 — Under the table, adjust the side clamps on the enclosure.
Installing Retractors
Follow the steps below to install Retractors. For horizontal or angular Retractor
mounting, see the information at right, then follow the steps below.
NOTE: To lower the side
clamp, turn the lever
down, then press and
hold the locking plate
while sliding down the
clamp.
Locking
plate
Angular Mounting
Remove the enclosure screws as shown above, then follow
this step:
Horizontal Mounting
See the Cable Retractor Setup Guide, available on the
Extron website, for additional steps.
Remove two enclosure screws
(one on each side) from this position.
Then, mount the Retractors as shown
at left.
Cable Release
Assembly
Move the cable release assembly upward until
the angular mounting hole is visible. Reinstall the
enclosure screws in this hole (both sides).
Remove two enclosure screws
(one on each side) from this position.
Then, mount the Retractors as shown
at left.
Cable Release
Assembly
Move the cable release assembly upward until
the angular mounting hole is visible.
Reinstall the
enclosure screws in this hole (both sides).
Secur
e the clip
on the pin.
Insert retractors into
the retractor trim.
Secure the locking screw on
each Retractor.
Insert the pin thr
ough the
r
etractor mounting hole on
the side of the Cable Cubby
and r
etractor assembly.
1
2
3
4
Do not overtighten. The locking
screw only needs to be snug.
1
Rotate the side clamp
outward and ensure that
the lever is down.
Slide the clamp all the way
up against the bottom of
the table.
Ensure the Cable Cubby
is rmly seated in the table.
Raise the lever to secure
the Cable Cubby.
Lever
1
2 3

68-2491-50
Rev. G
08 17
6
Installation Checklist
Planning (page 1)
Check with local and state regulations before starting the installation.
Check all parts and equipment before installation.
Preparing the Table (page 2)
Determine the best location for the enclosure.
Choose a method for cutting the hole in the table.
Preparing the Cable Cubby (page 3)
Choose and assemble a combination of AAP, cable-pass through, and Retractor connectivity to populate
the Cable Cubby.
Secure the connectivity modules and power module in the Cable Cubby.
Connecting a Cable Cubby 500 CCB (page 4)
Mounting the Cable Cubby in the Table (page 4)
Mount the Cable Cubby ush with the table.
Adjust the side clamps.
Installing Retractors (page 5)
Routing and Connecting Cables (page 6)
Routing and Connecting Cables
CAUTION:
Risk of Electric Shock.
This equipment must be grounded.
ATTENTION :
Risque de choc électrique.
Cet équipement doit être xé au sol.
NOTE: Ensure that there is no tension on the power cable.
Secure cables with zip ties to the rectangular
holes in the rear of the Cable Cubby.
For cable pass-thr
ough applications, allow at least 36 inches (0.9 m)
of cable loop for each cable.
Connect cables to the AV system
and connect the AC power cord.
2
1
3
Extron Headquarters
+800.633.9876 Inside USA/Canada Only
Extron USA - West Extron USA - East
+1.714.491.1500 +1.919.850.1000
+1.714.491.1517 FAX +1.919.850.1001 FAX
Extron Europe
+800.3987.6673
Inside Europe Only
+31.33.453.4040
+31.33.453.4050 FAX
Extron Asia
+65.6383.4400
+65.6383.4664 FAX
Extron Japan
+81.3.3511.7655
+81.3.3511.7656 FAX
Extron China
+86.21.3760.1568
+86.21.3760.1566 FAX
Extron Middle East
+971.4.299.1800
+971.4.299.1880 FAX
Extron Australia
+61.8.8113.6800
+61.8.8351.2511 FAX
Extron India
1800.3070.3777
(Inside India Only)
+91.80.3055.3777
+91.80.3055.3737 FAX
© 2017 Extron Electronics All rights reserved. All trademarks mentioned are the property of their respective owners. www.extron.com
/