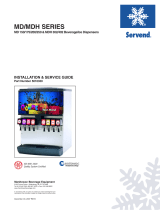
Installation Instructions Section 2
2-4
Part Number 020005256 5/15
Grounding Instructions
This appliance must be grounded. In the event of
malfunction or breakdown, grounding provides a path of
least resistance for electric current to reduce the risk of
electric shock.
This appliance is equipped with a cord having an
equipment-grounding conductor and a grounding plug.
The plug must be plugged into an appropriate outlet that
is properly installed and grounded in accordance with all
local codes and ordinances.
Risk of electrical shock. Connect to a properly grounded
outlet only.
Improper connection of the equipment-grounding
conductor can result in a risk of electric shock. The
conductor with insulation having an outer surface that is
green with or without yellow stripes is the equipment
grounding conductor. If repair or replacement of the cord
or plug is necessary, do not connect the equipment-
grounding conductor to a live terminal. Check with a
qualified electrician or serviceman if the grounding
instructions are not completely understood, or if in doubt
as to whether the appliance is properly grounded. Do not
modify the plug provided with the appliance — if it will not
fit the outlet, have a proper outlet installed by a qualified
electrician.
When using electric appliances, basic precautions
should always be followed, including the following:
a. Read all the instructions before using the
appliance.
b. To reduce the risk of injury, close
supervision is necessary when an
appliance is used near children.
c. Do not contact moving parts.
d. Only use attachments recommended or
sold by the manufacturer.
e. Do not use outdoors.
f. For a cord-connected appliance, the
following shall be included:
• Do not unplug by pulling on cord. To
unplug, grasp the plug, not the cord.
• Unplug from outlet when not in use and
before servicing or cleaning.
• Do not operate any appliance with a
damaged cord or plug, or after the
appliance malfunctions or is dropped or
damaged in any manner. Contact the
nearest authorized service facility for
examination, repair, or electrical or
mechanical adjustment.
g. For a permanently connected appliance —
Turn the power switch to the off position
when the appliance is not in use and before
servicing or cleaning.
h. For an appliance with a replaceable lamp —
Always unplug before replacing the lamp.
Replace the bulb with the same type.
i. For a grounded appliance — Connect to a
properly grounded outlet only. See
Grounding Instructions.