Page is loading ...

Hardware
Parts List
Left Handle (1) [LH]
M6 Jam Nut (6)
4mm Allen Wrench
Handle Brace (1)
Cam Clamp (4) M6 x 10mm SBHCS (4)
M6 x 40mm SBHCS (2)
Right Handle (1) [RH]
Top Plate (1)
Bottom Plate (1)
Professional Series Carriage Upgrade
Open End Wrench
10mm X 13mm(1)
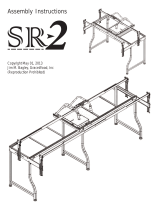
Copyright January 1, 2016
Jim M. Bagley, GraceWood, Inc
(Reproduction Prohibited)
Version 2.1

Parts needed:
1. Top Plate (1)
2. Left Handle (1)
3. Right Handle (1)
4. Handle Brace (1)
5. M6 x 10mm SBHCS (4)
6. M6 x 40mm SBHCS (2)
7. M6 Hex Nut (6)
8. 4mm Allen Wrench
1
Attach the Right and Left Handles to the
Bottom Plate using (4) M6 x 10mm SBHCS
and (4) M6 Hex Nuts (see Fig.1-1). Place the
Handle Brace across the two Handles (see Fig.2-
2
).
3
While holding the M6 Hex Nuts in place,
insert (2) M6 x 40mm SBHCS into the holes
on the outside of the Handle Brace and secure
them into the M6 Hex Nuts with the 4mm Allen
Wrench (see Fig.1-4).
2
Place (2) M6 Hex Nuts on the inside of
each Handle in the hex slot provided in the
Handle Brace (see Fig.1-3).
Fig.1-1 Fig.1-2
Fig.1-4Fig.1-3
Top Plate Assembly
Left Handle
Right Handle
M6 x 10mm
SBHCS
Handle Brace
M6 Hex Nut
M6 x 40mm SBHCS
Top Plate
2
M6 Hex Nut
(on bottom)

3
Parts needed:
1. Bottom Plate (1)
Bottom Plate Wheel Adjustment
Note: The direction of the carriage in the Fig.2-1 below before you review the instructions.
1
Check the conguration of your carriage and make sure it matchs the correct conguration for
your frame.
2
If your carriage conguration isn’t set up for your frame remove the M6 X 40 SBHCS screw from
each side of your carriage (see Fig.2-1).
3
Move each Bottom Plate Plastic Wheel Bracket to the correct wheel conguration for your frame
(see Fig.2-2).
4
Re-install each M6 X 40 SBHCS and M6 Nut.
Next Generation
Gracie Frame
Little Gracie II Frame
SR2 Frame
Original GMQ Frame
Sturdy Lite Frame
M6 X 40 SBHCS
M6 Nut
Bottom Plate Plastic
Wheel Bracket
Fig.2-1
Fig.2-2

1
First, remove the Take-Up Rail from the
Table Assembly. This is the rail located over
the middle of the Table.
2
Place the Bottom Plate Assembly on the
Table Assembly, and make sure that all four
wheels on the bottom plate are in contact with
the plastic track. Make sure the bottom plate
rolls smoothly on the track (see Fig.3-1).
Bottom Plate Placement
Parts needed:
1. Bottom Plate Assembly(1)
2. Table Assembly (complete) (1)
Top Plate Placement
Parts needed:
1. Top Plate Assembly(1)
2. Table Assembly (complete with Bottom Plate) (1)
Fig.3-1
Fig.4-1
1
Place the Top Plate Assembly onto the
Bottom Plate. Make sure all four wheels
are on the track, located on the top side of
the Bottom Plate, and that the Top Plate rolls
smoothly(see Fig.4-1).
Parts needed:
1. Cam Clamps (4)
2. Sewing Machine (not included)
3. Top Plate Assembly
1
Place your sewing machine onto the
Top Plate of the Carriage, and center
it, from side to side and from front to
back. Install your Take-Up Rail through
the throat of your machine.
2
Pull the Sewing Machine Clamp
Handle in the open position (see
Fig.5-1) and slide it into the slot on the
Top Plate until it is touching the sewing
machine. Push the handle down to lock
the Clamp into position (see Fig.5-1
and Fig.5-2). Repeat this with the
remaining (3) clamps.
Fig.5-2
Fig.5-1
Placing your Sewing Machine
4
Bottom Plate
Bottom Plate
Top Plate
/