Page is loading ...

Table Assembly Instrucons | 1
October 2019
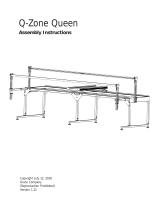
Stationary Longarm Table
With Built-In Stch Regulaon
Assembly Instrucons
Table of Contents
2 What's Included: Parts and Hardware, Assemblies
5 Le and Right Table Assemblies to Machine Stand Plate
6 Adding Upper and Lower Leg Assemblies
7 Turning the Table Right Side Up
8 Table Height Adjustment
9 Adjusng the Machine Stand Plate
Introducon
This table ulizes an insert that is custom sized to t specic machines. The insert with built-in stch
regulaon and insert assembly instrucons are packaged separately.
The table has a height adjustment for ne tuning the machine to the table top insert. The table also has
built-in levers and height adjustment for the table top work surface.

2 | Table Assembly Instrucons
October 2019
What’s Included
Parts and Hardware
2 QT09000-601 Upper Leg Assembly
1 QT09000-503 Right Top Rail*
12 QT09000-604 Screw, M8 x 12 BHCS w FLNG
1 QT09000-401 Table Top Right*
1 QT09000-300 Machine Stand Plate
1 QT09000-501 Table Top Le*
1 QT09000-502 Le Top Rail*
2 QT09000-602 Lower Leg
4 QT09000-603 Plug End (pre-installed in Lower Legs)
4 QT09000-606 Threaded Leveling Foot M10 x 45
4 QT09000-605 Screw, M8 x 1.25 x 45 SBHCS ZN
26 QM00500-14 Screw, M4 x 6 PHP ZN*
1 No part #, Hex Wrench 5mm
1 QT09000-506 Crossbar
*Assemblies: These parts ship already assembled.
Assemblies
1 QT09000-500: Le Table Assembly (Includes 1 QT09000-501 Table Top Le, 1 QT09000-502 Le Top
Rail, 13 QM00500-14 Screw M4 x 6 PHP ZN, and 2 QT09000-607 M4 x 8 PHP ZN.)
1 QT09000-400: Right Table Assembly (Includes 1 QT09000-401Table Top Right , 1 QT09000-503 Right
Top Rail, 13 QM00500-14 Screw, M4 x 6 PHP ZN, and 2 QT09000-607 M4 x 8 PHP ZN.)
Le Table Assembly
(1) QT09000-500
Right Table Assembly
(1) QT09000-400

Table Assembly Instrucons | 3
October 2019
Upper Leg Assembly
(2) QT09000-601
Screw, M8 x 1.25 x 45 BHCS ZN
(4) QT09000-605
Threaded Leveling Foot
(4) QT09000-606
Plug End
(4) QT09000-603
Lower Leg
(2) QT09000-602
Le Top Rail
(1) QT09000-502
Table Top Le
(1) T09000-501
Machine Stand Plate
(1) QT09000-300
Table Top Right
(1) QT09000-401
Screw, M8 x 1.25 x 12 BHCS
w/Flange (12) QT09000-604
Right Top Rail
(1) QT09000-503
Screw, M4 x 6 PHP ZN
(26) QM00500-14
Screw, M4 X 8 PHP ZN
(4) QT09000-607
Screw, M4 X 6 PHP ZN
(26) QM00500-14

4 | Table Assembly Instrucons
October 2019
Hex Wrench 5mm
Hex Wrench 5mm
No part #
Crossbar
(1) QT09000-506
Screw, M4 X 8 PHP ZN
(4) QT09000-607
Screw, M4 X 6 PHP ZN
(26) QM00500-14
Screw, M4 x 8 PHP ZN
(4) QT09000-607
Washer, M8 fender ZN
(4) QT09000-606
M8 Fender Washer
(4) QT09000-608

Table Assembly Instrucons | 5
October 2019
The le and right table assemblies, when
connected to the Machine Stand Plate,
create the table top.
Parts Needed
1 - Le Table Assembly
1 - Right Table Assembly
1 - Machine Stand Plate
4 - Screw, M8 x 12 SBHCS ZN
Tools Needed
Hex Key Handle 5mm (provided)
1. Place the Right Table Assembly upside
down on a protecve surface, with the
table surface down. It will be on the le
side of the Machine Stand Plate.
2. Place the Machine Stand Plate to the
right of the Right Table Assembly.
NOTE: The bent anges of the
Machine Stand Plate will be down
at this stage of the process.
3. Place the Le Table Assembly to the right
of the Machine Stand Plate, with the
table surface down.
4. Align the Machine Stand Plate with the
Table Assemblies and insert the four M8
x 12 SBHCS through the elongated holes
in the Table Assemblies and thread them
into the Machine Stand Plate Rivnuts.
NOTE: The elongated holes will allow
the machine height to be adjusted to
match the table top insert later on.
Let the screws and Machine Stand
Plate sele to the boom of the
slots for now.
Using a ruler is helpful to align the
table assemblies properly.
5. Align and start the four M8 x 12 SBHCS
with the hex key handle 5mm. They will
get fully ghtened later.
Le and Right Table Assemblies to Machine Stand Plate

6 | Table Assembly Instrucons
October 2019
Adding Upper and Lower Leg Assemblies
Parts Needed
2 - Upper Leg Assembly
4 - Screw, M8 x 45 SBHCS ZN
8 - Screw, M8 x 12 SBHCS ZN
4 - Threaded Leveling Foot
1 - Crossbar
2 - Lower Leg Assembly
4 - M8 Fender Washer
Tools Needed
Hex Key Handle 5mm (provided)
14mm open end wrench (not provided)
1. Slide the two Upper Leg Assemblies down into
the table top assembly tubes with the height
adjustment latches facing each other as shown.
2. Place one M8 Fender washer on each of the
M8 x 45 SBHCS. There should be a total of 4.
3. Align and start the screws M8 x 45 SBHCS with washers
into the center holes. Do not ghten the screws at
this stage of the assembly.
4. Align and start the two screws M8 x 12 into each of
the four leg assemblies at each corner. Do not ghten
the screws at this stage of the assembly.
5. Align the Lower Legs into the upper legs with the elongated
leg towards the front as shown.
NOTE: It is a lile easier to raise the table
than it is to lower it, so you may want to
set it at its lowest seng.
6. With the Lower Legs installed, it is now me to fully ghten the
four center screws M8 x 45, the two screws M8 x 12 at each
corner leg, and the four M8 x 12 SBHCS screws in the table top
assembly (which were used to aach the Machine Stand Plate).
7. Lay the Crossbar across the two rear threaded inserts in
the Lower Legs. Install the two rear Threaded Leveling
Feet through the cross bar and into the Lower Leg about half way.
8. Install the two front Threaded Leveling Feet and thread them into
the Lower Legs about half way. This will allow for easier leveling
adjustment later, if needed. Use a 14mm open end wrench to
adjust the feet.
Latches facing each other
Front

Table Assembly Instrucons | 7
October 2019
Turn the Table Right-Side Up
1. Verify that the four Plug Ends are securely
inserted into the open ends of the Lower
Legs.
2. With the help of a second person, turn
the table right-side up.

8 | Table Assembly Instrucons
October 2019
Table Height Adjustment
1. With the help of a second person,
place one foot lightly onto the lower leg
assembly. Simultaneously li on the table
top and raise it one click at a me unl
you reach the desired height.
2. To lower the table, rst remove the
machine. With the help of a second person
disengage the two latches on each leg and
lower the table one click at a me unl you
reach the desired height.

Table Assembly Instrucons | 9
October 2019
1. Place the machine in the table on the
Machine Stand Plate.
2. Align the machine with the opening.
3 Using a ruler or level to span the opening in
the table, compare the height of the machine
bed to the table top. At this point the plate
may be too high or low.
4. To adjust the height, carefully loosen the two
front screws holding the Machine Stand Plate,
and adjust the plate up or down as needed
unl the desired height is achieved. Lightly
ghten these two screws.
5. The rear of the machine is much heavier than
the front of the machine. Carefully loosen the
two rear screws holding the Machine Stand
Plate, and adjust the plate up or down as
needed unl the desired height is achieved.
Lightly ghten these two screws.
6. Firmly ghten the four Machine Stand
Plate screws.
NOTE: This table ulizes an insert
that is custom sized to t specic
machines. The insert with built-in
stch regulaon sensors and cables
for aaching to your staonary
longarm machine, and insert
assembly instrucons are packaged
separately.
Adjust Machine Stand Plate
/