Page is loading ...

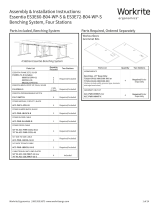
1 of 2 Line of Sight | (800) 463-7731 | los.workriteergo.com
Drill/driver or Phillips screwdriver
with #2 tip
Two Line of Sight Assembled Chassis' of
the same size with Desktop
A Line of Sight Filler Plate
Qty: 1 or 2 C Line of Sight Filler
Panel
Qty: 1
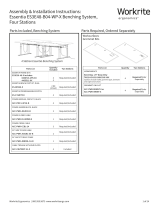
Assembly Instructions, Line of Sight Filler Plate & Filler Panel:
LOS3-FC-36-, LOS3-FC-42-, LOS3-FPB2B-
Parts Included
Note: These instruction assume that you've purchased and assembled at least two Line of Sight Electric
Workcenters and you want them attached back-to-back. For back-to-back configurations, End Panels and Filler
Channels are required.
For side-to-side configurations systems, especially with shared
power, Ganging Brackets are required and sold separately.
Use at least two people to move Line of Sight Workcenters.
Required, Sold Separately
Tools Required
B #10 ×½" Pan Head
Screws
Qty: 16
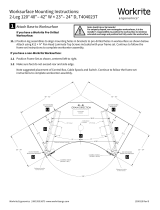
1 Install Filler Plate on Workcenter
Situate all Workcenters in their approximate final locations, anticipating that you will require a bit of working
room between the Workcenters to add the Panels.
1.1 Power all Workcenters and raise
all the Monitor Lis. You will
need to access the screw holes
located on the Chassis under the
Monitor Lid.
1.2 Insert the Filler Plate (A) into the
gap between the Top Bracket and
Chassis, under the open Lid.
1.3 Attach with two #10 ×½" Pan Head Screws
(B) from above in the OUTER screw holes.
1.4 Hold the lid up and press the down arrow
on the control to lower the Monitor Li
so you can access the CENTER screw hole
and attach with one #10 ×½" Pan Head
Screws (B).
or
One piece: 36", 42", 48" & 54" Workcenters
Two pieces: 60", 66" & 72"
Workcenters
Worksurface
Top
Bracket
Monitor li
down
Center hole
A
A
B
B
B
View from below
View from above
1.2
1.2
1.3
1.3
1.4
1.4
Raise
Lower
1.1
Button Side View

2 of 2 Line of Sight | (800) 463-7731 | los.workriteergo.com
#1500387 Rev A
3 Install Filler Panels
With all your Workcenter pairs joined back-to-back with the Filler Plates(A), you will need to finish your
configuration by adding Filler Panels(B) to the very ends of your rows.
Note: If you are building rows, you must attach side-by-side Workcenters with the Ganging Brackets (sold
separately). This can be done either before or aer the Filler Panels are attached, but it MUST be done to comply
with electrical regulations.
3.1 Insert the Filler Panel (B) UNDER the lip of the Filler Plate(A). Attach with one #10 ×½" Pan Head Screw from
above. Magnets will hold the lower portion in place.
3.2 Repeat for other side.
2 Attach Workcenter with Filler Plate to Second Workcenter
2.1 CAREFULLY push the second workcenter into
position and guide the Filler Plate (A) into the
gap between the Top Bracket and Chassis, under
the open Lid.
2.2 Attach with three #10 ×½" Pan Head Screws (B)
from above as in Steps 1.3 & 1.4.
2.1
Row of sixSingle pair
3.1
3.1
3.1
3.2
3.2
Magnets
Filler Plate under
Filler Panel
/