BARRON NYN4X Series New York City Approved LED Exit Sign Installation guide
- Type
- Installation guide
BARRON NYN4X Series New York City Approved LED Exit Sign
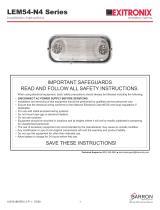
The BARRON NYN4X Series New York City Approved LED Exit Sign is a versatile and reliable emergency lighting solution for a variety of commercial and industrial applications. With its durable construction and energy-efficient LED technology, this exit sign is designed to provide clear and visible illumination in the event of a power outage.
Key features of the BARRON NYN4X Series New York City Approved LED Exit Sign include:
- New York City Approved: This exit sign meets the strict requirements of the New York City Building Code, ensuring compliance with local regulations.
BARRON NYN4X Series New York City Approved LED Exit Sign
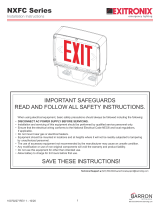
The BARRON NYN4X Series New York City Approved LED Exit Sign is a versatile and reliable emergency lighting solution for a variety of commercial and industrial applications. With its durable construction and energy-efficient LED technology, this exit sign is designed to provide clear and visible illumination in the event of a power outage.
Key features of the BARRON NYN4X Series New York City Approved LED Exit Sign include:
- New York City Approved: This exit sign meets the strict requirements of the New York City Building Code, ensuring compliance with local regulations.


-
 1
1
-
 2
2
-
 3
3
-
 4
4
-
 5
5


BARRON NYN4X Series New York City Approved LED Exit Sign Installation guide
- Type
- Installation guide
BARRON NYN4X Series New York City Approved LED Exit Sign
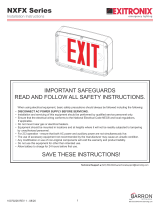
The BARRON NYN4X Series New York City Approved LED Exit Sign is a versatile and reliable emergency lighting solution for a variety of commercial and industrial applications. With its durable construction and energy-efficient LED technology, this exit sign is designed to provide clear and visible illumination in the event of a power outage.
Key features of the BARRON NYN4X Series New York City Approved LED Exit Sign include:
- New York City Approved: This exit sign meets the strict requirements of the New York City Building Code, ensuring compliance with local regulations.
Ask a question and I''ll find the answer in the document
Finding information in a document is now easier with AI
Related papers
-
 BARRON LEM54 Weatherproof Thermoplastic Series Installation guide
-
 BARRON NXFC Series NEMA 4X Installation guide
-
 BARRON NXFE Series NEMA 4X Installation guide
-
 BARRON NXFX Series NEMA 4X Installation guide
-
 BARRON CBLQ Series Color and Power Switchable LED Center Basket Operating instructions
-
 BARRON JJL Series Adjustable LED Vaportight Jelly Jar Installation guide
-
 BARRON LED-95 Series Thermoplastic LED Emergency Lighting Unit Installation guide
-
 BARRON LPX Series LED Flat Panel Installation guide
-
 BARRON QXEDGP Series Thermoplastic Edge-lit Exit Sign Installation guide
-
 BARRON RS2 Series Installation guide


Other documents
-
RAB EXIT-NY-E Operating instructions
-
Lithonia Lighting Contractor Select EXG and EXR LED Exit Sign Installation guide
-
RAB Lighting EXIT34-RG Operating instructions
-
GE current IND622 User manual
-
GE current IND623 User manual
-
e-conolight KXTE Die-Cast LED Exit Sign User manual
-
-
PORTOR LIGHTING PT-EXL-C-S User manual
-
Beghelli Fortezza™ Plus Installation guide
-
 Exitronix XET-20 Installation guide
