Note: The storage ports do not charge batteries.
© 2022 HM Electronics, Inc. All rights reserved.
The HME logo and product names are trademarks
or registered trademarks of HM Electronics, Inc.
4. When the headset pairing ring turns solid
green, pairing is successful. The headset sta-
tus LED also turns solid green. Registration
also happens automatically with the initial
pairing. See Fig. 3.2 note if pairing fails.
5. When the Select Your Position screen appears
(see Fig. 4.1), tap on a tile to select your
position. If you are selecting DRIVE-THRU (or
DRIVE-THRU 2 for stores with two lanes), you
also have the option of AUTO HANDS-FREE
mode. This saves you from having to man-
ually connect with a new customer using the
headset buttons.
Fig. 4.1
When the AUTO HANDS-FREE mode box is
checked, you are automatically connected
with customers when they arrive at the order
point and then automatically disconnected
when they leave. This feature is only avail-
able for one headset per drive-thru lane.
The headset remains in this mode until the
headset is taken out of use or powered off.
6. Select Next, and this Success
prompt appears. Tap OK to
begin using your headset.
A copy of this guide and much more can be found
under NEXEO | HDX by scanning this QR code or
going to:
https://www.hme.com/qsr/drive-thru-user-manuals/
Also, visit the HME Training Portal by scanning this
QR Code or going to:
https://www.hme.com/training
HELP
Need more help? Tap HELP or use the QR code and
URL links on this page. Product guides are found
under Drive-Thru Headset Systems>NEXEO | HDX.
Contact information is also found on the front page.
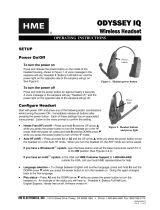
1 2 3 4
BATTERY CHARGER
with POWER SUPPLY
(AC70)
Charging
Ports (x4)
on top
Storage
Ports (x4)
on sides
Status LEDs
Using the AC70 Smart Battery Charger:
1. Install the AC70 close to the base station (<10 ft
(3 m)) and connect it to a power outlet.
Note: The AC70 will still charge batteries outside
of this range but without base station feedback.
2. Insert a BAT70 battery into the charging port to
begin charging (new batteries must be charged).
The Status LEDs on the AC70 indicate charge
status (see AC70 LED Reference Table).
Note: When within range, battery status is also
provided via the base station HOME screen. Tap
on the HOME screen to view status.
AC70 LED Reference Table
LED Color Status/Description
Green Flashing green = Charging
Solid green = Fully charged
Red Flashing red = Incompatible battery
Red/Yellow Flashing red & yellow = Fault condition
AC70 SMART BATTERY CHARGER OVERVIEW