Page is loading ...

Wentworth Technology, Inc. www.wentworthtechnology.com 877.495.1634 1
Wentworth Technology, Inc.
www.wentworthtechnology.
com 877.495.1634
Wentworth Technology, Inc. www.wentworthtechnology.com 877.495.1634
User’s Reference Guide

Wentworth Technology, Inc. www.wentworthtechnology.com 877.495.1634 1
Table of Contents
Base Station Operating Instructions ............................................................................................. 2
Register Headset ................................................................................................................................ 2
Registration Procedure ....................................................................................................................... 2
Listen Only Option .............................................................................................................................. 4
Enter PIN ............................................................................................................................................ 5
Settings Screen..................................................................................................................................... 6
Set Volume options ............................................................................................................................ 6
Adjusting a Volume............................................................................................................................... 7
Set Clock: Adjust the 24-hour internal clock ....................................................................................... 7
Set Lane Conguration ...................................................................................................................... 9
Headset Mode Selection .................................................................................................................. 9
Headset Mode Descriptions ............................................................................................................. 10
Day/Night Mode Information ............................................................................................................. 12
Menu A Information ........................................................................................................................... 13
System Clock .................................................................................................................................... 13
Resetting the System ....................................................................................................................... 13
Headset Operation Instructions .................................................................................................. 14
Headset Features ........................................................................................................................... 14
Headset Power On and Off ............................................................................................................ 14
Adjusting the Headset for Size ....................................................................................................... 14
Adjusting the Microphone Boom .................................................................................................... 15
Headset Buttons ............................................................................................................................ 15
Battery Installation ......................................................................................................................... 16
Battery Low Alert ............................................................................................................................ 16
Battery Charging ............................................................................................................................ 16
Battery Care ................................................................................................................................... 17
Disposing of Batteries .................................................................................................................... 17
Headset Cleaning .......................................................................................................................... 17
Tone Descriptions .......................................................................................................................... 17
Light Descriptions .......................................................................................................................... 17
Optional Greeter .......................................................................................................................... 18
Optional Message Repeater................................................................................................................. 20
Cautions/Warnings ........................................................................................................................ 22

Wentworth Technology, Inc. www.wentworthtechnology.com 877.495.1634 2
Base Station Operating Instructions
The Base Station home screen provides information on
operational modes as well as providing access to user
adjustable system settings.
Register Headset:
Wentworth Technology SpeedThru™ headsets
must be registered with the Base Station.
▪Press “Headset” on the home
screen to access the registration screen
shown below.
▪Note: If the Base Station is locked a PIN
will be required for access; see “Enter PIN”.
▪Press “Register Headset” on the Base Station Screen (1)
▪Turn on the headset you wish to register.
▪Serial number appears when registration is complete and the bar turns green (2)
▪Not
e: Once the bar turns green, you may leave the registration screen. If registration doesn’t
occur, within 5 minutes, the process times out. If further assistance is required call Wentworth
Technology at 877-495-1634.
Registration Procedure:

Wentworth Technology, Inc. www.wentworthtechnology.com 877.495.1634 3
Registration Bar Description:
The system has slots to register up to ten headsets. The base station will allow six of the headsets to
connect simultaneously at one time.
Registration bars may appear in three colors, with the following meaning:
• Gray bar, no serial number—registration slot is available (3)
• Gray bar with serial number—headset registered, unit powered off (4)
• Green bar with a serial number—headset registered, powered on (2)
• Red bar with no number—headset registration has failed
• Red bar with a serial number—headset is selected for deletion or for toggling Listen Only
Mode(5)
• Any serial number followed by “LO” means that headset is in the Listen Only Mode. See Listen
Only Mode for more information
Manual Deletion Procedure:
• Locate the serial number on the headset and match it to the serial number on the Base Sta-
tion screen (Note: Powering on the headset will cause the Registration bar to turn from gray to
green, conrming the selection.)
• Press the identied Registration Bar, which will turn red (5)
• Press “Delete Headset” (6)
• The Registration Bar will turn to gray with no serial number (3)

Wentworth Technology, Inc. www.wentworthtechnology.com 877.495.1634 4
Listen Only Option:
In order to prevent unintended communication between a headset and the order point, use the
Listen Only Option, which disables the Center button but allows the Page button to function. When
the headset is powered on or if the center button is pressed a voice prompt of “Listen Only Mode” is
played to remind the user of limited operation.
Selecting Listen Only Option:
Press the “Headset” button on the Home Screen to open the “Registration Screen” where the Listen
Only Option is managed.
To place a headset in the Listen Only Mode:
• First identify the serial number (located on the back side of the battery compartment) of the
headset selected (Tip: Another way to identify a headset is to power the headset on or off while
looking at the registration screen noticing which bar changes color.)
• Then press the “Listen Only” bar. (The headset may be powered on or off).
• Secondly, select the registration bar for the intended headset. (Before selecting, the headset
may be powered off [GREY bar] or powered on [BLUE bar], and the button will turn RED after
selecting.)
• Press the registration bar on the screen of the selected headset (the button will turn red to
indicate selection). Lastly, select the “Listen Only” bar at the top of the screen.
• Notice that the letters “LO” appear at the end of the headset serial number to conrm that
Listen Only has been applied to the selected headset.
• The headset is now a Listen Only headset until the process is repeated, placing it back in
standard operating mode.
• When the center button on the headset is pressed while in Listen Only Mode, a voice prompt
of “Listen Only Mode” is played.
• Tip: Place an identifying tag on the headset headband to visually identify LO mode.
Press the HOME graphic to return to the Home screen. Press “?” for screen help.

Wentworth Technology, Inc. www.wentworthtechnology.com 877.495.1634 5
Enter PIN:
Enter PIN (Unlock):
• Press PIN on the Base Station home screen
• Enter the four digit PIN using the keypad
• Successful PIN entry returns the user to Home screen.
The home screen now displays a green “Unlocked” graphic.
To Lock:
• Press the “Unlocked” button on the Home Screen to lock the system
• Note: The Base will automatically lock after 5 minutes of inactivity.
Errors:
• Press the “CLR” arrow to erase entry
• A “Thumbs Down” graphic indicates an incorrect in PIN entry.
• Re-enter correct PIN
• If the PIN has been lost, a master PIN is available. Please call Wentworth Technology for
assistance.
Tip: To change the PIN return to the Base Station home screen by pressing the “Home” button
(bottom right), press “Settings” then select “Change PIN”

Wentworth Technology, Inc. www.wentworthtechnology.com 877.495.1634 6
Settings Screen:
The “Settings” button (pin required) provides access to the following ve system settings categories:
(1) Set Volume, (2) Set Clock, (3) Set Night Volume Time, (4) Set PIN, (5) Set Lane Conguration.

Wentworth Technology, Inc. www.wentworthtechnology.com 877.495.1634 7
Set Volume options:
• Inbound Volume—the voice of the guest in the headset
• Grill Speaker Volume—kitchen ceiling speakers, optional
• Outbound Day Mode Volume—the sound level the guest hears at the order point, daytime
setting.
• Outbound Night Mode Volume—the sound level the guest hears at the order point, night time
setting, (if required),
• To change set time: Press “Set Night Volume Time” on “Settings” screen
Note: if “Night Volume Mode” is not required, simply set both Outbound Day and Outbound
Night volumes to the same level. (Alternative: set the Night Volume Time “Begin Time” and
“End Time” to the same time, preferably after closing time. See next “Settings” section for more
information)
• Local authorities may require a reduced outside speaker volume during evening hours in some
locations.
Adjusting a Volume:
• Press one of the four labeled bars needing adjustment
• Press the UP or DOWN arrows to the right to adjust volume
• Sound level indicator graphic will raise or lower and the volume number will change with each
arrow press.
• These adjustments are “live” meaning the sound level is instantly being adjusted.
Set Clock: Adjust the 24-hour internal clock:
• Press the UP or DOWN arrows to adjust the time as desired
• The example shows 4:41 PM displayed as 16:41.
• Adjust day using right and left arrows.

Wentworth Technology, Inc. www.wentworthtechnology.com 877.495.1634 8
Set Night Volume Time:
Adjust the time of day when the reduced volume of the Night Volume Mode should begin and end,
where required by local ordinance. Note: Set both the Day and Night Volume to the same setting if
this Mode is not desired.
Press “Begin Time” or “End Time” and adjust the time using a 24-hour format. (6:01 PM would
be entered as 18:01.)
Set PIN: Allows PIN to be changed:
• Enter a new four digit PIN using the keypad
• A starburst will indicate each number entered
• Re-enter the same PIN again
• If the two entered PIN numbers match the Settings screen will appear.
• Note: Although a Master PIN is available, it is strongly recommended that a new PIN be added
to the system. If the Master PIN becomes generally known, system security is greatly reduced.

Wentworth Technology, Inc. www.wentworthtechnology.com 877.495.1634 9
Headset Mode Selection: Select from the available modes:
Push To Talk
Hands Free
Auto Hands Free Speed Team
Pressing the button will toggle between the four modes.
NOTE:
Mode changes should be made when no customer order is in process since a Mode change will close
the order point speaker and microphone. It is best to press the Mode change when the customer has
completed their order but it is not necessary to wait until they have left the order point. The communi-
cation channel may be re-opened if desired by simply touching the center button on the headset.

Wentworth Technology, Inc. www.wentworthtechnology.com 877.495.1634 10
Headset Mode Descriptions:
Push To Talk
• With no vehicle present, the order point speaker and microphone will remain off
• When a Vehicle pulls to order point…
• All headsets hear repeating beep and see a ashing boom tip. The order point
microphone turns on.
• The Order taker answers, touch & hold the center button
• Order taker microphone/speaker turn on
• Order taker boom light turns solid red
• Other headset boom lights/beeps stop
• Option: A second order taker may join the conversation by touching and holding the
center button. (Excluding Listen Only Headsets)
• The Order taker releases center button
• Order taker microphone is muted
• Headset boom light ashes (reminder of customer presence)
• The session is completed when the customer leaves order point
• Order taker boom light goes off
• All microphones and speakers turn off
Hands Free Mode
• With no vehicle present, the order point speaker and microphone remain off
• When a vehicle pulls to order point
•
All headsets hear a repeating beep and see the ashing boom tip. Order point microphone
turns on
• The Order taker taps center button
• Order taker microphone/speaker turn on
• Order taker boom light turns solid red
• Other headset boom lights/beeps stop
• The Order taker taps center button again
• Order taker microphone is muted
• Order point microphone remains on
• Headset boom light ashes (reminder of customer presence)
• The session is completed when the customer leaves order point
• Order taker boom light goes off
• All microphones and speakers turn off
• Option- A second operator wishes to join the order in progress (excluding Listen Only
headsets)
• Second operator taps the center button

Wentworth Technology, Inc. www.wentworthtechnology.com 877.495.1634 11
•
Second operator is now conferenced with the customer and order taker, boom light turns
solid red
• Second operator taps center button again
• Headset resumes listen status with boom light off
Remember:
• A solid on LED indicates a “LIVE” microphone.
• A ashing LED indicates a “MUTED” microphone while a customer remains at the order point.
Auto Hands Free Mode
During very busy times, the Auto Hands Free mode will save time by automatically activating the
order taker microphone as a vehicle is detected at the order point.
Upon vehicle detection all headsets will hear one beep then only the order taker microphone will
automatically become active.
Note of Explanation:
In Auto Hands Free Mode the order taker is designated as the headset which initially communicates
with the order point.
Tip: Should a different headset wearer wish to become the order taker, simply do the
following. The current order taker should power off their headset. The new order taker
then may simply touch “on” the center button when the next vehicle activates the vehicle
alert tone. That headset will then become the default order taker headset, meaning that the
microphone on this headset will become active when a vehicle activates the loop.
Tip: OR your can press and hold the Page button and then immediately press and hold the
Center button. Continue holding both buttons until the message “Auto Hands Free mode” is
heard in the headset. Both buttons can then be released. At this time that headset will be the
new order taker headset and it’s microphone will be active.
.
• Remember:
• A solid on LED indicates a “LIVE” microphone.
• A ashing LED indicates a “MUTED” microphone while a customer remains at the order point.

Wentworth Technology, Inc. www.wentworthtechnology.com 877.495.1634 12
Speed Team Mode
This mode allows for the use of an outside order taker to acquire and transmit orders from customers
in the drive thru lane beyond the menu board. The key feature of the mode is the disabling of the
vehicle detection tone and the order point speaker and microphone. The microphone and speaker of
the order taker headset stays on full time when the center button is pressed so that the other headset
wearers (and grill speakers) may hear the customer place their order.
TIP: Should it be desirable to continue to use the order point speaker and microphone to take
alternate orders from guests, do not select Speed Team Mode. Instead, use Push to Talk to
communicate with the guests whose order needs to be taken at the order point. The outside
ordertaker may then relay orders to another team member using the Page channel.
Day/Night Mode Information:
Some local authorities require a diminished speaker volume during evening
operations to reduce noise in certain neighborhoods. The SpeedThru system accommodates this
requirement, allowing the operator to choose the desired time for the increased volume as well as the
volume setting.
Alternately, the restaurant may be located near a noise source, which reduces around the same time
each day. Therefore an elevated speaker volume to allow customers better opportunity to hear the
voice of the order taker may be desired.
The home screen will display the current mode (Day or Night) by the appropriate graphic. To change
these settings (volume and time) access the “Settings” screen.

Wentworth Technology, Inc. www.wentworthtechnology.com 877.495.1634 13
Menu A Information:
This graphic represents the order point. A car image will appear when a vehicle is present at the
order point. It will be blank when no car is present.
System Clock:
The clock reports the time in 24-hour format. (See “Settings”, “Set Clock” to adjust.)
Resetting the System:
Reset- Pull the power supply cord (barrel plug) located on the right of the base station for one
second, then re-insert. The system will always retain the restaurant-adjusted settings. The headsets
will automatically re-establish communications with the base in a few moments, playing “Headset
connected” in headset as an audio conrmation.

Wentworth Technology, Inc. www.wentworthtechnology.com 877.495.1634 14
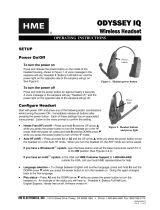
Headset Operation Instructions
Headset Features:
• Battery compartment and access door
• Power button and indicator light
• Adjustable headband
• Adjustable boom
• Talk button
• Page button
• Volume swipe
• Inside microphone
• Outside microphone
• Ear piece cushion and speaker
Headset Power On and Off:
Press and release the power button located on the battery compartment side of the headset. The
power light will illuminate near the power button. The headset will establish a communications link
with the base station if it has been previously registered. If the headset has not previously been
registered see the section on “Register Headsets.”
To power off, simply press and release the power button located on the battery compartment side of
the headset. The power light will go out.
Adjusting the Headset for Size:
A sliding adjuster is built into the battery compartment portion of the headset. Grasp the battery
compartment and gently slide the headset headband to adjust for proper t.

Wentworth Technology, Inc. www.wentworthtechnology.com 877.495.1634 15
Method for tightening the t of a SpeedThru headset
The dual headbands may be-
come miss-shaped resulting in
a loose t. To tighten the “grip”
of the headset, grab one side of
the headset in each hand and
pull the two sides past each
other as illustrated in the photos.
A video of this process is avail-
able on our website.
Adjusting the Microphone Boom:
To maintain the best sound quality the microphone boom should point at the corner of the mouth.
The boom allows for enough adjustment that the headset may be worn for right-hand or left-hand
operation.
Headset Buttons:
The WT headset features three (3) electronic touch “buttons”
that sense the presence of a nger. No pressure is required
as there are no moving parts. Only one button at a time may
be activated. (The headset ignores multiple buttons touched
at one time.)
• The TALK or CENTER button is the larger center
depression on the headset. Actuate this button by placing
ngertip in the depression. The button has different
operation depending upon the Headset Mode selected. See
Headset Mode Descriptions.
• The PAGE button is the smaller, off-center button.
To communicate to other team members, place and hold a
ngertip in the button area. PAGE ends when the ngertip is
removed or after 45 seconds if being continuously activated.
The Page function will not interfere with the customer order
in process.
• The VOLUME button is a “nger sweep” area along the raised rim across the wide end of
the headset. Each “sweep” of the nger across the area will raise or lower the volume of the
headset ear speaker, depending on the direction of the “sweep”. An increasing or decreasing
tone will indicate the change in volume. “Minimum” or “Maximum” will play when the available
volume adjustments have been made.
Tip: For the volume not to be accidentally adjusted, the sweep speed is designed to be deliberate
and made at a reasonably slow rate.

Wentworth Technology, Inc. www.wentworthtechnology.com 877.495.1634 16
Battery Installation:
The battery compartment is located on the opposite side of the headset from the microphone boom.
To open the battery compartment, push up on the battery door latch while pulling out the bottom of
the door. Insert the battery with the label facing out. Replace the door by inserting the top of the door
in its slot followed by pushing the bottom of the door into place until it locks.
Battery Low Alert:
When a battery reaches a low level of charge a “Low Battery” prompt will sound. The Battery Low
Alert will sound reminders once every 30 seconds for about 2 minutes until the battery is replaced.
If ignored the headset will either automatically power off or turn the boom LED solid red and disable
button presses depending on the headset version you are using. . Ample time is provided from the
rst alert until the headset shuts down (1 hr +). headsets will monitor the battery level and when it
gets consistently low, it will play the “LOW BATTERY” message 4 times (30 seconds apart) and then
play “HEADSET OFF”, turn the boom LED solid red, and disable the button presses.
Battery Charging:
Place the battery in one of the charging ports on the battery charger. The lights will communicate the
charging or ready status of the battery. Battery charging time is approximately 4
hours. Only remove batteries from the charger when the light is green, indicating a
full charge. Only charge depleted batteries. For example, do not charge batteries at
the end of each shift.
Either a 3-bay or 6 bay battery charger is part of this sytem.
3-Bay: Insert batteries with label to the right. A red light will display if the battery
needs charging. A green light indicates a fully charged battery.
6-Bay: Insert batteries with the label away from the latch. A ashing amber
battery indicates a pending charge. An amber light indicates a charging battery. A
solid green light indicates a fully charged battery.
It is recommended that 6-bay chargers be wall mounted to reduce the likelihood of liquids,
or debris falling into the charger. The lights must be on the right side, which will place
the retention latches under each battery. Also run the power supply cord behind the wall
mounted charger to prevent accidential unplugging.
battery door latch

Wentworth Technology, Inc. www.wentworthtechnology.com 877.495.1634 17
17
Battery Care:
Do not carry batteries in your pocket where they may come in contact with metal, resulting in a quick
discharge and possible re.
Disposing of Batteries:
Old batteries may be returned to WT or disposed of at any battery recycling station.
Headset Cleaning:
Wipe the exterior of the headset with a soft cloth dampened with a mild cleaning solution. Do not
immerse the headset in water.
• Ear foams are replaceable.
• Microphone boom port foam ovals are replacable. Dirty foam can negatively affect noise
canceling functions
Tone Descriptions:
Vehicle Detected (Hands Free) Repeating Beep, every second
Vehicle Detected (Auto Hands Free) Single Beep, microphone opens
Low Battery “Low Battery”
Headset Registered “Headset Connected” voice prompt
Headset Not Registered “Headset not connected” voice prompt
Volume Up/Down 2 step tones, increasing volume for up,
decreasing for volume down
Minimum/Maximum Volume “Minimum” or “Maximum” voice prompt
Page “Page”
Tap/Talk Quick short tone/chirp for ON, Double tone/chirp
for mute
Power on sound Either “Headset connected or “out of range”
Mode Options Voice Prompt: “Push to talk”, “Hands Free”, “Auto
Hands Free” or “Speed Team”
Listen Only Voice Prompt: “Listen Only” repeated if center
button is touched.
Light Descriptions
Red LED ashes in boom vehicle detected, muted microphone
Red LED solid in boom vehicle detected, microphone is “LIVE”
Power light on the battery side Unit on
Wentworth Technology, Inc. www.wentworthtechnology.com 877.495.1634

Wentworth Technology, Inc. www.wentworthtechnology.com 877.495.1634 18
Wentworth Technology, Inc. www.wentworthtechnology.com 877.495.1634 18
Greeter Set Up
Some SpeedThru systems come with an
optional Greeter. The Greeter Plays up to 7
pre-recorded messages in the order post as a
customer drives up. It will select which message
plays based on the day of the week and the day
part selected. To access, press to
access the Greeter control screen.
Greeter On - OFF
This screen shows the Greeter in the ALL OFF
setting. Press to turn on the Greeter.
Record Message
Select G1 through G7 to open the recorder
function. (G1 is shown as selected)
...plays the message in headset only
(not to order post).
...starts the recorder. Hint: Pause for 2-3
seconds before touching the center button on the headset to record a message so the drive thru cus-
tomer has time to roll down the window before the message is played.
...stops the recorder
Greeter messages are recorded using the headset. No orders may be taken while the message
recordings are being made.

Wentworth Technology, Inc. www.wentworthtechnology.com 877.495.1634 19
Press immediately when the recording is complete so that the message is ended promptly.
If not stopped, the recorder will continue until 16 seconds have elapsed.
To exit the Record Message function, press the “G” button (G1 - G7) to release it. No other functions
may be selected until the button is released.
Select Label
Press one of the seven message
labels (Dinner is shown selected)
to display the scroll function.
Press the to scroll
through the available labels to
identify the recorded message.
To exit the Label function, press
the selected label to release
it. No other functions may
be selected until the button is
released.
Set Time
Select the start and end time of
the daypart you wish to set and
the Up/Down edit arrows
will appear.
Adjust the time by 15 minute
increments until the desired time
is set.
Set Date: All recordings must
be done with the M-T button depressed, regardless of the day you wish it to play. Once recording is
complete, you may select day of the week you want it to play. Any combination of M-T, F, S, S.
Greeter Operation
• Vehicle arrives at menu board
• Greet plays. Then Greet ends
• Vehicle tone sounds and inbound audio comes on
• Mode options:
Hands Free Mode- Operator touches Center Button to open full communication
Auto Hands Free Mode- Headset automatically opens communication after one beep
Push to Talk Mode- Operator pushes and holds Center Button to open communication
/