Page is loading ...

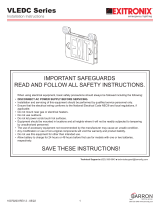
Use Flexible Conduit Only
1. Disconnect power at fuse or circuit breaker before installing or servicing.
2. Do not use outdoors.
3. Do not mount in hazardous locations, or near gas or electric heaters.
4. Do not let power cords touch hot surface.
5. Equipment should be mounted in locations and at heights where it will not be subjected to tampering by unauthorized
personnel.
6. Do not use this equipment for other than intended use.
7. All servicing should be performed by a qualified personnel only.
8. After installation is finished, Please charge battery 24hours.
Page 1 of 2
IMPORTANT SAFEGUARDS
INSTALLATION INSTRUCTIONS FOR
LED EMERGENCY LIGHT
READ AND FOLLOW ALL SAFETY INSTRUCTIONS
When using electrical, basic safety precautions should always be followed including the following.
OPERATION
TROUBLE SHOOTING GUIDE
If LED heads or LED indicator does not illuminate, check the following:
1. Check AC supply - verify that unit has 24 hours AC supply.
2. Battery connection.
3. Discharge the Battery and then charge the battery for 24 hours and retest.
4. If above trouble shooting hints do not solve the problem, contact factory for assistance.
DUAL VOLTAGE INPUT (120/277V)
SAVE THESE INSTRUCTIONS
MAINTENANCE
Battery have to recharge if product keep in stock over 9 months, detail manual refer “BATTERY STOCK AND RECHARGE
GUIDELINE”.We recommend that the equipment is tested regularly in accordance with local codes. Replace the batteries as
needed if discharge time do not achieve 90 minutes.
Press the test button. The LED heads will turn on and the LED indicator light will turn off.
Release the test switch,So that the LED indicator will turn on and the LED heads will turn off.
Halco Lighting Technologies www.halcolighting.com

Mounting Instructions
Wall Mount - Back Power Feed (see Fig 2)
1. Open front cover and remove top knockout on the top flange of fixture.
2. Secure conduit (or surface raceway) to knockout and feed wires.
4. Refer to above 5 - 10 steps in Wall Mount-Back Power Feed.
Page 2 of 2
3. Remove keyhole knockout on back plate and mount to wall.
5. Connect the J-box wires to the power supply wires using the wire
nuts provided. Connect the white wire to neutral. If using 120V,
connect the black wire to the hot lead. If using 277V, connect the
orange wire to the hot lead. Cap the unused lead. Press the wires
into the J-box (Refer to Wiring diagram below).
6. Connect remote heads. Refer to below instruction for remote heads.
7. Connect battery connector.(see Fig 2).
8. Snap the front cover onto the back plate.
9. Restore power and press test button. LED heads will turn on.
10. Adjust the lamp head and lens direction as per needs
Connect Remote Heads (see Fig 2)
White NEUTRAL
Black 120V/AC
Orange 277V/AC
AC INPUT
Charge
PCBA
Integral
LED Head
Remote heads
3.6V1.5W max.
(option)
Wiring Diagram
Fig 1
Fig 2
Fig 4
Remote capability 3.6V1.5W max.---just for RC option.
Attach remote wire on remote connector on PCBA.
Connect remote heads extended wire to remote wire, yellow is
positive(+), purple is negative(-). connect wires using wire nuts.
Open fixture
Wall mount-
Back Power Feed
Wall mount-
Top Power Feed
Ceiling Mount (see Fig 3)
Refer to above Wall mount-Back Power Feed instruction.
Here are some differences:
Mount back plate on the ceiling surface instead of wall surface.
Feed building AC supply wire through back plate then connect to
fixture power supply wires using wire nuts provided.
Fig 3
Ceiling mount-
Top Power Feed
Max. Mounting Height
Wall Mount - Top Power Feed (see Fig 4)
EV-EME-R
22 ft
Back plate
Remote
connector
Front cover
Battery
connector
Back plate
Remote
connector
Front cover
Battery
connector
Front cover
knockout
Conduit
Ceilling mounting Wall mounting
21 ft
Halco Lighting Technologies www.halcolighting.com
EV-EME-R
EV-EME-R-RC EV-EME-R-RC
/