Page is loading ...

INSTALLATION
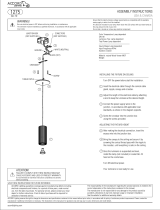
WARNINGS AND INSTRUCTIONS FOR LUMINAIRES
IMPORTANT: FOR YOUR PROTECTION, YOU MUST CAREFULLY READ ALL WARNINGS AND INSTRUCTIONS IN THEIR
ENTIRETY PRIOR TO
INSTALLATION, OPERATION, SERVICE, OR MAINTENANCE. FAILURE TO DO SO CAN RESULT IN DEATH, PERSONAL
INJURY AND PROPERTY
DAMAGE. If you do not understand these warnings and instrucons, or if addional informaon is desired, please
contact the Customer
Care Call Center at 800‐555‐0050.
Installation, service, and maintenance of luminaires must be performed by a qualified professional and
in accordance with all federal, state, and local laws, regulations, and electrical codes. This professional
should be familiar with the construction and operation of this product and any hazards involved. If not
qualified, do not attempt installation, service or maintenance.
To reduce the risk of death, personal injury or property damage from fire, electric shock, falling parts,
cuts, abrasions, and other hazards, please read all warnings and instructions included with the
luminaire, on the luminaire’s packaging and affixed to the luminaire itself.
Maintenance of the luminaires should be performed by person(s) familiar with the luminaire’s
construction and operation and any hazards involved.
CAUTION
RISK OF PRODUCT DAMAGE
Never connect luminaires and/or components under load with supply voltage turned on.
Do not mount or support these luminaires in a manner that can cut the outer jacket or damage wire insulaon.
Do not restrict xture venlaon. Allow for some volume of airspace around the luminaire. Avoid covering the
luminaire with insulaon, foam, or other material that will prevent convecon or conducon cooling.
Do not exceed luminaire maximum ambient temperature.
Do not modify the luminaire.
Only use luminaire in its intended applicaon and locaon.
LED products are polarity sensive. Ensure proper polarity before installaon.
Electrostac Discharge (ESD) can damage LED. Personal grounding equipment must be worn during all
installaon and servicing of the luminaire.
Do not touch individual electrical components as this can cause ESD, shorten LED life, or impact LED
performance.
Some components inside the luminaire may not be serviceable. In the unlikely event, your luminaire may
require service, stop using it immediately and contact the Customer Care Call Center at 800‐555‐0050.
Always read the luminaire’s complete installaon instrucons prior to installaon for any addional luminaire‐
specic warnings.
WARNING
RISK OF FIRE, ELECTRIC SHOCK OR PERSONAL INJURY
Disconnect or turn o power before aempng any installaon, service or
maintenance.
Verify that supply voltage is correct by referencing the luminaire label
informaon.
Make all electrical and ground connecons in accordance with the
Naonal Electrical Code (NEC) and any other applicable laws, regulaons,
or codes.
All wiring connecons should be capped with UL‐approved wire
connectors.
WARNING
RISK OF PERSONAL INJURY
Keep combusble materials away from LED/lamp & lens.
Do not operate in close proximity to persons, combusble materials or
substances aected by heat or drying.
WARNING
RISK OF PERSONAL INJURY
Wear gloves and safety glasses at all mes when removing luminaire
from carton, installing, servicing or performing maintenance.
Avoid direct eye exposure to the light source while it is on.
WARNING
RISK OF FIRE, ELECTRIC SHOCK OR PERSONAL INJURY
Allow LED/lamp & lens to cool before handling.
Do not touch enclosure or light source.
Do not exceed maximum waage marked on luminaire label.
Follow all manufacturer’s warnings, recommendaons, instrucons, and
restricons for driver type, burning posion, mounng locaons and
replacement.
In the case of HID or Fluorescent luminaires, regular re‐lamping is required to keep the luminaire operang
within safe limits.
Do not install damaged products. Handling and installing damaged products can potenally increase the risks
menoned. In case of damage and/or missing parts upon arrival of the luminaire, please contact the Customer
Care Call Center at 800‐555‐0050.
page 1 of 4

INSTALLATION INSTRUCTIONS FOR CSEC[X]RWW EMERGENCY COMBO
CAUTION: This equipment used special circuit diagram to protection for LiFePO4 battery overcharge
and over discharge. Allow 24 hour recharge time after installation or power failure for full load testing.
These instrucons do not purport to cover all details or variaons in equipment nor to provide every possible
conngency to meet in connecon with installaon, operaon, or maintenance. Should further informaon be
desired, or should parcular problems arise which are not covered suciently for the purchaser’s or owner’s
purposes, this maer should be referred to the Customer Care Call Center at 800‐555‐0050.
Please see luminaire‐specic Installaon and Maintenance Instrucon for addional warnings or any applicable
FCC or regulatory statements. Failure to follow any of these instrucons could void luminaire warranes.
Luminaire Maintenance and Operation
Regular luminaire maintenance programs are recommended.
It is recommended to clean the outside of the luminaire and the refractor/lens.
Frequency of cleaning will depend on ambient dirt level and minimum light output which is acceptable to the
user.
If clean water is not sucient for cleaning, use a neutral, synthec, non‐scratching, and non‐abrasive cleaning
substance.
Never use alkaline and/or acetous cleaning substances.
Make sure that the cleaning substance is carefully removed by rinsing with lots of clean water.
Signify recommends using a cleaning soluon that has a PH between 5 and 8.
Recycle: For informaon on how to recycle electronic products and components, please visit www.epa.gov.
To test self powered units, depress test switch, lamp head will remain lit when switched to battery power.
Release test switch, lamp head will operate with AC supply.
Servicing of any parts should be performed by qualified personnel. For replacement parts to see fixture label
for proper identification of manufactory.
Replace batteries according to ambient conditions. Equipment should be tested regularly in accordance with
local codes.
Max mounting height: 35 ft.
page 2 of 4
NOTE: This equipment has been tested and found to comply with the limits for a Class A digital device,
pursuant to part 15 of the FCC Rules. These limits are designed to provide reasonable protection against
harmful interference when the equipment is operated in a commercial environment. This equipment
generates, uses, and can radiate radio frequency energy and, if not installed and used in accordance
with the instruction manual, may cause harmful interference to radio communications. Operation of this
equipment in a residential area likely to cause harmful interference in which case the user will be required
to correct the interference at his own expense.

Side cover
Glass panel
WIRING DIAGRAM
AC wiring
Remote head wiring for remote capability unit,
connect Max. 6V 3W remote head to lamp head
connector.
Fig 1
Batt
AC input MAIN PCBA Battery
Indicator
Test switch
Fig 2
Liner
PREPARATION WORK FOR INSTALLATION
EXIT LED strip
LED strip
White NEUTRAL
Black 120~277VAC
Lamp head
WALL MOUNT INSTALLATION
Step 1. Extend unswitched 24 hour AC supply of rated
voltage to junction box. Leave at least 18 inches
of slack. Circuit should not be energized at this time.
Step 2. Disassemble glass panel by removing the screw
holding side cover, use flat head screwdriver to
open the liner. See Fig 2.
Step 3. Knock out the appropriate mounting pattern and
wire pass hole to match junction box. Insert
bushing into wire access hole to prevent abrasion
on supply wires,bring wires through back of fixture.
Step 4. Connect power supply and ground in accordance
with local codes. Neutral line to white lead, 120V
or 277V Live line to black lead, ground to green
lead. Splice connections must be pushed back into
Step 5. Mount to junction box.
Step 6. Reconnect battery connector.
Step 7. Energize AC supply, LED will come on.
Step 8. Fasten liner back, slide the glass panel back to
housing, reassemble side cover and screw removed
Fig 3
Liner
Fasten liner back.
Junction box screws(by others)
Junction box
(by others)
Housing Battery connector Back plate
page 3 of 4
Connect the white wire to neutral, connect the
black wire to the hot lead, connect the green
wire to the ground lead.
the junction box.
in Step 2.
CEILING OR SIDE MOUNT INSTALLATION
Step 1. Extend unswitched AC supply of rated voltage to
junction box. Leave at least 18" of slack. Circuit
should not be energized at this time.
Step 2. Disassemble glass panel by removing the screw
holding the side cover, use flat head screwdriver
to open the liner. See Fig 2.
Step 3. Knock out the appropriate mounting pattern on top
or side of housing to accommodate canopy.
Step 4. Fasten canopy to exit housing by means of two
#8-32x3/8 screws and nuts.
Step 5. Feed unswitched AC supply through center of crossbar.
slots and using screws supplied with junction box. Fig 4
Mount crossbar to junction box by choosing proper

Step 6. Feed wires through exit housing and canopy.
Step 7. Connect power supply and ground in accordance
with local codes. Neutral line to white lead, 120V
or 277V Live line to black lead, ground to green
lead. Splice connections must be pushed back
Step 8. Mount exit-canopy assembly to crossbar using two
#8-32x1 screws.
Step 9. When side mounting, route wires along top and
side edges of exit frame. Use wire manager
Step 10. Reconnect battery connector.
Step 11. Energize AC supply, LED will come on.
Step 12. Fasten liner back, slide the glass panel into the
housing, reassemble side cover and screw
CONDUIT MOUNT INSTALLATION
Step 1. Extend unswitched AC supply of rated voltage to
conduit. Leave at least 18" of slack. Circuit should
not be energized at this time.
Step 2. Disassemble glass panel by removing the screw
holding the side cover, use flat head screwdriver
to open the liner. See Fig 2.
Step 3. Knock out the mounting pattern on top of the
sign housing.
Step 4. Feed wires through the center hole and fasten
conduit to exit housing by conduit nut.
Step 5. Connect power supply and ground in accordance
with local codes. Neutral line to white lead, 120V
or 277V Live line to black lead, ground to green
lead. Splice connections must be enclosed by liner.
Step 6. Reconnect battery connector.
Step 7. Energize AC supply, LED will come on.
Step 8. Fasten liner back, slide the glass panel into the
housing, reassemble side cover and screw removed
Conduit (by others)
Fig 5
Conduit nut(by others)
© 2023 Signify Holding. All rights reserved. The information provided herein is subject to change, without notice. Signify does not give any representation or
warranty as to the accuracy or completeness of the information included herein and shall not be liable for any action in reliance thereon. The information
presented in this document is not intended as any commercial offer and does not form part of any quotation or contract, unless otherwise agreed by Signify
Signify North America Corporation
400 Crossing Blvd, Suite 600
Bridgewater, NJ 08807
www.chloride-lighting.com
page 4 of 4
Fig 7
[The following steps required when converting to
double(2) face.]
Step 9. Fasten liner back, remove backplate, slide
the glass panels into the housing. (take note to
confirm direction of panels)
in Step 2.
into the junction box.
removed in Step 2.
[The following steps required when converting to
double (2) face.]
Step 13. Fasten liner back, remove backplate, slide
the glass panels into the housing. (take note to
confirm direction of panels)
Fig 6
provided to hold wires flush to inside of housing.
Telephone 800-555-0050
/