Deagostini Spitfire User guide

Type
User guide

Deagostini Spitfire: Build a detailed 1:12 scale model of the iconic Supermarine Spitfire Mk Vb fighter plane with this comprehensive kit. Explore the intricate details and historical significance of this legendary aircraft as you assemble it piece by piece.

Deagostini Spitfire: Build a detailed 1:12 scale model of the iconic Supermarine Spitfire Mk Vb fighter plane with this comprehensive kit. Explore the intricate details and historical significance of this legendary aircraft as you assemble it piece by piece.

1
Build the Spitfire: Step-By-Step
Pack 1
Stages 1-4
2
Build the Spitfire: Step-By-Step
12-4
25-8
39-11
412-14
Stage PagesParts
1 - Instrument panel
2 - Aluminium plate
3 - Propeller blades
4 - Gears for propeller blades
1 - Fuselage frame 1
2 - Right lateral fuselage
3 - Propeller crown
4 - Ring of propeller cone
5 - Spinner base plate
6 - Aluminium plate
1 - Left lateral fuselage
2 - Fuselage frame
3 - Wood Glue
4 - Tyre
5 - Wheel rim
Contents
1 - Fuselage frame 4
2 - Rivet marker
3 - Aluminium plate
4 - Propeller spinner
1
Build the Spitfire: Step-By-Step
Assembling your Supermarine Spitre Mk Vb
The 1:12 scale model that you are going to build is a faithful reproduction of a Supermarine Spitfire Mk Vb,
the most widespread and characteristic version of this extraordinary fighter plane.
You will be supplied with the necessary pieces, along with easy-to-follow, step-by-step instructions for you
to be able to build this remarkable model, from the cockpit, with all its accessories, to the landing gear.
This exceptional model has been designed by aero modelling specialists from original plans and
specifications from the period, enabling you to build a high-quality model in terms of its details and the
materials used.
We will also be supplying or making available for purchase all the elements that will give your scale model
an extra degree of realism – an electric motor to turn the propeller, signal lights, controls to deploy the
landing gear and a display stand. Begin building your Supermarine Spitfire Mk Vb today!
2
Build the Spitfire: Step-By-Step
With a metal file, smooth any rough or uneven
surfaces on the edges of the propeller blades.
To provide an even tone, rub down the two faces
of each propeller blade with very fine glasspaper
to make them shine.
1 2
3
3
This stages parts You will need
Stage 1
1 - Instrument panel
2 - Aluminium plate
3 - Propeller blades
4 - Gears for propeller blades
Metal file
Glasspaper
Fast-drying metal glue
3
1
2
4
3
Build the Spitfire: Step-By-Step
Repeat this operation with the two other blades
until all the gears have been fixed into place.
5
Then, fit the gear onto the small projection at the
end of the propeller blade and wait for the glue to
dry before proceeding.
4
4
3
Ensure that each blade fits properly into its gear
housing before applying fast-drying metal glue to
the end of the propeller blade (broken red line).
3
3
4
Pay close attention to the placing of the blades.
They will be mounted on a single round piece
which has a central crown designed to move all
three blades simultaneously. These parts will be
assembled in Stage 3.
6
4
Build the Spitfire: Step-By-Step
Once you have all the parts, you will mount them ahead of the fuselage on a
central axle which will allow the propeller to rotate freely.
Here is the result
of this phase of the
construction.Keep the
other pieces in a safe
place, as they will be
used in later stages of
the assembly.
7
8
5
Build the Spitfire: Step-By-Step
1 - Left lateral fuselage
2 - Fuselage frame
3 - Wood Glue
4 - Tyre
5 - Wheel rim
Assemble the wheel rim and the tyre by inserting
one of the parts of the rim into the centre of the
tyre.
Ensure that the rim is centred on the opening of
the tyre, and perfectly aligned with it.
Superglue
Fine sandpaper
Set-square
1 2
5
4
5
4
2
3
5
4
1
Stage 2
This stages parts You will need
6
Build the Spitfire: Step-By-Step
Align and insert the other part of the rim and wait
for the glue to dry.
Repeat the operation on the frame to prepare it
for attachment to the fuselage.
Take the left lateral fuselage and smooth its entire
surface with very fine sandpaper to remove any
irregularities.
5
4
1
2
4
6
5
Turn the tyre over and apply a little superglue to
the part of the rim that appears in the opening.
3
7
Build the Spitfire: Step-By-Step
Place the frame into the slots on the fuselage,
taking care to position it accurately.
Before the glue has
completely dried, check
the position of the frame
and, using a set-square,
ensure that it is at an
angle of 90 degrees to the
fuselage.
2
1
90o
8
9
Position the fuselage as shown in the photo. Apply
PVA glue along the broken red line that indicates
the position where the frame is to be attached.
1
7
8
Build the Spitfire: Step-By-Step
This photo shows the final construction of the framework of the fuselage. As you
assemble the pieces, your model will begin to resemble this photo.
Here is how the
pieces that you have
assembled look at this
stage of the Spitfire’s
construction.
2
10
11
9
Build the Spitfire: Step-By-Step
1 - Fuselage frame 1
2 - Right lateral fuselage
3 - Propeller crown
4 - Ring of propeller cone
5 - Spinner base plate
6 - Aluminium plate
Take the right lateral fuselage and smooth all
of its surfaces with fine sandpaper to remove any
irregularities.
Repeat the operation on fuselage frame 1 to
prepare for the assembly of the two pieces.
12
21
Fine sandpaper
Set-square
Wood glue
Metal file
Stage 3
This stages parts You will need
6
1
2
35
4
10
Build the Spitfire: Step-By-Step
Before the glue dries, check with a set-square that
the position is correct. The frame should form a
90-degree angle with the fuselage.
6
Apply some wood glue to the part of the fuselage
where the new frame will be fitted, marked by the
dotted red line.
4
Place the frame as shown in the photo, taking care
to ensure that it is in the correct position.
5
1
Take the fuselage parts that you assembled in the
previous issue and place them as shown in the
photo. Check that fuselage frame 1 fits in its place.
3
1
11
Build the Spitfire: Step-By-Step
This photo of the assembled fuselage shows the
position of all the different pieces.
Fit the metal parts together, with the propellor
crown in the centre of the ring of propeller cone,
and the spinner base plate on top, as shown.
Check that the parts fit properly, but do not glue
them at this stage.
Use a fine file to remove any burrs from the parts
that will make up the propeller.
This is the assembly of
pieces at this stage of the
build. For now, keep the
metal plates in a safe place.
8
10
9
11
1
2
The right lateral fuselage will be attached to its
counterpart in the way shown in the photo. Do
not glue it now. It will be glued only after you
have installed the other frames.
7
12
Build the Spitfire: Step-By-Step
Take the frame and smooth all of its surfaces with
fine sandpaper.
Take the parts that you assembled last time and
place frame 4 in the position shown
in the photo, to ensure that it fits well.
1
1 2
1 - Fuselage frame 4
2 - Rivet marker
3 - Aluminium plate
4 - Propeller spinner
Fine sandpaper
Set-square
Wood glue
Steel rule
Small clamps
Stage 4
This stages parts You will need
1
2
3
4
13
Build the Spitfire: Step-By-Step
Place the frame as shown in the photo, taking care
to place it in the correct position. Before the glue
dries, check with a set-square that the frame forms
a 90-degree angle with the fuselage.
Take the right lateral fuselage (Stage 3) and place
it on the frame edges. While the glue dries, you
can hold the pieces of the assembly together with
some small clamps.
After the first glue has dried, apply more glue
to the edges of the two frames, as indicated in red,
to fix the other lateral fuselage.
90o
4
6
5
You will note that the front part of the lateral
fuselage is not glued to the frame (indicated by
the red arrow). You will glue this once the parts
supplied in the next issue have been assembled.
7
Apply PVA wood glue to the parts of the fuselage
(broken red line) that will come into contact with
the frame.
3
14
Build the Spitfire: Step-By-Step
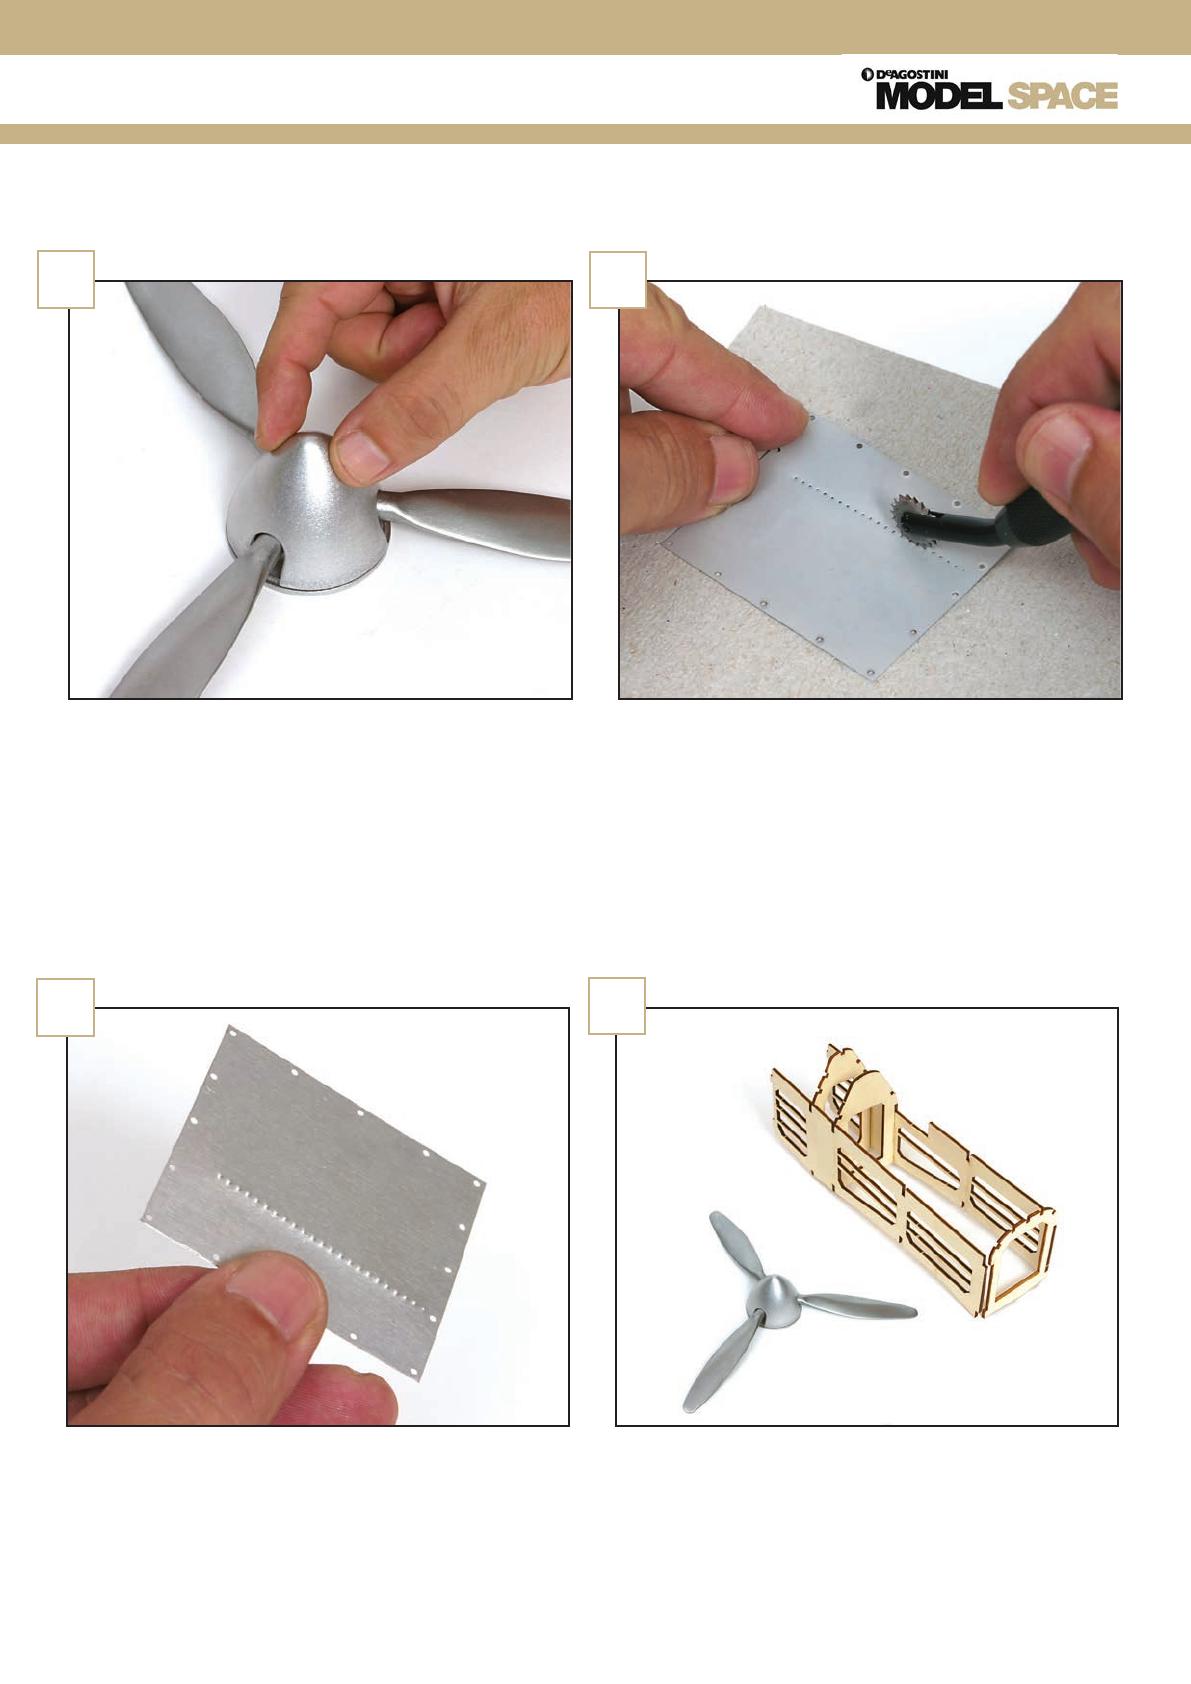
Put the propeller spinner in place over the pieces
that you assembled in Issue 3. You now have
almost all of the propeller pieces. You will finally
assemble them with the help of the vices provided
in future issues.
The rivet marking tool will enable you to produce
the rows of indentations far closer together
and more precisely than would be possible by
hand. Again, wait until you are given detailed
instructions before marking any of the panels you
have received so far.
To create the effect of riveting on the aluminium
plates that will cover the fuselage and wings of
your Spitfire, you will use the rivet marker tool, as
shown above. Do not mark out any of your plates
yet, as detailed explanations as to preparation and
spacing will be given at a later stage.
This is how the pieces should look once you have
completed this stage of the assembly.
8
10
9
11
  • Page 1 1
  • Page 2 2
  • Page 3 3
  • Page 4 4
  • Page 5 5
  • Page 6 6
  • Page 7 7
  • Page 8 8
  • Page 9 9
  • Page 10 10
  • Page 11 11
  • Page 12 12
  • Page 13 13
  • Page 14 14
  • Page 15 15
  • Page 16 16

Deagostini Spitfire User guide

Type
User guide

Deagostini Spitfire: Build a detailed 1:12 scale model of the iconic Supermarine Spitfire Mk Vb fighter plane with this comprehensive kit. Explore the intricate details and historical significance of this legendary aircraft as you assemble it piece by piece.

Ask a question and I''ll find the answer in the document

Finding information in a document is now easier with AI