Deagostini Spitfire User guide

Type
User guide

Deagostini Spitfire: Embark on a hands-on journey to construct a detailed replica of the iconic Spitfire aircraft, featuring intricate parts, historical accuracy, and the chance to learn about its engineering marvels and historical significance. Immerse yourself in a rewarding modeling experience, suitable for hobbyists and history enthusiasts alike.

Deagostini Spitfire: Embark on a hands-on journey to construct a detailed replica of the iconic Spitfire aircraft, featuring intricate parts, historical accuracy, and the chance to learn about its engineering marvels and historical significance. Immerse yourself in a rewarding modeling experience, suitable for hobbyists and history enthusiasts alike.

1
Build the Spitfire: Step-By-Step
Pack 23
Stages 88-90
2
Build the Spitfire: Step-By-Step
Contents
Stage Parts Pages
88
1 - Lower wing plate 25
2 - Lower wing plate 26
3 - Lower wing plate 30
4 - Spare plate
5 - 2 x 5 x 300mm wooden strips
6 - Template
306-308
89
1 - Fuselage plate 5
2 - Fuselage plate 6
3 - Fuselage plate 7
4 - Fuselage plate 12
5 - Fuselage plate 21
6 - Template
309-312
90
1 - Lower wing plate 22
2 - Lower wing plate 24
3 - Lower wing plate 29
4 - Lower wing plate 32
5 - Lower wing plate 33
6 - Template
313-315
306
Build the Spitfire: Step-By-Step
Cover the underside of the wing with paper,
securing it with tape and cut out the paper
covering the landing gear housing (dotted lines).
The covered wing should now look like this. When
painting, always cover sections that you don’t
want painted.
1 2
This stages parts You will need
Stage 88
1 - Lower wing plate 25
2 - Lower wing plate 26
3 - Lower wing plate 30
4 - Spare plate
5 - 2 x 5 x 300mm
wooden strips
6 - Template
Paper
Masking tape
Knife
Primer/metallic paint
Grey paint/clear varnish
6
4
51
32
307
Build the Spitfire: Step-By-Step
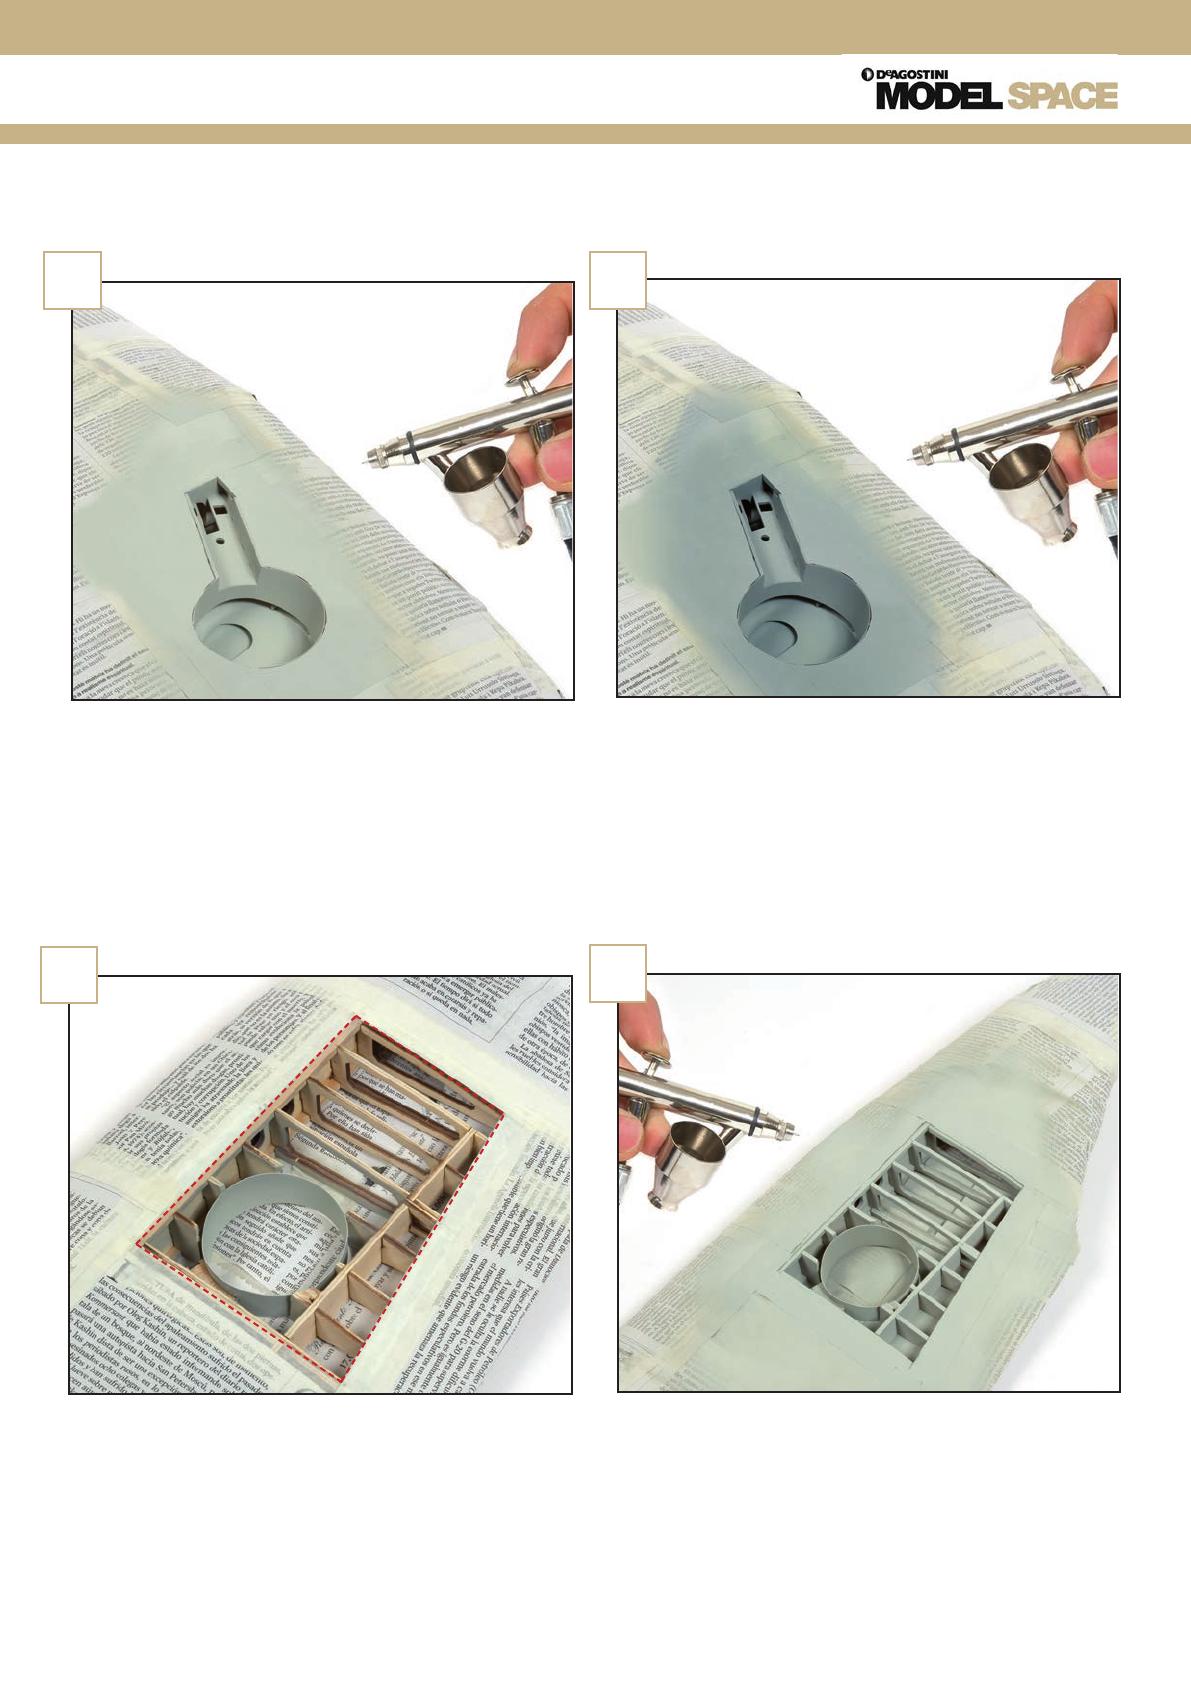
Cut out the area around the landing gear housing
(dotted line) on the right side of the wing.
5
When the primer has dried, paint the landing gear
housing with a satin grey acrylic paint slightly
mixed with water. Recommended paint colour
is Pantone 7543. Repeat for the landing gear
housing on the other side of the wing. Housing
shown painted grey.
4
If you don’t want to paint the plane, colour the
exposed wooden parts with a metallic paint
and apply a clear coat of varnish over the entire
surface. If you want to paint the plane, apply
a primer with an airbrush or spray can. Always
follow the manufacturers guidelines when using
paints, varnishes and primers. Housing sprayed
with primer shown here.
3
Paint the opening with primer, or metallic paint
and clear varnish.
6
308
Build the Spitfire: Step-By-Step
When the primer is dry, apply the same colour
paint as the landing gear housing.
This is how the painted area of the right wing
should now appear.
When the paint is almost dry, remove the masking
paper. If the paint has gone onto any of the plates,
wipe it off with a little water.
This is how the two landing gear housings should
now look from the underside of the wing.
The wing should now look like this. Keep any
unused parts to one side.
7
9
8
10
11
309
Build the Spitfire: Step-By-Step
Retrieve housing parts 1 and 2 from Stage 61. Test-
fit in the holes in the left landing gear housing.
Insert the projections at the end of the suspension
strut from Stage 70 into the holes in housing parts
1 and 2.
1 2
This stages parts You will need
Stage 89
1 - Fuselage plate 5
2 - Fuselage plate 6
3 - Fuselage plate 7
4 - Fuselage plate 12
5 - Fuselage plate 21
6 - Template
Tweezers
Glue
Drill/bits
Primer/metallic paint
Grey paint/clear varnish
6
23415
310
Build the Spitfire: Step-By-Step
Repeat this process on the other side of the wing
to create the second suspension assembly. Then
remove the wheels and paint the struts with the
same gray as the landing gear housing.
5
Remove the suspension and wheel, which are now
one piece.
4
Insert a strut with a wheel attached (Stage 72)
into the suspension strut. Once you have found
the correct position, apply glue to the end of the
wheel strut to secure it in place.
3
Drill a shallow, 2mm-wide hole in the four
projections of the wheel fairings, from Stage 69.
Don’t drill through the fairing.
6
311
Build the Spitfire: Step-By-Step
Smooth the surface of the fairings and paint them
the same grey as the suspension.
Place housing parts 1 and 2 back
onto the projections at the end of
the strut, and then into the holes in
the landing gear housing. Apply glue
to parts 1 and 2 to secure them in
the housing.
Fix the wheels to the suspension again and
place the assemblies onto the fairings, as shown,
aligning the holes at the side of the struts with
those in the fairing. Secure by tightening four
screws from Stage 69 into the four holes.
7
9
8
312
Build the Spitfire: Step-By-Step
The wing should now look like
this. Keep any unused parts to
one side.
11
Follow the same process to
complete the landing gear
on the other side of the wing.
There should be a gap of
130mm between them when
the landing gear is down.
10
130mm
313
Build the Spitfire: Step-By-Step
Take upper wing plate 16 and the template from
Stage 80. Place the plate on the template to
identify it.
Transfer the dashed line from the template onto
the plate with a marker and a ruler.
1 2
This stages parts You will need
Stage 90
1 - Lower wing plate 22
2 - Lower wing plate 24
3 - Lower wing plate 29
4 - Lower wing plate 32
5 - Lower wing plate 33
6 - Templates
Ruler
Marker pen
Rivet marker
Sandpaper
Glue
Awl
Hammer
62
13
4
5
314
Build the Spitfire: Step-By-Step
Place the plate at the right end of the wing. Adjust
to match the curve of the wing, and mark the
excess that overlaps (dotted lines).
5
This is how the plate should now look.
4
Place the plate on a flat surface and press the rivet
marker along the line marked in the previous step.
3
Sand the excess, marked in the previous step, from
the plate.
6
315
Build the Spitfire: Step-By-Step
Apply glue to the contact points between the
plate and the ribs of the wing (dotted lines).
When dry, punch two holes in the corners of the
plate (arrows).
Place the plate in position at the end of the wing.
Lightly hammer a nail into each hole.
The wing should now look like this. Keep any
unused parts to one side.
7
9
8
10
11
  • Page 1 1
  • Page 2 2
  • Page 3 3
  • Page 4 4
  • Page 5 5
  • Page 6 6
  • Page 7 7
  • Page 8 8
  • Page 9 9
  • Page 10 10
  • Page 11 11
  • Page 12 12

Deagostini Spitfire User guide

Type
User guide

Deagostini Spitfire: Embark on a hands-on journey to construct a detailed replica of the iconic Spitfire aircraft, featuring intricate parts, historical accuracy, and the chance to learn about its engineering marvels and historical significance. Immerse yourself in a rewarding modeling experience, suitable for hobbyists and history enthusiasts alike.

Ask a question and I''ll find the answer in the document

Finding information in a document is now easier with AI