Page is loading ...

A-1
A-2
Min. 2" (51mm)
Min. 4" (102mm)
<5/8" (16mm)
Attach Arm to Wall
2-A
1-2 Select Correct Monitor Screw Length
Correct CorrectToo Long
Too Short
CAUTION: Too short will not hold your monitor. Too long will damage your monitor.
1-3
Attach VESA Plate to Monitor
1
Which Situation Needs Spacers?
If the screw is too long or the surface is uneven, please choose the appropriate
screws and spacers for your monitor.
For more
spacing between
bracket and monitor
For protruded back
monitor
For counterbore
of monitor
To avoid the
blocked input
Option A: M4x12mm
Screw
VESA Plate
Spacer
23.5mm
5.5mm 10.5mm 13.5mm 18.5mm
Do not tighten the screws excessively or tighten them by
using the Electrodrill, or your monitor might be damaged.
Locate your studs. Verify and mark
the center of the stud by finding the
stud edges using awl and stud finder.
OPTION A:
Wood Stud Installation
Drill pilot holes using a
Ф3/16 in (Ф4.5mm) diameter drill bit.
IMPORTANT:
Do not drill holes into where water pipes
or electrical wires are located. Be sure to
drill into the center of the stud.
DANGER
Position the wall plate at your desired
height and line up the holes with your
stud center line. Level the wall plate
and mark the pilot hole locations.
Ф 3/16in
(Ф 4.5mm)
2 ¾ in
(70mm)
A
Level
T
Option B: M4x25mm
If you have any questions, please feel free to contact Customer Service
via Amazon before returning.
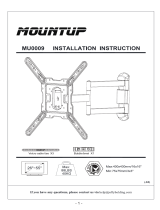
INSTALLATION INSTRUCTION
YZ2315_US2.0
NOTE: Not all parts and hardware included will be used.
Supplied Parts and Hardware
Extra Tools You Need (Not Supplied)
Socket
Wrench
ScrewdriverPencil Electrodrill
HammerMasonry
Drill Bit
For
Concrete Wall
Ф3/8"
(Ф10mm)
Stud
Finder
Awl Wood
Drill Bit
For
Wood Studs
Ф3/16"
(Ф4.5mm)
A (x1)
Lower Arm
B (x1)
Upper Arm
M-A (x4)
Screw M4x12mm
M-B (x4)
Screw M4x25mm
M-D (x2)
Set Screw M6x8mm
(Spare)
M-C (x8)
Spacer H5mm
±90°
6.8"
173mm
0.89"
22.5mm
7.6~11"
192~280mm
2.6"
65mm
3.74"
95mm
6.81"
173mm
10.6"
270mm
±135°
±90°
360°
+90°
-90°
3.54" / 90mm
6.65"
169mm 5"
127mm
1.65" / 42mm
5.2"
132mm
Wall Plate
L (x2)
Extenders
E (x1)
VESA Plate
D (x1)
Cable Cover
C1 (x1)
Decorative Cover
(Long)
C2 (x1)
Decorative Cover
(Short)
T (x1)
Bubble Level
J (x4)
Nuts
M5
K (x4)
Bolts
M5x10mm
H (x1)
Allen Key
6mm
F (x1)
Bolt
M5x10mm
G (x1)
Allen Key
3mm
W-B (x3)
Concrete Wall Anchor
Φ10x50mm
W-A (x3)
Lag Bolt
ST6.3x65mm
I (x1)
Open-end Wrench
S8mm / S10mm
E
Top of Monitor
UP
Center
line
J
K
L
L
E
I
200mm
150mm
150mm
200mm
100mm
200mm
100mm
75mm
75mm
100mm
100mm
ABC
12.5"
318mm
A-3
W-A
To avoid potential personal injury or property damage:
All 3 lag bolts MUST BE firmly tightened to prevent unwanted movement of
the wall plate assembly. Ensure the wall plate assembly is securely fastened to
the wall before continuing on to the next step.
W-A
CAUTION:
Install wall plate using lag bolts with Socket Wrench, NO Electrodrill.
No anchors when installed onto the wood studs.
W-A
H
MC
MA or MB
May be needed
ME
M-E (x4)
Washer
1-1
Attach VESA Plate to Monitor
1
Assemble Extenders (When VESA > 100mm)
W
H
Top of Monitor
VESA Pattern
(WxH)
VESA Pattern
(WxH)
Configuration Configuration
B C150mm x 150mm 100mm x 200mm
100mm x 100mm A B200mm x 200mm
75mm x 75mm A B200mm x 100mm
If your monitor hole pattern is greater than 100×100mm, attach extenders (L) to VESA
plate (E) using nuts (J) and bolts (K).
Select VESA Plate Configuration
Measure the width and the height of the square or rectangle formed from the VESA
holes pattern. Select the configuration to use based on the measurement from monitor.
Safety Caution
Please read this instruction carefully before installation. If you do not understand these
instructions or have doubts about the safety of the installation, assembly or use of this product,
please contact us.
● This product is designed for use in wood stud or solid concrete wall.
- DO NOT install into drywall alone.
● The wall must be capable of supporting five times the weight of the monitor and mount combined.
● Incorrect installation may result in product damage/property damage or body injury.
We shall bear no responsibility for any damage or injury resulted from incorrect installation,
incorrect assembly or misuse.
WARNING: This product contains small items that could be a choking hazard if swallowed.
Before starting assembly, verify all parts are included and undamaged. If any parts are missing
or damaged, do not return the damaged item to your dealer; please contact our customer
service team. Never use damaged parts!
Must Check Before Getting Started
VESA Pattern (W × H):
MIN: 75mm×75mm / 3"×3"
MAX: 200mm×200mm / 8"×8"
cm
inches
W
H
WARNING:
Gas Spring Arm is under pressure and should be handled
with care. Failure to follow the instructions may result in
damage to the mount and/or personal injury.
3 ~ 12 kg
6.6 ~ 26.4 lbs
Load
Capacity
WARNING: DO NOT exceed the
maximum weight indicated.
Min. 8"
(203mm)
Solid concrete wall
<5/8"(16mm)
Min. 2"
(51mm)
Min. 4"
(102mm)
Wall with wood studs
Tension adjustment should be done only
after monitor installation
DO NOT install into drywall alone.
CAUTION:

B-1
Level the wall plate and
mark the pilot hole locations.
B-2
OPTION B:
Solid Concrete Wall Installation
002862.eps
DANGER
Cable Management
5
Adjustments (If necessary)
4
Attach Arm to Wall
2-B
Install the Upper Arm (B) to the Lower Arm (A). Secure the arm by tightening the
inside screw using 3mm Allen key (G). Attach Decorative Covers (C) to wall plate.
Adjust monitor position and rotation.
Note: To ensure stability, the tightness of the
rotating axis has been preset, so it would be
kind of difficult to rotate the VESA plate.
Suggestion: Please attach the monitor first,
then hold the sides of it with both hands, and
rotate vigorously. If that doesn't work out,
please do not hesitate to ask for our help.
A
B
C1
(Long)
C2
(Short)
Press
Press
D
Insert
Slide the monitor onto the head of swivel arm, install the security bolt (F).
Make sure the security bolt is installed before you rotate the monitor.
Min. 8"(203mm)
360°
Rotation
Height
Tilt
+90°
-90°
±90°
±135°
±90°
Swivel
G
Hang Monitor
3
Drill pilot holes using a
Ф3/8 in (Ф10mm) diameter drill bit.
IMPORTANT:
Do not drill holes into where water pipes
or electrical wires are located, or mortar
between blocks.
4-2
The gas spring is pre-set for a load-bearing range of 8.8 lbs -13.2 lbs. For intended
functioning of the mount, you will need to adjust the tension of Arm in accordance
with your monitor weight by 6mm Allen Key (H).
Tension Adjustment
4-1
1. Loosen the tilting bolt.
2. Adjust monitor to your desired tilt angle.
3. Retighten the tilting bolt to fix the intended angle.
Tilt Adjustment
Lower Arm
Remove the cable cover, run cables through the cable cover,
then install the cable cover again.
H
Tighten
Loosen
Ф 3/8in
(Ф 10mm)
2 ¾ in
(70mm)
A
Level
T
Upper Arm
Run cables through the cable cover
(D), then with both hands slightly
press inwards the tabs inside the
cover and insert it to upper arm.
If the inside screw are
missing or stripped, you
can use spare screws.
M-D
DO NOT tighten the screw
excessively or it might be
stripped.
Note:
Be sure to keep the arm in a horizontal position during adjustment.
Or else it would be difficult to adjust the mount or damage the mount.
Situation 1: Arm falls down
Upper Arm with monitor falls down and fails
to stay where intended.
Solution:
Turn the inside screw counterclockwise
(“+”direction) to increase gas spring tension
until the arm can stay as intended.
Situation 2: Arm rises up or can't press down
Upper Arm with monitor rises up and fails to stay
where intended.
Solution:
Turn the inside screw clockwise (“-”direction) to
decrease gas spring tension until the arm can stay
as intended. Rotate Vigorously
F
H
B-3
Use the hammer to knock anchors into the concrete wall. Be sure the anchors are
seated flush with the concrete surface. Install wall plate using lag bolts and
anchors with Socket Wrench, NO Electrodrill.
To avoid potential personal injury or property damage:
All 3 lag bolts MUST BE firmly tightened to prevent unwanted movement of
the wall plate assembly. Ensure the wall plate assembly is securely fastened to
the wall before continuing on to the next step.
W-A
CAUTION:
W-A
W-B
W-A
W-B
/