Page is loading ...

Developers of Home Comfort Products
INSTRUCTION MANUAL
PLEASE READ BEFORE USE AND SAVE
Fan
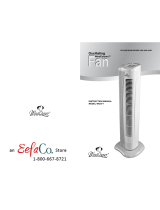
Air Cleaning
Fan
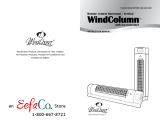
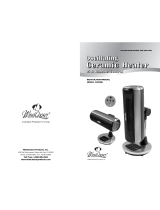
WindColumn
™
with LCD Display and
Remote Control

LIMITED WARRANTY
Limited Warranty Terms and Conditions
Three (3) Year Limited Warranty on Motor and One (1) Year Limited
Warranty on All Other Parts
This warranty applies to repair or replacement if a product is found to be
defective in material or workmanship. This warranty does not apply to
any damage resulting from commercial, abusive and/or unreasonable
use or supplemental damage. Defects as a result of normal wear and
tear will not be considered manufacturing defects under this warranty.
Read the instruction manual before attempting to use this product.
WindChaser Products, Inc. is not liable for incidental or consequential
damages of any nature. Any implied warranty of merchantability or
fitness for a particular purpose on this product is limited in duration to
the duration of this warranty. Some states do not allow the exclusion or
limitation of incidental or consequential damages or limitations on how
long an implied warranty lasts, so the above limitations or exclusions
may not apply to you. This warranty gives you specific legal rights, and
you also may have other rights which vary from state to state. This
warranty applies only to the original purchaser of this product.
WindChaser Products, Inc. will repair or replace this product if it is
found to be defective in material and/or workmanship. Defective product
should be returned to the place of purchase in accordance with store
policy. Thereafter, while within the warranty period, any defective
product should be returned to WindChaser Products, Inc.. This warranty
does not cover damage resulting from unauthorized attempts to repair
or from any use not in accordance with its manual.

CONTENTS
Before Initial Use 2
For Your Safety 3
Parts and Assembly 4
Preparation 5
Operating Instructions 6-7
Cleaning and Storage 8
Limited Warranty 9
MODEL
Fan
with LCD Display and
Remote Control
Air Cleaning
WindColumn
™
1. Turn the unit OFF and unplug the unit before cleaning.
2. Use only a soft, damp cloth to clean the exterior. A can of
compressed air or a vacuum cleaner can be used to clean
the interior
3. Do not immerse the unit in water and never allow water to drip into
the motor housing.
4. Do not use gasoline, paint thinner or other chemicals to clean the fan.
5. Store the fan in it’s original box and store in a cool, dry place.
NOTE: If you experience a problem, please return the unit to the
place of the original purchase or see your warranty. Do not
attempt to open the motor housing yourself. Doing so may void
your warranty and cause damage to the fan or personal injury.
CLEANING AND STORAGE

Attach your purchase receipt here
Read this Entire Instruction Manual Before Use.
For your reference:
Serial No. Date of Purchase
Name and Address of Dealer
BEFORE INITIAL USE
DEFAULT THERMOSTAT
Press the mode button until 73°F (Default Temperature) is viewed on the LCD
Screen. When the feature is activated, the fan speed will change automatically
with changes in the room temperature.
For Example:
Low Speed: Room Temperature is between 73-75°F, Med Speed: Room
Temperature is between 76-78.4°F, High Speed: Room Temperature is
between 79°F or above.
CUSTOM THERMOSTAT
To lower or raise the temperature manually, press the up and down arrow
buttons on the remote control. Once the desired temperature has been set, the
fan will alternate through the fan speeds to maintain the set temperature.
For Example:
If your room temperature is 78°F and want to set it to 73°F, simply set the
temperature to 73°F using the up and down arrows on the remote control. Then
the fan will adjust to lower the temperature in the room. As soon as the desired
temperature is reached, the fan will stop.
Note: When the fan is unplugged and plugged back in, the temperature
will set to its default setting (73°F)
5. OSCILLATE ( )
Press to turn the oscillation function ON or OFF.
6. ION GENERATOR ( )
Press to turn ion generator ON or OFF.
NOTE: The ion generator produces negatively charged ions which remove air-
borne contaminants such as smog, pollen and dust.
7 - 10. INDICATOR LIGHTS
Indicate which functions are ON or OFF. All Functions correspond to the
Indicator Lights on the Control Panel (Fig. 5) and Icons on the LCD Display
(Fig. 7).

FOR YOUR SAFETY
IMPORTANT INSTRUCTIONS
Read and save these important safety instructions before using this fan. When
using electrical appliances, basic safety precautions should always be followed
including the following:
1) Use this fan only as described in this manual. Other uses not recommended
may cause fire or electric shock.
2) This product is intended for household use ONLY and not for commercial,
industrial or outside use.
3) To protect against electrical shock, do not place fan in window, immerse unit,
plug or cord in water, or spray with liquids.
4) Close supervision is necessary when any appliance is used by or near
children.
5) Unplug the fan from the outlet when not in use, when moving fan from one
location to another and before cleaning.
6) Do not operate the fan in the presence of explosive and/or flammable fumes.
7) Do not place the fan or any parts near an open flame, cooking or other
heating appliance.
8) Do not operate the fan with a damaged cord, plug, after a malfunction or if
dropped or damaged in any manner.
9) Avoid contact with moving fan parts.
10) To disconnect, grip the plug and pull it from the wall outlet. Never yank the
cord.
11) The use of attachments is not recommended and may cause hazards.
12) Always use on a dry level surface.
13) Do not operate if the fan housing is removed or damaged.
14) This appliance has a polarized plug (one blade is wider than the other). To
reduce the risk of electric shock, this plug is intended to fit in a polarized outlet
only one way. If the plug does not fit fully in the outlet, reverse the plug. If it
still does not fit, contact a qualified electrician. Do not attempt to defeat this
safety feature.
WARNING: To reduce the risk of fire or electrical shock, DO NOT USE
THIS FAN WITH ANY SOLID STATE SPEED CONTROL DEVICE.
SAVE THESE INSTRUCTIONS
OPERATING INSTRUCTIONS
(4)
(5)
(6)
(1)
(2)
(3)
(1)
(4)
(5)
(6)
(2)
(3)
Fig. 5
Fig. 6
The unit can be operated by the Control Panel (Fig. 5) or the
Remote Control (Fig. 6).
1. POWER ( )
Press to turn the unit ON or OFF.
2. TIMER ( )
Press to set the timer to automatically shut off the fan after 1/2 hour. Each
additional press of the button will add one half hour to the timer setting up to a
maximum of 9 hours.
*Note: To set the digital clock on the fan, turn the fan off, then press the
Speed button to set the hours and Timer button to set the minutes.
3. SPEED ( )
Press to select Low, Medium or High fan speeds.
4. WIND MODES
The wind modes will alternate the fan’s speeds to simulate a natural breeze.
( ) Natural Wind Mode and ( ) Sleep Wind Mode.
(9)
(10)
Fig. 7
POWER
MODE
TIMER
OSCILLATE
SPEED
IONIZER
IONIZER
POWER
TIMER
OSCILLATE
POWER
TIMER
SPEED
MODE
OSC
IONIZER
(7)
(8)
Control Panel
Remote
Control
LCD

PARTS
ASSEMBLY INSTRUCTIONS
Fig. 1
1. Pass the power cord (b) through the “Front” and “Back”
pedestal pieces (c).
2. Snap the two parts of the pedestal (c) together (the back
being the side with the holes) and secure with the six
screws using a Phillips (cross-head) screwdriver. Fix the
pedestal to the bottom of the Fan Body (a) with the six
short screws with a Phillips (cross-head) screwdriver.
3. Pass the power cord (b) through the center hole of the
base after snapping the two pieces together (The back
piece is the one with the power cord securing channel).
4. Line up the pedestal on the base. Fix with the 4 long
butterfly screws (h) by turning the screws.
5. Weave the cord through the cord securing channel and place
the cord fastener (g) over the cord and secure with the two
screws.
(d) Base
(e) Bottom of base
(g) Cord fastener
(f) Cord securing
channel
(b) Power Cord
(a) Fan Body
(c) Pedestal
Fig. 1

Fig. 2
Fig. 3
PREPARATION
1. Remove the cover from the back of the remote control.
2. Insert two AAA dry-cell batteries.
3. Do not use rechargeable batteries because they differ from standard dry
cell batteries in shape, dimension and performance.
4. Be sure to replace the batteries with two new batteries of the same type.
5. Remove the batteries if the fan is not going to be used for an
extended period of time.
6. The plastic cover on the remote can be moved up and down by pressing up
or down on the grip. (Fig. 2)
7. For storage place the remote control into the compartment behind the
fan. (Fig. 3)
NOTE: The compartment has a spring loaded release and catch device.
Insert the remote until you hear a click. Then the remote will be secured in
the compartment. To remove the remote, push the remote in and the tip of
the remote will pop out.
8. To open the control panel lid, press on the cover release button (Fig.4).
A CHANGE IN THE FUNCTION IS USUALLY INDICATED BY A BEEP.
Grip
Cover release
button
/