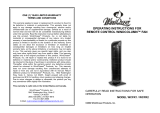
Windchaser WGCF1RP is an oscillating column fan with remote control that provides powerful airflow and customizable settings for your comfort.
With three-speed options (low, medium, high), you can adjust the airflow intensity to suit your needs. The oscillation function allows the fan to automatically rotate, providing wider air distribution.
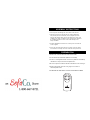
The built-in timer lets you set the fan to turn off automatically after a chosen interval (up to 8 hours), ensuring energy efficiency. The remote control offers convenience, allowing you to adjust settings from a distance.
Windchaser WGCF1RP is an oscillating column fan with remote control that provides powerful airflow and customizable settings for your comfort.
With three-speed options (low, medium, high), you can adjust the airflow intensity to suit your needs. The oscillation function allows the fan to automatically rotate, providing wider air distribution.
The built-in timer lets you set the fan to turn off automatically after a chosen interval (up to 8 hours), ensuring energy efficiency. The remote control offers convenience, allowing you to adjust settings from a distance.


-
 1
1
-
 2
2
-
 3
3
-
 4
4
-
 5
5
-
 6
6


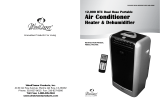
Windchaser WGCF1RP is an oscillating column fan with remote control that provides powerful airflow and customizable settings for your comfort.
With three-speed options (low, medium, high), you can adjust the airflow intensity to suit your needs. The oscillation function allows the fan to automatically rotate, providing wider air distribution.
The built-in timer lets you set the fan to turn off automatically after a chosen interval (up to 8 hours), ensuring energy efficiency. The remote control offers convenience, allowing you to adjust settings from a distance.
Ask a question and I''ll find the answer in the document
Finding information in a document is now easier with AI
Related papers
-
 Windchaser WindColumn User manual
-
 Windchaser Oscillating WindColumn Fan WGCF1 User manual
-
 Windchaser CER95R User manual
-
 Windchaser Windcolumn WCFR1 Operating instructions
-
 Windchaser OCWR161 User manual
-
 Windchaser DT12M User manual
-
 Windchaser WINDCOLUMN WCF1 Operating Instructions Manual
-
 Windchaser PACRWC-HP User manual
-
 Windchaser PACR12WC User manual
-
 Windchaser WindColumn WCH3iRO User manual


Other documents
-
 Wind Chaser WC166 User manual
-
Sencor SFN 4070WH User manual
-
Soleus Air FC1-38R-21 User manual
-
Kambrook 40cm DC Motor Pedestal Fan User manual
-
-
-
Goldair GCPF150 User manual
-
-
Meaco MeacoFan 1056P User manual
-
