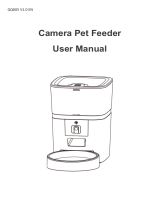
TLL331461

Tellur TLL331461 User manual

  • Hello! I am an AI chatbot trained to assist you with the Tellur TLL331461 User manual. I’ve already reviewed the document and can help you find the information you need or explain it in simple terms. Just ask your questions, and providing more details will help me assist you more effectively!
TLL331461
User manual
Manual de utilizare
Manual del usuario
Manuel d’utilisation
Manuale d'uso
Benutzerhandbuch
Smart Wi-Fi Pet Feeder,
UltraHD Camera, 4L
EN
Thank you for choosing Tellur!
To ensure an optimum performance and safety, please,
read this user manual carefully before using the product. Keep
this user manual safe for future references.
1. What's in the box
2. Product diagram
Pet feeder adapter
x 3 ( EU/US/UK )
Cable Manual Desiccant
Grain barrel
Power interface
Food bowl
Automatic
feeding device
Micro SD slot
Record button
Play button
Dry battery
compartment
Main body
Switch button
Feeding button
Top cover
Desiccant box
Battery use instructions: When the external power fails, the device will automatically enable the installed
battery to power the device. Note: The device cannot charge the battery
*Desiccant= Material or substance that has the property of absorbing excess moisture from a given environment.
EN
3. Technical specifications:
Food capacity: 4 liters
Food dimension: 2mm ~ 10mm, dry food
Food portions: Up to 10 portions each feed
Feed record log: Yes
Feeding notification: Yes, push notification via APP
Low food warning: Yes, push notification via APP
Voice recorder: Yes
Scheduled and remote feeding: Yes
Removable container: Yes, for easy cleaning
Power supply: Port Micro USB DC 5V/1A, braided cable
Emergency power supply: 3 x D (LR20) battery (not Included)
Sensor type: 1/2.8" CMOS
Sensor resolution: 3 Megapixels
Lens: f:4mm / F2.0
Field of view: 110°
Infrared sensor: Yes, up to 8 meters
Image resolution: Ultra HD 2304 x 1296
Video compression: H.265
Frame rate: Up to 20/second
Image flip: Vertical by APP
Motion detection: Yes
Night vision: Yes
Audio communication: Two-way audio
Built-in speaker: 1W
Built-in microphone: Yes
Internal storage: MicroSD card up to 128GB Class 10 min (not
included)
Cloud storage: Yes, compatible
Google Home: Compatible
Amazon Alexa: Compatible
APP Name: Tellur Smart
APP Pairing Name: Tellur Pet Feeder
Wi-Fi standard: IEEE 802.11b/g/n
Supported Wi-Fi network: 2.4GHz
Suitable for: Indoor use
Working condition temperature: -10°C ~ +55°C
Working condition humidity: 10% ~ 95% RH
Product dimensions: 196 x 355 x 289mm
Product weight: 2000g
Color: White
EN
4. Product installation
Important notes and cautionary tips:
- Avoid mounting the device in a place where the temperature
changes too much, such as heat/cold sources, air-outlet, etc.
- Please place the device correctly; prevent the pet from tipping
over the device. Ideal placement in a corner of against the wall.
This device is suitable for small and medium pets under 20kg.
- Replace the desiccant in the storage lid regularly.
- Do not drop any other substances than pet dry food into the
grain bin. Otherwise, the device may function abnormally or can
cause pet safety problems.
- Regularly clean the food bucket and food bowl.
- The power cable should be installed as concealed as possible to
prevent being damaged by the pets.
- Make sure the power plug is firmly connected to the power
socket.
- If you smell smoke, or hear high noise, from the device, turn off
the power and unplug the power cable. Then contact the service
center for assistance.
- Do not touch the camera lens with fingers. If cleaning is neces-
sary, use a clean cloth and wipe it gently.
- The camera sensor may be damaged by laser beams. Make sure
the camera will not be exposed to any laser beam.
First use:
1. Open the top cover of the feeder and remove the power cord
adapter from the food bucket.
2. Plug the power cord into the power connector on the rear of the
main unit and connect the adapter to power.
3. Place the main unit in a vertical position and mount the food
bowl at the corresponding position of the main unit.
4. Add pet dry food to the feeder bucket. Compatible with food
dimension 2mm~10mm
5. Place the desiccant in the desiccant box by default. Please
replace it regularly for long-term use (do not clean)
6. The battery compartment can be installed with 3 x D (LR20)
battery (not included) for manual feeding when there is no elec-
tricity.
7. Pair with Tellur Smart APP to set up the feeding schedule and
use all functions including the camera.
Functions description:
1. Feed button – Short press for one portion release (about 10
grams, depending on the food type). Long press for 5 seconds to
restore to factory settings.
2. Record button – Press and hold to record audio message for
calling the pet to eat. The message will be played 3 times when
feeding is activated.
3. Play button – Plays the recorded audio message.
4. Feeding and low food notification – Notifications will be sent
via Tellur Smart APP when food is released or when there is not
enough food in the device.
5. Camera functions – motion detection, night vision and
two-way audio communication via Tellur Smart APP.
6. Google Home and Amazon Alexa compatible.
Cleaning and maintenance
The food bowl and the bucket should be cleaned regularly to
prevent harmful occurrence of bacteria that can affect the health
of the pet.
EN
Important notes and cautionary tips:
- Avoid mounting the device in a place where the temperature
changes too much, such as heat/cold sources, air-outlet, etc.
- Please place the device correctly; prevent the pet from tipping
over the device. Ideal placement in a corner of against the wall.
This device is suitable for small and medium pets under 20kg.
- Replace the desiccant in the storage lid regularly.
- Do not drop any other substances than pet dry food into the
grain bin. Otherwise, the device may function abnormally or can
cause pet safety problems.
- Regularly clean the food bucket and food bowl.
- The power cable should be installed as concealed as possible to
prevent being damaged by the pets.
- Make sure the power plug is firmly connected to the power
socket.
- If you smell smoke, or hear high noise, from the device, turn off
the power and unplug the power cable. Then contact the service
center for assistance.
- Do not touch the camera lens with fingers. If cleaning is neces-
sary, use a clean cloth and wipe it gently.
- The camera sensor may be damaged by laser beams. Make sure
the camera will not be exposed to any laser beam.
First use:
1. Open the top cover of the feeder and remove the power cord
adapter from the food bucket.
2. Plug the power cord into the power connector on the rear of the
main unit and connect the adapter to power.
3. Place the main unit in a vertical position and mount the food
bowl at the corresponding position of the main unit.
4. Add pet dry food to the feeder bucket. Compatible with food
dimension 2mm~10mm
5. Place the desiccant in the desiccant box by default. Please
replace it regularly for long-term use (do not clean)
6. The battery compartment can be installed with 3 x D (LR20)
battery (not included) for manual feeding when there is no elec-
tricity.
7. Pair with Tellur Smart APP to set up the feeding schedule and
use all functions including the camera.
Functions description:
1. Feed button – Short press for one portion release (about 10
grams, depending on the food type). Long press for 5 seconds to
restore to factory settings.
2. Record button – Press and hold to record audio message for
calling the pet to eat. The message will be played 3 times when
feeding is activated.
3. Play button – Plays the recorded audio message.
4. Feeding and low food notification – Notifications will be sent
via Tellur Smart APP when food is released or when there is not
enough food in the device.
5. Camera functions – motion detection, night vision and
two-way audio communication via Tellur Smart APP.
6. Google Home and Amazon Alexa compatible.
Cleaning and maintenance
The food bowl and the bucket should be cleaned regularly to
prevent harmful occurrence of bacteria that can affect the health
of the pet.
Food bowl
Automatic feeding device
Topcover
Desiccantbox
- The upper part of the device and the food bowl can be
removed and cleaned with water and detergent.
- Remove the desiccant box before cleaning
- After cleaning, all components must be dried or air-dried
before being assembled for use.
- This feeder is suitable for dry foods smaller up to 10 mm size.
- Please keep the environment dry.
EN
5. Pairing the device with Tellur Smart APP
Note
Mare sure your phone is connected to the 2.4GHz wireless network
and you have access to Wi-Fi password before you start the pairing
procedure.
The app doesn’t support Wi-Fi 6 networks with 802.11ax standard.
Please set the 2.4GHz Wi-Fi network to 802.11b/g/n
We also recommend having the Bluetooth function activated for an
easier pairing.
1.Download and install the Tellur Smart app, available for either
iOS or Android devices.
2.Once downloaded, the app will ask you to create an account (if
you don’t have any already). Enter your email, select the country
you live in and create a password for your Tellur Smart account
***Set up router
This device only supports 2.4GHz frequency band router, does
not support 5GHz frequency band router. Please set the rele-
vant parameters of the router before Wi-Fi configuration, Wi-Fi
passwords do not include special characters such as ~!
@#$%^&*(). When the device is being connected to the Wi-Fi,
keep the mobile phone and device close to the router to speed
up the configuration of the device.
EN
1.Open the Tellur Smart app and click “Add device” or “+”
and then select “Video Surveillance” -> “Pet Feeder with
Camera (Wi-Fi)”.
2.When connecting, make sure your router, smartphone and the
device are as close as possible.
3.Power on and reset the device until the status indicator is flash-
ing quickly or a prompt tone is heard, and then click "Next". Then
input your Wi-Fi password and click "Next".
Click to change network if necessary
EN
6. Storage
4.With the camera lens, scan the QR code that appeared on
your phone. When the device makes a sound, click “I heard a
Prompt” and the configuration will be complete.
Installing microSD card
1. The storage card slot is located inside the food bucket as seen
in the diagram below.
2. Insert the card in the slot
(The camera supports microSD cards up to 128GB capacity, mini-
mum class 10 required.)
MicroSD card slot
Formatting the card
1. Access the live view
2. Go to settings menu (click on “…” from top right corner)
3. Select Card Settings. Here you can see how much capacity is
used and available.
4. Choose Format Card
Recording settings
1. Ensure you have inserted a compatible microSD card and its
formatted.
2. Access the camera and go to settings menu (click on “…”) and
choose Card Settings
3. Click on Recording Mode and you can select Continuous
recording or Event recording
EN
7. Failed to add device?
- Make sure the device is powered on.
- Check the Wi-Fi connection of your phone.
- Check if the device is in pairing mode. Reset your smart
device to enter pairing mode.
- Check router or related: If you use a dual-band router, select
the 2.4GHz network to add the device. You also need to enable
the router's broadcasting function. Set encryption method as
WPA2-PSK and authorization type as AES or set both on "auto".
- Check if the Wi-Fi signal is strong enough. To maintain the
signal strong, keep your router and the smart device as close
as possible.
- Wireless mode should be 802.11.b/g/n (Wi-Fi 6 protocol
802.11ax is not supported)
- Make sure you don't exceed the maximum number of regis-
tered devices supported by the app (150).
- Check if the router's MAC filtering function is enabled. If so,
remove the device from the filter list and make sure the router
is not prohibiting the device connection.
- Make sure the Wi-Fi password entered in the app is correct.
Can I control the device with 2G/3G/4G network?
When adding the device for the first time, the device and the
phone need to be connected to the same Wi-Fi network. Once
the device has been successfully paired with the Tellur Smart
app, you can remotely control it via 2G/3G/4G networks.
How can I share my device with family?
Open Tellur Smart app, go to "Profile" -> "Device sharing" ->
"Sharing sent", tap "Add sharing" and share the device with the
added family members.
Notice - users must install the Tellur Smart app on their device
in order to see shared devices.
How can I manage the devices shared by others?
Open App, go to "Profile" > "Device Sharing" > "Sharing
Received", then you can find the devices shared by other users.
To delete a shared device, swipe left.
EN
8.Alexa integration
1. Go to Home menu on Alexa app.
2. Select "Skills" / "Skills & Games".
3. Type Tellur Smart in the search bar.
4. Select Tellur Smart and click "Enable" to activate Tellur Smart.
5. Enter your Tellur Smart account and password. Now you have
finished the integration with Alexa.
Tellur Smart app is now skilled with Alexa, and you can vocally
control the devices added in Tellur Smart.
Remember - if you rename your smart devices, use a simple
name that Alexa can recognize.
1. 2. 3. 4. 5.
To control your smart devices through Alexa, use simple and
concise voice commands. Here is an example for bedroom
lighting:
“Alexa, turn off bedroom light”
“Alexa, turn on bedroom light”
“Alexa, dim bedroom light”
“Alexa, set bedroom light to red”
EN
9.Google Home integration
Before using Google Home to control your devices, make sure
you meet the following conditions:
•You have a Google Home device or an Android device with
Google Assistant.
•You have the newest version of Google Home app.
•You have the newest version of Google app (Android only).
•The device display language is set to English US.
•You have the Tellur Smart app and a related account.
Add devices in Tellur Smart app (refer to app instructions) – you
can skip this part if you have already added some devices to your
Tellur Smart account. Make sure your devices' names are easily
recognizable.
2. Hit the "Add new" button, enter Tellur Smart in the search bar,
and select the app from the list. Next, select your Tellur Smart
account's region, enter your Tellur Smart account and password,
and tap "Link now". After you assign rooms for devices, your
devices will be listed in the Home Control page.
EN
Now you can control your smart devices through Google
Home. Take bedroom light as example – the supported voice
commands are as below:
• Ok Google, turn on/off bedroom light.
• Ok Google, set bedroom light to 50 percent.
• Ok Google, brighten bedroom light.
• Ok Google, dim bedroom light.
• Ok Google, set bedroom light to red.
Disposal and recycling information
The crossed-out wheeled-bin symbol on your product, battery, literature or packaging
reminds you that all electronic products and batteries must be taken to separate
waste collection points at the end of their working lives; they must not be disposed of
in the normal waste stream with household garbage. It is the responsibility of the user
to dispose of the equipment using a designated collection point or service for separate
recycling of electrical and electronic equipment waste (WEEE) and batteries according
to local laws. Proper collection and recycling of your
equipment helps ensure EEE waste is recycled in a manner that conserves valuable
materials and protects human health and the environment. Improper handling,
accidental breakage, damage, and/or improper recycling at the end of its life may be
harmful for health and environment.
/