Page is loading ...

FB33210R
2020 – Current JT Gladiator
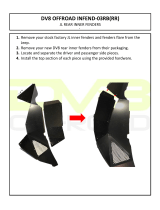
Rear Inner Fenders
REQUIRED TOOLS
3mm Allen
5mm Allen
M8 Nutsert Tool
KIT CONTAINS
Rear Inner Fender Set (Driver/Passenger)
M8 Washer
M6 Washer
M8 Nutsert
M8 Button Head Bolt
M6 Button Head Bolt
M6 Serrated Nut
QTY
1
6
4
2
6
4
4

FB33210R
2020 – Current JT Gladiator
Rear Inner Fenders
1
1) PREPARE YOUR VEHICLE
Remove your vehicle’s existing inner fenders.
Please visit Fishbone Offroad on YouTube for
instructions on how to remove your OEM parts.
Inside the wheel well, at the shown hole, with an
M8 Nutsert tool, install one of the included nutserts
into the vehicle.
2) INSTALL YOUR FRONT FENDERS
Note: The mesh and accent plates can be removed
with a 3mm Allen key to be painted separately.
The fenders are driver and passenger side specific
and can be identified by our logo pointing forward
on each side.
Slide your front inner fenders into the well and align
the holes behind the body and into the nutsert.

FB33210R
2020 – Current JT Gladiator
Rear Inner Fenders
2
With a 3mm allen and two of the included M6 bolts,
washers, and serrated nuts, secure the bottom of
the fender.
With a 5mm Allen and 3 of the included M8 bolts
and washers, secure the top of the fender.
Repeat on the opposite side.
3) ENJOY YOUR NEW FISHBONE OFFROAD
ALUMINUM INNER FENDERS!
/


