Page is loading ...

!
www.screeninnovations.com 9715-B Burnet Rd., Suite 400, Austin TX 78758 512.832.6939
!
•
•
•
•
EQUIPMENT
•The following parts are available in kit form from Decorativefilm.com
part (sx-002)
•Application solution (in spray container, properly mixed)
•
•Edge guide tool
•Trimming knife
•
•Razor scraper
•Paper towel (a lint free towel is best)
•Standard 32-oz spray bottle full of warm distilled water mixed with 3
drops of dish soap
COMPLETELY CLEAN WINDOW
1. Place absorbent cloth on floor under the windows to collect excessive
window solution.
2. Wash window with solution and squeegee.
3. Wet window with solution and scrape entire surface with razor scraper
to remove any dirt particles.
4. Wash and squeegee again.
5. Wipe edges carefully with paper towel.
6. Make sure that all loose dirt is removed.
Cleaning the window completely and
thoroughly is the single most important
step.
Black Diamond Film Application Instructions
Screen Innovations recommends installation by a professional
window film installer.
Black Diamond Film is intended to be installed on the projector side of the glass/acrylic.
Recommended minimum projector throw is 1.2 times screen width.
Blending is not recommended on Black Diamond Film!

!
www.screeninnovations.com 9715-B Burnet Rd., Suite 400, Austin TX 78758 512.832.6939
!
FILM PREPERATION
1. Take the film out of the box. Remove end plugs and protective
plastic sleeve.
2.
3.
4.
5. Soak window thoroughly with solution.
6. Overlap the film at the top and bottom of the window by
approximately 1” and cut.
7. Have assistant hold cut film, or place film against solution
soaked window
8. with release liner facing the installer. The solution on a window
will hold film in place.
!
RELEASE LINER REMOVAL
The film is coated with pressure sensitive adhesive which must
be kept clean. The adhesive is protected with a release liner and
during application the release liner must be removed. Protect the
film and exposed adhesive during the entire installation procedure.
Do not let it touch anything but the glass on which it is
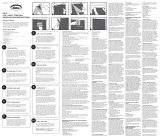
Apply pressure sensitive tape on one side of an upper corner of
the film. Place a second piece of tape on same corner on the
reverse side of film (see diagram A). Be careful not to let
exposed tacky surfaces of the tape touch each other.
As you pull the liner off the film, begin to spray the adhesive
surface with solution, completely soaking exposed adhesive.
Continue pulling down on clear release sheet while spraying
solution on adhesive. Solution will neutralize adhesive,
preventing it from sticking to anything. Once initial removal of
liner begins, try to pull it down evenly across the film (see
diagram B). Discard release liner.
With adhesive surface completely exposed, spray one final time with
solution to
Please be aware that Black Diamond Film
can be scratched if a hard squeegee is used!

!
www.screeninnovations.com 9715-B Burnet Rd., Suite 400, Austin TX 78758 512.832.6939
!
!
FILM APPLICATION
Hold film at uppermost corners being careful not to allow film to touch
floor or any other surface, place film on window with adhesive side
against glass (see diagram C).
The application solution acts as a lubricant making the window
surface slippery. You can now slide the film so that one edge of film
is 1/16” from one side of window (see diagram D). Lift film if
necessary to remove large wrinkles or bubbles. (For ease of
installation the edge you select should be the one you favor, i.e. right
side for right-handed people, left side for left-handed people. If fitted
correctly this edge will not have to be trimmed. Other edges of the
film should overlap top, bottom, and opposite edge of window.)
Spray the surface side of the film facing you with solution. This acts
as a lubricant for the squeegee.
Beginning at the center of window, squeegee once to right side of
window (see diagram E). Going back to the center, squeegee across
to left hand edge of the window, then squeegee the window in
straight, smooth strokes working from center out to the edges of the
window until all excess application solution has been squeegeed out
from under the film and film is lying flat. Note: the squeegee will not
float across a dry surface, so re-lubricate with application solution as
needed.
FILM TRIMMING
Butt the edge guide tool against window frame, perpendicular to
glass (see diagram F).
With trimming knife and new sharp blade, trim excess film using edge
guide tool to provide a narrow straight line border. Trim the bottom
and side before top, so that trimmed film will not get in your way.
Start trimming operation from corner but do not finish cutting into
corner
Remove and discard all film scraps
FINAL SQUEEGEE
Once film is completely trimmed, spray the surface once more with
application solution. Repeat squeegee operation as described in Step 4-
d (see diagram G). Finally, using a wad of paper towels, gently wipe
around edges of film to completely remove all excess water. This
prevents the application solution from re-entering between the glass and
film.
CLEANING & MAINTENANCE
The film can be cleaned periodically using a soap and water solution.
We recommend wetting a soft cloth with solution and then cleaning the
window rather than directly spraying solution on the surface. Never use
harsh chemicals or cleaning agents such as Windex to clean the film
surface. The chemicals used in many window-cleaning agents can
/


