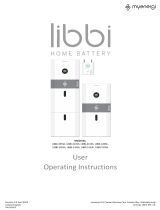
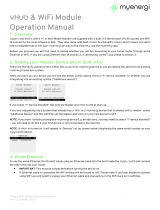
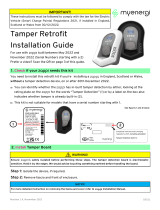
Myenergi 16A1P01H Installation guide

Type
Installation guide
Rev 2.0.3 September 2022ENGLISH
eddi
microgeneration energy diverter
Installation Manual
MODELS: 16A1P01H
Page 2 of 32
Contents
1. Introduction ........................................................................................................................................................................................... 3
2. Safety ....................................................................................................................................................................................................... 3
3. Disposal ................................................................................................................................................................................................... 3
4. Copyright ............................................................................................................................................................................................... 3
5. Overview ................................................................................................................................................................................................. 4
5.1 Overview Diagram ................................................................................................................................................................... 4
6. Box Contents ........................................................................................................................................................................................ 6
6.1 Optional: Relay & Sensor Board ........................................................................................................................................ 6
7. Connectivity .......................................................................................................................................................................................... 6
7.1 Wireless Connection ............................................................................................................................................................... 6
7.2 Ethernet or WiFi Connections ............................................................................................................................................. 7
8. Installation ............................................................................................................................................................................................. 8
8.1 Mounting...................................................................................................................................................................................... 8
8.2 Clearances .................................................................................................................................................................................. 8
8.3 Wiring ............................................................................................................................................................................................ 9
8.4 CT Sensor Installation ........................................................................................................................................................... 11
8.5 Advanced Installation Options ......................................................................................................................................... 13
8.6 Relay & Sensor Board ......................................................................................................................................................... 15
8.7 Fitting the Cover .................................................................................................................................................................... 16
9 Set-up .................................................................................................................................................................................................... 16
9.1 Switching On ............................................................................................................................................................................ 16
9.2 Testing ......................................................................................................................................................................................... 17
10 Application Examples................................................................................................................................................................ 18
10.1 Dual Element Water Heater ............................................................................................................................................... 18
10.2 Underfloor Heating Mat and Water Heating .............................................................................................................. 20
10.3 Water Heater with Auxiliary Boiler Control S Plan .............................................................................................. 22
10.4 Heat Pump with Water Heating and Priority Control ............................................................................................ 24
10.5 Pool and Water Heating ..................................................................................................................................................... 26
11 Fault Codes ................................................................................................................................................................................... 28
12 Technical Support...................................................................................................................................................................... 29
13 Declaration of Conformity...................................................................................................................................................... 30
Page 3 of 32
1. Introduction
Thank you for choosing eddi. Of course, we think you have made an excellent choice and are sure you will be
very happy with the features, benefits, and quality of your myenergi product.
eddi is an automatic power controller. Ittracks’ available surplus power from a grid-tied PV or Wind turbine
system and varies the power to your heater to match the surplus power, therefore ensuring all of the green
energy is fully utilised.
These instructions will help you to familiarise yourself with the eddi. By reading the instructions, you will be
sure to get the maximum benefit from your 'eco-smart' device.
varisineTechnology
varisineis the proprietary power control technology used in the eddi. The technology
enables the output voltage to be very smoothly adjusted in order to alter the power to the
heater. The power to the heater is always a sine wave and only the voltage is altered.
This control technology is more sophisticated than many other products on the market and
the technology ensures trouble free operation with all inverters and compatibility with all
import/export energy monitors and electric meters.
2. Safety
The device has been manufactured in accordance with the state of the art and the recognised safety standards,
however, incorrect operation or misuse may result in:
Injury or death to the operator or third parties
Damage to the device and other property of the operator
Inefficient operation of the device
All persons involved in commissioning, maintaining, and servicing the device must:
Be suitably qualified and competent
Have knowledge of and experience in dealing with electrical installations
Read and follow these operating instructions carefully
Always disconnect the device from the supply before removing the cover
3. Disposal
4.
In accordance with European Directive 2012/19/EU on waste electrical and electronic equipment and its
implementation in national law, used electrical devices must be collected separately and recycled in an
environmentally responsible manner. In the UK these requirements are covered by The Waste Electric and
Electronic Equipment (WEEE) Regulations 2013. Ensure that you return your used device to your dealer or
obtain information regarding a local, authorised collection and disposal system. Failure to comply with this EU
Directive may result in a negative impact on the environment.
4. Copyright
Copyright of these operating instructions remains with the manufacturer. Text and images correspond to the
technical level at the time of going to press. We reserve the right to make changes. The content of the operating
instructions shall not give rise to any claims on the part of the purchaser. We are grateful for any suggestions
for improvement and notices of errors in the operating instructions.
myenergi zappi, myenergi eddi and myenergi harvi are registered trademarks of myenergi Ltd.
Page 4 of 32
5. Overview
Microgeneration systems such as Solar PV and small wind turbines are at their most efficient when the
generated energy is consumed on-site rather than exporting it to the grid. This is what we call 'self-
consumption'.
eddi is an energy management system for use with grid-tied PV or wind turbine systems. Excess energy from
the microgeneration system is used to heat water or rooms rather than exporting it to the grid.
A grid current sensor (supplied) simply clips around the incoming cable. This sensor is used to monitor excess
power and eddi automatically adjusts the voltage to the heater load, thereby consuming the surplus power. A
self-powered wireless sensor (harvi) is available separately.
An internal expansion interface provides a means to install a Relay & Sensor Board to enable various functions
such as auto switching from day-time and night-time supply, heat pump interfacing for Legionella control and
temperature sensing.
eddi utilises myenergi’s proprietary varisinetechnology to ensure compliance with worldwide power grid
standards.
Feature Set
3.68kW nominal/16A max. heater load
Supports two heaters (subsequentially)
Integral bypass switch
varisinePWM technology
Fan-less cooling
Built-in programmable boost timers
Energy savings data logging
Graphical back-lit LCD screen for ease of use
Overload and short-circuit protection
Automatic Daylight Saving Time adjustment
Relay & Sensor Board add-on option
Wall mounting bracket for ease of installation
Fully EMC and safety compliant (CE)
3-year warranty (with the option of adding an Extended Warranty of 2 extra years)
Integrated WiFi for connecting to internet
RJ45 connector for the option of hardwired Ethernet connection
5.1 Overview Diagram
The diagram on the next page shows the eddi as part of a complete energy management system. Other
myenergi products are shown with details of how they integrate with the grid connection and the
microgeneration system.
Page 5 of 32
Page 6 of 32
6. Box Contents
1 x eddi unit with mounting bracket attached
1 x Current transformer with 5m cable (Grid CT sensor)
2 x Antenna
1 x Manual
1 x vHub & WiFi Operation Manual
4x screws (for use on cable clamps)
6.1 Optional: Relay & Sensor Board
The relay sensor board is an optional add-on to the eddi and allows the use of multiple wiring configurations.
It includes:
Relays with a capacity for 16A
Two temperature sensor units (PT1000)
eSense input (isolated detection for economy tariff)
The two relays can be independently set for several functions or set to operate as a pair.
These functions include:
Export/Import Threshold
Operate when heating and timed operation
De-stratification pump control
Fault signal for BMS systems
7. Connectivity
7.1 Wireless Connection
myenergi devices use an 868MHz/915MHz wireless link to communicate with each other. Although this is
usually more effective at passing through walls than a standard WiFi signal, radio communication can be
affected by many factors such as:
the distance between the devices
the thickness of any walls that the signal has to pass through
wall construction and insulation materials
large metal objects such as washing machines, fridges, sinks and baths
mirrors
electronic products such as televisions
other wireless devices operating on the same radio frequency
Please consider the position of your myenergi devices carefully to ensure that they operate as planned.
Although the devices work in the majority of installations and our technical support team are available to
provide help in setting up your system, we cannot guarantee the performance where circumstances beyond
our control affect the performance of the wireless link.
If you have any concerns about the wireless performance then we would be pleased to answer your questions,
but please consider that if a WiFi signal works OK then there is a very high probability that the myenergi
devices will also work without any issues.
Page 7 of 32
7.2 Ethernet or WiFi Connections
eddi’s with the built-in vHub (identified by product code EDDI-2Hxxxx) are supplied with a built-in Ethernet
port (RJ45) socket and WiFi to connect eddi to the local area network (LAN).
All myenergi internet capable devices should be connected to the internet via either WiFi or a hardwired
Ethernet connection.
This version of the eddi can also act as the “gateway” or “hub” between all your myenergi devices and the
myenergi server. The gateway device MUST be connected to the internet.
Note: harvi can only be connected using a wireless link to the Master device
If radio connection is not possible you have the option to tether two devices using an Ethernet cable. When
pairing devices, they will automatically use the Ethernet link if available.
Further detail on the Ethernet connection and WiFi see separate vHub & WiFi manual.
Page 8 of 32
8. Installation
8.1 Mounting
Step 1: With the unit on its back on a flat surface, remove the front cover by unscrewing the two screws (1)
on the front of the device and lifting it off.
Step 2: Loosen the two mounting bracket securing screws (2) and separate the bracket (3) from the eddi.
Step 3: Place the bracket against the wall where you will be installing the device and mark the holes ready
for drilling. (If fixing to timber stud you can use the two central vertically aligned points to screw the bracket
directly into the timber.
8.2 Clearances
NOTE
eddi is NOT suitable for installation outdoors
Ensure the device always has adequate ventilation; do not block the vents or obstruct airflow at
the back of the unit.
eddi must be fixed to a flat vertical surface using the dedicated mounting bracket which comes
attached to the unit.
NOTE
Suitable fixings must be used dependant on application/mounting surface. To be determined by installer.
Page 9 of 32
8.3 Wiring
8.3.1 Strip Length
8.3.2 Supply
The eddi device should be connected to a single-phase 230V or 240V nominal AC supply. The supply should
be from a dedicated 16A circuit breaker, or it can be from a hard-wired 13A fused spur outlet if the heater load
is less than 3kW.
8.3.3 Heater Loads
Most purely resistive heaters can be used with eddi, examples include immersion heaters, storage heaters,
convection heaters and underfloor heating mats. Refer to the Application and Examples section for wiring
diagrams using different heater types. Whichever heater type is used, the following criteria must always be
observed:
One or two purely resistive loads may be connected (Note: only one is live at any one time)
Maximum rating of each load is 3.68kW
Minimum heater rating is 150W
Resistive loads only
The loads neutral conductor must be connected to heater output N terminal
No electronic controls to be connected to Heater terminals; mechanical thermostats only
No timers to be connected to Heater terminals, including mechanical timers
8.3.4 Cable Clamps
If using flexible cables or cables not secured by other means, the cable clamps must be used to secure the
supply and heater cables.
8.3.5 Wiring Overview Diagram
The diagram on the following page gives an overview of the wiring required for a standard installation with the
eddi connected to one or two heaters.
WARNING!
ELECTRIC SHOCK An electric shock can be fatal; electrical connection work may only be carried out by
a competent person. The earth conductor must be correctly installed and reliably connected. This device
must be equipped with an over-current protection device of maximum 16 Amps (B16). Only purely resistive
loads must be connected to the Heater output terminals.
Page 10 of 32
Page 11 of 32
8.4 CT Sensor Installation
Current Transformers (CTs) are used to measure current at various places of the installation. For example, the
Grid connection point, the solar/wind inverter or a static battery system.
Installation of a CT to monitor the Grid connection point is required. Other CTs are optional and can be
purchased separately. The number and location of CTs used within an installation will vary according to devices
installed and the user requirements.
CTs can be wired to any myenergi device with CT inputs (e.g. eddi, zappi or harvi). This enables very flexible
installation as the CT can be wired to the nearest device. Note: The harvi device can be used if it is not practical
to connect any CT to the eddi.
8.4.1 Grid CT
The Grid CT sensor (supplied) needs to be clipped around either
the Live or Neutral meter tail of the electricity supply meter. If
using the Neutral conductor, reverse the direction of the sensor
(so the arrow is reversed).
The black and red wires need to be inserted into the CT terminal of
the
eddi
(as per image adjacent). Do this using a terminal
screwdriver to push in the white plunger and then insert the wire
into the respective hole (black to [-], red to [+]).
The positioning of the Grid CT sensor is crucial, take note of the
following when deciding where best to install the sensor:
Can be connected to any myenergi device with a CT
input e.g. the eddi or zappi (wired sensor) or harvi
(wireless sensor).
ALL of the imported and exported power must be
'seen' by the sensor be sure to install it upstream of
ANY junction box or 'Henley Block' (the CT can be
fitted inside the consumer unit).
There must be only one Grid CT per-phase for the
whole installation. (There can be other CTs but only
one at the grid connection point, also note CTs for
third-party devices do not matter).
The CT should be on the Live or Neutral cable.
The arrow on the sticker of the CT sensor must be pointing towards the consumer unit (in the
direction of grid import) if on the Live cable, or reversed if on the Neutral cable.
Ensure the CT is fully closed and clicks shut.
Be sure to wire the CT the correct way round; black [–], red [+] otherwise import and export
readings will be swapped.
8.4.2 Additional CTs
There is an option to add other CT sensors (available separately) for monitoring the generation or other
appliances such as battery systems. Installing a CT for the generator (PV system) will allow the main screen to
show the generated power and the total power consumption of all the other appliances in the property.
CTs can also be used to limit the power drawn from the supply:
Additional CTs can be connected to any myenergi device with a CT input that is linked to the
network
The arrow on the sticker of the sensor must be pointing in the direction of normal power flow (e.g.
away from the PV inverter) if on the Live cable or reversed if on the Neutral cable.
Ensure the sensor is fully closed and clicks shut.
Be sure to wire the CT the correct way round; black [], red [+]
NOTE
If a myenergi zappi EV Charger is configured it is not G100 compliant to use a harvi to measure grid CT,
for UK installations.
Page 12 of 32
8.4.3 Extending CT Sensor Cable
If there is a need to extend the CT sensor, cable like CAT5 must be used (only use one pair).
8.4.4 Wireless CT Sensor (Optional accessory)
In some cases it can be difficult or impractical to install a wired sensor. For example, it may be the case that
the eddi unit needs to be connected to a sub-board, rather than main consumer unit and two consumer units
are in different buildings.
The solution is to install harvi a clever little device that enables the eddi products to be installed without
using wired CT sensors for measuring the grid, generation power and/or battery storage system; instead the
CT sensor is connected to harvi.
The harvi does not need batteries or a power supply the energy from the sensor is harvested and used to
transmit the measurement signal to the eddi. This means batteries or electrical wiring are eliminated!
Up to 3 CT sensors may be used with harvi and it also supports 3-phase systems if three sensors are connected.
Refer to the harvi installation guide for details on installing and configuring harvi for your system.
8.4.5 CT Golden Rules Grid CT
Only ONE Grid CT per phase (check for only one ~ symbol in Linked Devices Info).
Located to ‘seeALL import and ALL export current (i.e. always upstream of any junction box).
Arrow pointing in direction of import (e.g. towards consumer unit if on Live cable).
8.4.6 All other CTs
Arrow should point towards the consumer unit.
8.4.7 3-phase harvi CTs
When using harvi in 3-phase mode, the CT inputs correspond to the phase number (e.g. CT1 =
Phase 1). This helps to avoid phase shifting/phase misalignment.
IMPORTANT
DO NOT use mains cable, bell wire or
speaker cable. It is important to use
only twisted-
pair cable to maintain
s
ignal integrity. The cable can be
extended up to 100m.
NOTE
If a myenergi zappi EV Charger is configured it is not G100 compliant to use a harvi to measure grid CT,
for UK installations.
Page 13 of 32
8.4.8 CT Can do’s
Can be wired to ANY myenergi device in the network.
harvi can be used to make CT wireless.
Cable can be extended up to 100m (must use twisted-pair cable e.g. one pair of CAT5).
Cable can be shortened.
Can be clipped around two or more conductors feeding appliances of the same type (e.g. two Live
cables from two inverters that are on the same phase).
Can be in close proximity to other CTs.
Wires can be swapped around in device to reverse the direction of the readings (e.g. change import
to export).
Can be grouped with other CTs of the same type so that the power reading is summed (e.g. east
and west solar Generation).
Can be used on the Neutral conductor (direction of arrow or wires must be reversed).
Can be set to None if you want to exclude the reading.
8.5 Advanced Installation Options
8.5.1 Load Balancing/Current Limiting/Load Curtailment
CTs can also be used to limit the current drawn by myenergi devices to avoid overloading circuits; this is
referred to as load balancing or load curtailment. There are four different ways to limit current and they can be
used alone or combined for more complex situations. See the table below:
Function
Operation
Example
Device Limit
Sets a maximum current that can be
drawn by the device (e.g. eddi
). The
current will not be exceeded even
during boost.
An
eddi
is wired to a 3.4kW heater, but the
supply to the eddi is only a 13A fused spur.
Grid Limit
Sets the limit that can be drawn from
the grid connection (i.e. the maximum
import current).
The eddi
and any other linked
myenergi device, will limit the current
they draw if there is a danger of
exceeding the set Grid Limit.
An
eddi
is installed in a property with a 65A
main fuse. The property has a 10kW electric
shower and a washing machine (2.5kW).
With the Grid Limit set to say 55A, the eddi
would reduce its load if the shower and washing
machine were on at the same time.
Group Limit
(Internal CT)
Sets the combined current limit for
several myenergi devices.
A property has a large PV array and a swimming
pool, three eddi units are installed to heat the
pool with surplus solar power using 3kW heaters.
The supply for the eddi units is only 40A, to be
safe a Group Limit of 35A is set.
Group Limit
(External CT)
Sets the combined current limit for
several myenergi
devices that are
sharing a supply with another large
appliance
An
eddi
is installed to heat the hot water
cylinder in a garage which also has a washer and
a dryer (2.5kW each), the garage has a supply of
only 32A coming from the main consumer unit in
the house. If all appliances were on and there
was no limiting set, the total current would
exceed the maximum supply current.
Page 14 of 32
8.5.2 Three-Phase Systems
If the installation supply is three-phase, it is recommend to install a harvi device and use three Grid CTs (one
for each phase). This will allow the eddi to show the total grid import and export figures rather than just one
of the phases.
If all 3 phases are monitored and the generation is 3-phase, it is also possible to net the export power across
phases. To do this, enable Net Phases in the Supply Grid menu see Supply Grid Net Phases. This allows the
eddi to use surplus power from any phase and not just the phase which the eddi is installed on. However, you
must be sure that the electricity is metered in such a way as to allow this.
3 eddi units can be installed (1 per phase) provided there are suitable loads.
8.5.3 Battery Storage System
8.5.3.1 AC Coupled
Where there is an AC coupled battery storage system, there can be a conflict as both the storage system and
the eddi are effectively competing to consume the surplus energy. Whilst this is not necessarily an issue, the
results can be somewhat unpredictable.
There is the option to allocate a CT sensor to monitor the battery storage; this will give control as to which
device has priority. This CT sensor should be wired to one of the CT terminals of the eddi or a harvi device if
wireless measurement is required. This CT should be clipped around the live or neutral cable of battery inverter.
During the setup process it will be necessary to change the setting for the appropriate CT to AC Battery; refer
to CT Config. Also refer to Supply Grid Battery for information on setting 'priority' of battery systems.
8.5.3.2 DC Coupled / Hybrid
Battery systems that charge directly from the solar array are usually referred to as being DC coupled. This type
of battery system uses the solar PV inverter to provide power from the batteries, thus it is not possible to
differentiate between solar and battery power when using a CT to measure the AC current from the inverter.
Because of this limitation, there are less options for managing the surplus power with this type of battery
system. However, it is usually possible to effectively give priority to the battery by setting an Export Margin in
the eddi. A setting of 50W or Third-Party Diverters.
Some properties may have a third-party energy diverter already installed and you may want the eddi to take
priority (when consuming surplus power) over the other diverter. This is possible by installing an extra CT to
monitor the diverter.
The CT should be clipped around the Live cable of the supply feeding the diverter. The arrow on the CT should
be pointing away from the diverter. Wire the CT to the nearest myenergi device or use a harvi unit if wireless
connection is needed. Configure the CT Type as Storage Only. See CT Config for details of how to configure
CTs.
8.5.3.3 Voltage Optimisers
If there is a voltage optimiser (VO) installed in the property, the CT sensor and the eddi must both be on the
same side of the VO; either the incoming grid supply or the optimised supply.
TIP
It is usually possible to split a 3-phase heating element into 3 individual elements by removing the links.
Page 15 of 32
8.6 Relay & Sensor Board
eddi has the option to install a Relay & Sensor Board (available separately). This allows for many different
wiring configurations and includes the following features:
Two independent multifunction relays (16 Amp)
eSense input (isolated 230V detection for economy tariff etc.)
Two temperature sensor inputs (PT1000)
The two relays can be independently set for several different functions, or they can be set to operate as a
pair. The relay functions include:
Export Threshold
Import Threshold
Operate when heating
De-stratification pump control
Timed operation
Fault signal for BMS systems
Refer to Application Examples in this guide for practical examples.
The Relay & Sensor Board is installed by plugging it into the eddi main circuit board using the three plastic
spacers included with the Relay & Sensor Board.
The flexible ribbon cable is then pushed into the black connector to the right-side of the display on the top
eddi circuit board.
Page 16 of 32
8.7 Fitting the Cover
Step 1: Re-place and screw in the two mounting bracket securing screws (2).
Step 2: Re-place and screw in the two front cover screws (1)
9 Set-up
9.1 Switching On
After completing and checking the wiring of the supply, the heater(s) and the sensor(s):
Step 1: Switch on the eddi via the circuit breaker or fused spur.
Step 2: If it's not already on switch the ON/OFF and Bypass Switch (underneath the eddi) to the ON
position.
Step 3: After the eddi starts-up for the first time, there will be a start-up wizard.
There are two likely scenarios here. Either this is your first myenergi device or you are adding this device to
an existing myenergi home eco-system.
When you boot up your device you will see the below screen asking if this is “1st device installed” or whether
you are integrating into an existing system (“Additional device”).
If you select “1st Device Installed” this sets the Master and vHub to ON at start up.
If you are integrating into a system that already has a ‘Hub’ or a myenergi device that
is already set to ‘master’ select “Additional Device” and this will then set the Master
and vHub on your new device to OFF.
NOTE: If you have 1 existing standalone myenergi device E.g. a zappi only, you may
need to select “1st device installed” you will need to do this if your first device is not
connected to the internet.
Page 17 of 32
9.2 Testing
Before leaving site, it is wise to perform a few checks to ensure that the sensors and heaters have been
correctly installed and are functional.
Step 1: Test the heaters by trying a manual boost, and check the power reading on the screen for the heater
corresponds to the heater rating.
Step 2: Cancel the boost by pressing the button twice during the boost
NOTE
By default, the eddi is set to operate as in Application Examples 1: Single Element Water Heater. If
the application differs, refer to the specific application example for details of settings that may
need to be changed.
If eddi has been installed alongside other eddi units or another myenergi device, refer to Linking
Devices for guidance on pairing devices. Also refer to the instruction documentation for the other
devices
NOTE
When eddi is diverting surplus power to the heater, the grid power figure (above the pylon symbol)
should be 0.0kW). Note; however, if the surplus power exceeds the rating of the heater then this
cannot be achieved and some export power will be observed.
If power is being imported from the grid when the eddi is in Heating mode, it is likely that the Grid
CT is incorrectly installed.
If a Generation CT has been installed, the generated power will show at the top left of the main
screen.
If the generation reading is missing, the most likely cause is the Generation CT has not been
configured see CT Config on page 21. Or, if the Grid CT is instead wired to a harvi ensure the
device settings are correct.
For instruction on vHub & WiFi Set-up please see separate vHub & WiFi Module Instructions.
Page 18 of 32
10 Application Examples
The following wiring diagrams show some suggested applications and are examples only; there are many more
possibilities. Please refer to the Safety section (page 4) and be sure to read all of the installation sections before
attempting to install the eddi. A good level of electrical competence and a reasonable understanding of
domestic plumbing systems is assumed for studying these application examples.
10.1 Dual Element Water Heater
10.1.1 Key for Wiring Diagram 10.1
(1) eddi device
(2) Mains supply (230V AC from B16 circuit breaker or 13A fused spur)
(3) Hot water cylinder
(4) Heating element 1 (max. 3.7kW)
(5) Heating element 2 (max. 3.7kW)
IF IN DOUBT
Contact myenergi Technical Support support@myenergi.uk
Page 19 of 32
10.1.2 Functional Description
Electric only households tend to have a hot water cylinder (immersion tank) with two heating elements. This is
perfect for eddi as it can support heating two elements sequentially.
Heater element 1 (the top immersion heater) (4) is heated with surplus power until the water at the top of the
cylinder is hot and the thermostat opens, then eddi will immediately switch over to Heater 2 (5); heating the
bottom of the cylinder. This makes the most of surplus energy as sometimes there will not be enough to heat
the whole volume of the cylinder; it's best to heat a smaller proportion (i.e. the top) first so there is some usable
hot water, rather than a larger volume of warm water.
During heating of the lower priority heater (Heating element 2), eddi will switch back to the higher priority
heater (Heating element 1) every 15 mins (default time set in eddi) to check if it can store any more heat.
When the water is fully heated, any surplus power will be exported, eddi will switch back to the priority heater
and check the lower priority heater every 15 mins (depending on your check period setting). The heating
priority can be changed in the Main Menu >Heater Settings > Priority
This can be repeated in any scenario where there are 2 resistive heating elements i.e. radiator, underfloor
heating mat etc.
10.1.3 Settings Required
Menu Option
Settings
Main Menu
Device
Settings…
Display…
Icons…
Heater 1:
Water Top
Heater 2:
Water Bottom
Heater Settings
Priority…
Heater 1
Page 20 of 32
10.2 Underfloor Heating Mat and Water Heating
10.2.1 Key for Wiring Diagram 10.2
(1) eddi device
(2) Mains supply (230V AC from B16 circuit breaker or 13A fused spur)
(3) Hot water cylinder
(4) Water heating element (max. 3.7kW)
(5) Relay & Sensor Board (optional add-on for eddi)
(6) Temperature probe (type PT1000) (optional)
(7) Mains supply for underfloor heating controller
(8) Underfloor heating mat (max. 3.7kW)
(9) Underfloor heating controller or thermostat
  • Page 1 1
  • Page 2 2
  • Page 3 3
  • Page 4 4
  • Page 5 5
  • Page 6 6
  • Page 7 7
  • Page 8 8
  • Page 9 9
  • Page 10 10
  • Page 11 11
  • Page 12 12
  • Page 13 13
  • Page 14 14
  • Page 15 15
  • Page 16 16
  • Page 17 17
  • Page 18 18
  • Page 19 19
  • Page 20 20
  • Page 21 21
  • Page 22 22
  • Page 23 23
  • Page 24 24
  • Page 25 25
  • Page 26 26
  • Page 27 27
  • Page 28 28
  • Page 29 29
  • Page 30 30
  • Page 31 31
  • Page 32 32

Myenergi 16A1P01H Installation guide

Type
Installation guide

Ask a question and I''ll find the answer in the document

Finding information in a document is now easier with AI