Page is loading ...

4”, 6”, and 8” New Construction Metal Plate Installation Guide
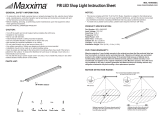
MRL-S48PLATE-10
MOUNTING INSTRUCTIONS
1 YEAR WARRANTY
Maxxima extends a 1 year limited warranty to the original purchaser that the products listed are free from defects in material and/or
workmanship only. Maxxima will replace any warrantied product to the original consumer/purchaser if the product fails because of defects
due to workmanship and/or materials within the limited warranty period. Limited warranty is not transferable and applies to the original
installation of the Maxxima product. This offer does not constitute in any way a product guarantee and Maxxima does not hereby assume
any obligation whatsoever beyond sending a free replacement product.
• Risk of electric shock - Disconnect power at the source
before installation.
• If you are unsure about the installation, please consult
an electrician.
CAUTIONS
• To insure personal safety, proper grounding of the
electrical fixture is required.
• The fixture must be wired in accordance with the National
Electric Code and applicable local codes or ordinances.
WARNINGS
1. Ensure power has been switched off before starting installation.
2. Secure the construction metal plate to the ceiling joists using screws as shown in figure 1 ensure the plate is oriented
such that the raised ridges are facing downward.
3. If the light fixture being installed is 4 inches then skip to step 5.
4. If the light fixture being installed is 6 inches then remove the inner square by cutting the four supports using metal shears
and discard the inner ring. If the fixture is 8 inches, remove both inner squares as shown in figure 2.
5. Ensure the holding clips are bent up to suit the power supply module being used, as shown in figure 3.
6. Install the ceiling material of choice (not suplied) and ensure the cutout matches the metal plate shown in figure 4 and 5.
7. Install the desired slim downlight (not supplied) ensuring the clips are resting on the metal plate as shown in figure 6.
8. Restore power to the light fixture.
www.maxximastyle.com
Figure 1 Figure 2
Figure 3
Figure 4
Figure 5 Figure 6
/