Page is loading ...

Workrite Ergonomics | 800.959.9675 www.workriteergo.com 1 of 2
Parts Included
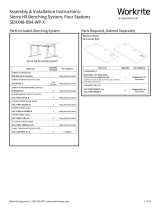
Assembly & Installation Instructions:
Cable Trough, ACC-CBLTRKIT-XX-X
Attach Tough Ends to Cable Trough
Slide Trough Ends (B & C) onto Cable
Trough (A).
Attach from below using #10-32 × "
Pan Head Machine Screws (F). Repeat
for other side.
If Installing optional Rigid Modesty
Panel, skip to Step 2.
Attach from behind Trough using
the #10-32 × " Pan Head Machine
Screws (D) and the #10-32 Hex Nuts
(E). Repeat for other side.
A Cable Trough
Qty: 1 B Le Trough
End
Qty: 1
C Right Trough
End
Qty: 1 G #12 × " Pan Head
Wood Screw
Qty: 8
Verify that you have all the tools needed for the assembly
#2 tip Phillips screwdriver over 6"
long or drill/driver with extension
" wrench if needed for Hex Nut (E)
or
Optional & Sold Separately
Daisy Chain Power System, Rigid Modesty Panel
41", 53" or 65" long
D#10-32 × " Pan Head
Machine Screws
Qty: 8
E#10-32 Hex Nut
Qty: 4
F #10-32 × " Pan Head
Machine Screws
Qty: 2
+6"
+6"
+6"
+6"
1
B
C
A
✓
a
a
a
c
c
b
b
D
E
F
Trough only installation

Workrite Ergonomics | 800.959.9675 www.workriteergo.com 2 of 2
1500283 Rev B
Attach Cable Trough to Underside of Worksurface
Align holes in Cable Trough with holes in bottom
of your Workrite pre-drilled worksurface.
Attach Trough assembly using the #12 × "
Phillips Pan Head Screws (G). Access holes
provide easy attachment with long screwdriver.
Under Benching Worksurface with optional Rigid Modesty Panel
& Daisy Chain Power System
Attach Tough Ends to Cable Trough With Optional Rigid Modesty Panel
Skip this step unless you've purchased the Rigid Modesty Panel ACC-MODPNL-XX-B3
Attach Trough (A) to the threaded
inserts on the Rigid Modesty Panel
from inside Trough using the eight
#10-32 × " Pan Head Machine
Screws (D).
3
a
b
2
G
Access hole
A
D
Optional Rigid Modesty Panel
ACC-MODPNL-XX-B3
/


