Page is loading ...

1 of 2 Workrite Ergonomics | 800.959.9675 www.workriteergo.com
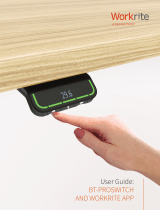
SENTINEL BASIC SWITCH
User Guide
SENTINEL BASIC SWITCH
The Sentinel Basic Switch has a few key functions to set user height limits and initialize and restore factory settings on your
Sentinel desk. The following instruction will guide you through how to use each of this functions.
SWITCH LAYOUT AND FEATURES
Height Control
INITIALIZING
"INITIALIZE" YOUR SENTINEL DESK
It is recommended aer assembling and using Sentinel desk, you performed initialization to ensure the leg and control system
are all synchronized.
INITIALIZE YOUR DESK
Step User input
1. Press and hold the DOWN button to lower the desk until the desk reaches the lowest position and then release it
2. Press and hold the DOWN button for 10 seconds. The desk will move down then back up for short distance. When the
desk stops release the down button and the initialization has been completed
Up Down
LED indicator light

2 of 2 Workrite Ergonomics | 800.959.9675 www.workriteergo.com
SET A "SPECIAL HEIGHT LIMITS"
A feature is available to limit either upper and or lower heights to avoid contact with drawer pedestals or shelving or other
obstacles that are near the desk inside the usable height range of the desk. By using this feature you can manage your usable
height range avoiding collisions into these objects.
SET LOWER OR UPPER LIMIT
Lower Limit:
A height limit that is in the lower half of the desk's
usable height range adjustment
Upper Limit:
A height limit that is in the upper half of the desk's
usable height range adjustment
48.7"
37.5"
22.5"
Upper Height Range
Lower Height Range
HOW TO SET A HEIGHT LIMIT
Step User input
1. Using the UP or DOWN button to move the desk to the position that a limit is to be set
2. Simultaneously Press and hold the UP and DOWN buttons for 10 seconds. When the position limit is set the LED
indicator light will flash GREEN two times signaling the step has been completed
3. Repeat to set another height limit to the opposing height range.
REMOVE HEIGHT LIMITS
Step User input
1. Using the UP or DOWN button to move the desk to the position that a limit is to remove
2. Simultaneously Press and hold the UP and DOWN buttons for 10 seconds. When the position limit is removed the
LED indicator light will flash GREEN two times signaling the step has been completed
3. Repeat to set another height limit to the opposing height range.
RESTORE FACTORY SETTINGS
CAUTION! Restoring "Factory Settings" will remove height limits. Perform this step only if needed to restore the desk to first use
settings or to help trouble-shoot any functional problems in operating your desk.
Step User input
1. Press the DOWN button and lower the desk fully.
2. Simultaneously press both the UP and DOWN buttons and release.
3. Quickly again simultaneously press and hold both the UP and DOWN buttons. The LED indicator will turn red.
When the LED indicator flashes RED then release both buttons.
4. Press the DOWN button until the desk moves and stops. The "Restore Factory Settings" step is now completed.
1500486 Rev A
/


