Page is loading ...

INSTALLATION & OPERATING
INSTRUCTIONS
for
REDCO
®
INSTABLOOM™
MODEL 15600 SERIES
TO BE SERVICED ONLY BY AUTHORIZED PERSONS
InstaBloomOpsMan P/N: 2803060 REV: 5/10/07
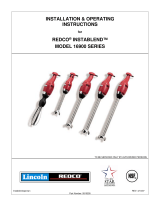
Shown with optional accessories

InstaBloom - 15600 Series Ops Manual
2
WARNING AND SAFETY INFORMATION
LIMITED TWO (2) YEAR WARRANTY
Lincoln Foodservice Products, LLC (“Lincoln”) warrants, to the original purchaser for use in the United States of
America, that each new item of Redco food preparation utensils (other than blades) manufactured by it (“Warranted
Product”) is free of defects in material and workmanship under normal use and conditions.
The exclusive remedy available under this Limited Warranty is that Lincoln will, free of charge, but at its option,
subject to, and in accordance with the terms and conditions of this Limited Warranty, repair or replace, for the
original purchaser for use in the United States of America, any Warranted Products or part thereof that proves to be
defective with the same or a similar item or part, it is returned to Lincoln in accordance with the procedure set out
on the warranty card.
This Limited Warranty applies only to original parts of Warranted Products sold for use in the United States of
America and does not apply to any Warranted Products located outside the United States of America, regardless of
where sold, or to any item or part thereof that has been subjected to accident, casualty, alteration, misuse, or abuse
or if the date of manufacture is altered or removed.
THIS LIMITED WARRANTY DOES NOT APPLY TO BLADES WHICH ARE SOLD COMPLETELY WITHOUT
WARRANTY OR GUARANTEE OF ANY KIND, EXPRESSED OR IMPLIED. THE OBLIGATION OF LINCOLN IS
LIMITED TO THE ABOVE AND, EXCEPT AS EXPRESSLY STATED HEREIN, LINCOLN MAKES NO
GUARANTEES OR WARRANTIES, EXPRESSED OR IMPLIED, INCLUDING WITHOUT LIMITATION,
WARRANTIES OF FITNESS OR MERCHANTABILITY, WITH RESPECT TO WARRANTED PRODUCTS.
LINCOLN SHALL NOT BE LIABLE FOR SPECIAL, INCIDENTAL, OR CONSEQUENTIAL DAMAGES OF ANY
KIND. NO ONE IS AUTHORIZED TO MAKE ANY GUARANTEES OR WARRANTIES, EXPRESSED OR
IMPLIED, ON BEHALF OF LINCOLN.
SOME STATES DO NOT ALLOW LIMITATIONS OF IMPLIED WARRANTIES, OR THE EXCLUSION OR
LIMITATION OF INCIDENTAL OR CONSEQUENTLY DAMAGES IN CONNECTION WITH THE SALE OF
CONSUMER PRODUCTS, CONSEQUENTLY, IF YOU ARE A CONSUMER, AS THAT TERM IS LEGALLY
DEFINED, THE ABOVE LIMITATION OR EXCLUSION MAY NOT APPLY TO YOU.
TABLE OF CONTENTS
Limited Warranty……………………………………………………………………………………………………………….. 2
Onion Preparation……………………………………………………………………………………………………………….3
Operating Instructions………………………………………………………………………………………………………….. 3
Cleaning……...………………………………………………………………………………………………………………..… 3
Disassembly………………..…………………………………………………………………………………………………… 4
Parts Lists……………………………..………………………………………………………………………………………… 5
Breading Recipe………………………………………………………………………………………………………..………. 6
!
WARNING
!
THIS MACHINE CONTAINS SHARP BLADES AND CAN CAUSE SERIOUS INJURY OR DEATH IF NOT
HANDLED PROPERLY. ALL OPERATORS OF THIS EQUIPMENT SHOULD READ THIS OPERATION
MANUAL BEFORE OPERATING EQUIPMENT.
IN ORDER TO AVOID DAMAGE TO PEOPLE AND THE APPLIANCE, READ AND FOLLOW THE
MANUFACTURER’S INSTRUCTIONS FOR THE CLEANING OF THIS EQUIPMENT.

InstaBloom - 15600 Series Ops Manual
3
ONION PREPARATION
Specify “super colossal” onions when ordering onions for “blooms.” These larger onions will “bloom” properly;
smaller onions may not. The onion should weigh a minimum of 20 ounces (367 grams). They should be firm, well-
shaped, with “short necks.” Onions should have single hearts and be free of green spots, blemishes, decay or
mold. Outer skin should be dry and papery. A small onion adapter is available should you decide to use small
onions.
1. Leaving root intact, remove papery skin from onion.
2. Approximately ½ to ¾ inch (1.27 to 1.40 cm) down from the “neck,” slice the top off the onion.
OPERATION
1. Raise the lever handle to lift the cutting blade assembly. Handle is designed to stay in the up position for
operating convenience.
2. Place the onion, root down, and core pointing directly upward, upon the pedestal and centered under the
cutting blade. NOTE: DO NOT ATTEMPT TO USE ONIONS LARGER THAN THE CUTTING BLADE.
3. Bring the handle down to check that the onion core lines up with the ring in the center of the cutting blade
assembly.
4. Place both hands on the handle. Raise the handle slightly and bring it down with a firm motion.
5. Hold the base with one hand and lift the handle to its full up position to push the onion from the blade
assembly.
6. Remove the onion from the machine. Hold onion about 18 inches (46.44 cm) off a clean surface with the
petals in the up position and drop the onion. This will cause the onion to “bloom” and the petals will
separate and open. (The onion may have to be dropped more than once before it blooms.)
7. Place the onions in an ice water bath for a minimum of one hour. This step allows the onion petals to
bloom and firm. Onions may be held in water over night.
CLEANING
To insure optimal performance of the equipment, clean the machine after every use.
Machine may be immersed completely or disassembled for cleaning. We suggest using a mild liquid detergent.
DO NOT USE ALKALINE OR CAUSTIC CLEANERS and do not run through a dishwasher.
!
CAUTION:
!
Blades are sharp and can cause injury. Check machine before using. Be sure machine is clean. Check for
broken, nicked or dull blades and if found, replace blade assembly. Check to be sure Blade and Blade Holder
Assembly can be raised and lowered freely. Lubricate if necessary using a light coating of mineral oil, Petrol
Gel or food grade lubricant. DO NOT LUBRICATE WITH COOKING OIL AS IT WILL BECOME STICKY.
CAUTION:
PRIOR TO USING YOUR EQUIPMENT, IT IS IMPORTANT TO CLEAN THE UNIT.
WASH NEW BLADES WITH WARM SOAPY WATER AND RINSE THOROUGHLY TO
REMOVE THE THIN PROTECTIVE OIL FILM.
!

InstaBloom - 15600 Series Ops Manual
4
DISASSEMBLY
1. Loosen thumb screws (I), lift handle (M) a few inches and remove core pusher (J) off the guide rods (G).
2. Remove pull pin (L). Hold handle (M) up and out of the way and lift the blade holder assembly (P) off the
guide rods (G).
3. To remove handle (M) and link bars (F), remove lock nuts (E) from screws (D) and remove. Save all parts.
4. To remove the blade assembly, remove screws (S) and blade retainer (R) from blade holder (P) and lift out.
CAUTION: USE CARE IN HANDLING BLADES. EVEN DULL BLADES WILL CUT.
5. To remove lift bracket (K) from blade holder (P), remove screws (N).
6. Reassemble in reverse order.
TO REPLACE BLADES:
1. Disassemble as in “cleaning procedure” through #4 and reassemble in reverse order with the new blade
assembly. CAUTION: BLADES ARE SHARP AND CAN CAUSE INJURY. HANDLE WITH CARE.

InstaBloom - 15600 Series Ops Manual
5
SPARE PARTS
LETTER PART NUMBER DESCRIPTION QTY
A 5108 Suction Cup 4
B 353 Nut, Hex. Nylon Lock, 5-16 x 18 2
C 379044 Base 1
D 379045 Screw, Shoulder, Slotted, ¼” dia. 2
E 379046 Nut, Lock, 10-32 2
F 379047 Link, Handle 2
G 379048 Guide Rod ½” dia. 2
H 379049 Washer, ½” ID, Silicone Rubber 2
I 369211 Thumb Screw 2
J 379050 Core Pusher 1
K 379051 Lift Bracket 1
L 4411 Pull Pin 1
M 379052 Handle 1
N 415 Screw, Hex Head, ¼-20 x 7/8 4
O 379053 Bearing only for Blade Holder 4
P 379054 Blade Holder with Bearings 1
Q 15601 Blade Assembly 1
R 379055 Blade Retainer 1
S 350247 Screw, Mach., 10-32 x 3/8 6
T 379056 Large Core Tool 1
U 379057 Small Core Tool 1
V 379058 Adapter 1

InstaBloom - 15600 Series Ops Manual
6
BREADING RECIPE
A. Prepare a flour mixture: 4 pounds (1.81 kg) All Purpose Flour, 5 Tablespoons (70 gr) paprika, 7
Tablespoons (100 gr) seasoning salt, 2 Tablespoons (28 gr) white pepper, 8 Tablespoons (113 gr) Cajun
seasoning and 1 Tablespoon (14 gr) cayenne pepper. For spicier onion, and 2 additional Tablespoons (28
gr) cayenne pepper. Set aside in large bowl.
B. Prepare an egg wash: 12 eggs and 3 quarts (2.84 L) milk whisked together to form a homogeneous
mixture. Set aside in a large bowl.
C. Breading the onion:
1. Remove the chilled onion from the ice water bath and shake off excess water and allow to drain for
a few minutes. Place the onion in the flour mixture with root down and sprinkle breading lightly
onto the top of the onion. Turn the onion onto its side; with one hand, leaf through the petals
spreading them apart while using the other hand to sprinkle flour mixture through the petals as they
separate. When one area of the onion bloom is completely coated with flour, roll the onion on its
side to another section until the entire bloom has been coated with flour. Invert the bloom and
shake off loose flour.
2. With the root side down, place the onion in the egg wash. Gently turn the onion so that petals are
down and allow 10 to 15 seconds rest so that the egg wash migrates into the crevices of the onion
bloom. Cup fingers beneath the flower petals and lift the onion out of the egg wash. Allow excess
egg mixture to flow off of the onion before placing the onion back into the flour mixture.
3. Position the onion once again on its side in the flour mixture and begin the breading procedure
again until the entire onion is covered in the breading mixture. As before, be sure to separate the
individual petals so that the flour will coat all the way to the base of the petal. Invert the onion,
petals down, and bounce the onion bloom lightly on the fingertips to shake off excess flour.
D. Frying: The fryer set temperature is 350°F (177°C) and should be properly preheated. With the onion in the
inverted position (root up), place it gently in the fryer and deep fry for two minutes in the petals down
position and gently turn the onion to petals up position and fry for an additional 2 minutes. After the onion
is removed from the fryer, drain the onion by letting it stand for 30 seconds.
E. Serving: A shallow serving dish or soup bowl may be the utensil of choice. The bowl may be garnished
with green Romaine leaves or other colorful greens. Remove the onion heart with the supplied Redco
circular core cutter. A push and twist motion cuts through quickly. With a pair of tongs, reach into the
center of the core cutter and lift out the entire heart with the root attached. The bloom will relax into the
dish, leaving a center space for a 2 ounce (56.7 gr) ramekin of dipping sauce. SERVE HOT!
Thousand Island dressing, Cocktail Sauce, Bleu Cheese dressing, Dijon Ranch, Creamy Ranch, and Catalina
dressings are some of the sauces typically served with the Onion Bloom. Create your own signature sauce
mixture. Additional cooking information or recipes are available from Lincoln’s Research Application Kitchen.
CAUTION:
HOT GREASE OR OIL CAN CAUSE A SEVERE BURN. USE EXTREME CARE
WHEN LOADING OR UNLOADING PRODUCT. WEAR SAFETY AND/OR
PROTECTIVE CLOTHING ITEMS AS NEEDED.
!

InstaBloom - 15600 Series Ops Manual
7
This page intentionally left blank.

InstaBloom - 15600 Series Ops Manual
8
Lincoln Foodservice Product, LLC
1111 North Hadley Road
Fort Wayne, Indiana 46804
United States of America
Telephone: (260) 459-8200
U.S. Fax: (888) 790-8193
Int’l Fax: (260) 436-0735
Technical Support Hotline: (800) 678-9511
www.lincolnsmallwares.com
/