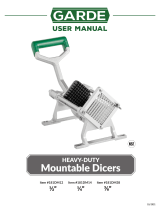
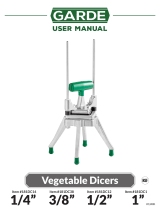
Page is loading ...

USER MANUAL
Item #181FC14Item #181FC12 Item #181FC38
10/2016
HEAVY DUTY

Be careful when handling and operang the machine, as the blades are very sharp. Always
keep your hands away from the blades.
These fry cuers can be mounted to a countertop, workstaon, or wall.
1. Wall Mount Instrucons:
a. Place the unit where you’d like it to be mounted.
b. Find the closest stud and move the machine so that the mounng holes on one side of the
unit are over the stud.
• It’s important that the unit be mounted to a stud to prevent it from falling during use!
c. Mark the 4 hole locaons and remove the machine.
d. Drill 5/32” holes through these marks and then, with washers under their heads, drive the
mounng screws through the holes in the unit and into the holes in the wall.
2. Countertop/Workstaon Instrucons:
a. Choose a sturdy countertop or workstaon for mounng.
b. Place the unit where you’d like it to be mounted.
c. Mark the 4 hole locaons and remove the machine.
d. Drill 5/32” holes through these marks and then, with washers under their heads, drive the
mounng screws through the holes in the unit and into the holes in the surface.
1. Put a potato on the blade and holder assembly.
2. Aer making sure your hands and ngers are clear of the cung area, pull the handle in one quick
moon.
a. This may occasionally need to be repeated for potatoes that are exceponally large.
b. Do not try to cut potatoes that are bigger than the opening in the blade holder.
3. When nished, be sure to clean the machine using the instrucons below.
Note: to cut 1/4” and 1/2”, use the 1/4” push block. To cut 3/8”, use 3/8” push block.
USER MANUAL
Please read and comply with the instrucons listed on this document. To get the best service life
and performance from your machine, clean it thoroughly before and aer each use by following the
instrucons listed below. Minimize the use of alkaline cleaners as they may dull the nish and cause ping.

Cleaning and Maintenance
1. Release the push block by removing the thumb screws.
2. Release the blade and holder assembly by removing the wing nuts.
3. Carefully remove the blade and holder assembly, as well as the push block.
4. Wash the push block and blade and holder assembly.
a. The blade and holder assembly can be further disassembled for more thorough cleaning by:
• Removing the thumb screws and blade holder plate
• Lightly tapping the blades and spacers to remove them from the holder.
b. To reassemble the blade and holder assembly:
• Put the blade holder on a at surface with the spacer pockets facing up.
• Insert blade spacers with their slots facing the inner opening of the blade holder.
• Insert blades with cung edge facing down and slots facing up.
• Insert blades with cung edge and slots facing down.
• Put the blade holder plate into place and secure it with the thumbscrews.
5. Simply reverse the disassembly instrucons to reassemble the fry cuer.
6. When needed, lubricate the guide rods with mineral oil, food grade grease or paran. Do not
use cooking oil.
Warranty
1 year free of defects replacement warranty. All products sold under the Garde NSF Manual
Food Preparaon Equipment trademark are used for commercial purposes and are guaranteed
to be free from defects in material and construcon at the me of shipment. Garde will replace
a defecve piece for a period of up to one year from purchase provided the product has been
subject to normal use. Misuse or abuse of the product as interpreted by Garde will void the
warranty. Residenal use voids the warranty.
USER MANUAL

USER MANUAL
Feet
#181FT1
SS Wing Nut
#181SSWNUT
/


