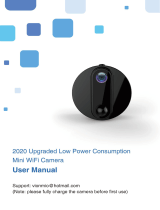
RD03

Sunsky RD03 User manual

  • Hello! I've reviewed the user manual for the RD03-WIFI camera. This document provides information on how to use the device, including charging instructions, network connectivity, local video viewing, and storage options. I'm ready to answer any questions you may have about the device and its features based on the manual.
  • What kind of charger should I use?
    What does the red indicator light mean during charging?
    How do I reset the device if the blue indicator is slow flashing?
    How to connect in local mode?
RD03-WIFI Manual
Appearance Guide
Togle switch/ON
/OFF
SD-Holder
 USB Charge
Microphone
LED-Guiding Lights
Back clip Reset
Reversible camera
Press the power button to start the machine. After starting the machine, the blue
indicator light flashes continuously and quickly, and the device enters the state to
be connected.
Note: If the blue indicator is slow flashing/always on or cannot be connected, long
press the reset button for 5 seconds to reset.
Turn on the device
Please use 500-1000mA charger to charge the device. When charging, the red
indicator is steady on, and when fully charged, the green indicator is steady on.
During the charging process, the device is turned on and can work while charging.
Charge
Download and install JXLCAM APP, Android system in Google play search
download. For easy installation, easily scan the following QR code installation.
Note: during installation, you need to open all permissions of the APP,
otherwise the APP will not work properly.
1.Install APP
Please select APP to download
Android Phone Options
Note: When there is no WiFi in the environment, AP mode can be
used for connection. The effective distance of this mode is no more
than 10M,which can realize localized video viewing.
Open your phone's WiFi list and connect to ACCQ...... After success, open the APP
page and click AP as shown below to watch the video.
2.Local mode
1. First, confirm that there is available WIFI signal near the device, turn the
device on, the blue indicator light flashes quickly, and the device enters the
state to be connected. (Note: only support 2.4G band WIFI signal)
2.Unable to connect successfully when power is low.
3.When connecting to the network, place the device as close to the router as
possible. If the nearby available WiFi signal is weak, the connection cannot
be successful or the screen will be closed after successful connection.
4.open the APP and follow the steps below˖
ķClick“+” ĸClick "AP add Camera"
3
ĻClick"Cancel" ļWaiting for the connection
ĹClick "···" to connect to the local
2.4G WIFI band, enter the password,
and then go to the next step
ĺClick "... "to connect to the camera
WIFI hotspot and add the camera
ĽClick"Next" ľYou can change the name or not,
and then click “Next”
ĿCheck out the video preview on the home page
4.Description of ICONS and buttons on the home page
SFGSFTIQBHF
4%DBSEQMBZCBDLMF
.BOVBMMZSFDPSEMFT
-PDBMNPEF 
/VNCFSPGEFWJDF
%FWJDFOJDLOBNF
/FUXPSLTUBUVT
"EEEFWJDF
NOTE:
1. When the device fails to con¿gure the network, please check whether the router
and WiFi password are con¿gured correctly (the device does not support WIFI
signals in the 5.8G band). After con¿rming that it is correct, you can press and
hold the reset button until the device indicator Àashes quickly, restore the factory
settings, and recon¿gure network.
2. When the software homepage shows that the device is oine, you can check
whether the device is normally powered on, and click the refresh icon in the upper
right corner to refresh.
Storage card
If you need to store video content, you need to install an SD card.
˄This machine supports loop video recording˅
5.Description of ICONS and buttons on the video page
1IPUP 3FDPSEJOH
-BOETDBQF
TXJUDIJOH
-JTUFO
4IBSQOFTT
TXJUDI
*OEJDBUPSMJHIU
0//0''
*OGSBSFEMBNQ
0//0''
5BML
1SPEVDUTXJUITQFBLFSTDBOCFVTFE
Note: PTZ function is only
applicable to shaking head
products, some products do
not support this function
4XJUDIMFGU
BOESJHIU
4XJUDIVQ
BOEEPXO
/