Page is loading ...

THIS INSTRUCTION BOOKLET CONTAINS IMPORTANT
SAFETY INFORMATION.
PLEASE READ AND KEEP FOR FUTURE REFERENCE.
Whalen Furniture Mfg., Inc. Page 1 Factory No. 15548
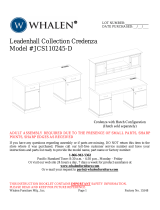
Leadenhall Collection Desk
Model # JCS110243-I
ADULT ASSEMBLY REQUIRED DUE TO THE PRESENCE OF SMALL PARTS, SHARP
POINTS, SHARP EDGES AS RECEIVED
If you have any questions regarding assembly or if parts are missing, DO NOT return this item to the
store where it was purchased. Please call our toll-free customer service number and have your
instructions and parts list ready to provide the model name, part name or factory number:
1-866-942-5362
Pacific Standard Time: 8:30 a.m. - 4:30 p.m., Monday - Friday
Or visit our web site 24 hours a day, 7 days a week for product assistance at
www.whalenfurniture.com
Or e-mail your request to [email protected]
LOT NUMBER:
DATE PURCHASED:
/ /

Model # JCS110243-I
Please call for replacement parts or assistance:
1-866-942-5362
Whalen Furniture Mfg., Inc. Page 2 Factory No. 15548
Important
Before you begin: Open, identify and count all parts prior to assembly. Lay out parts on a flat and non-
abrasive surface. You will need the parts identified on page 3, 4 and 5 of this instruction manual.
NOTE: IT IS VERY IMPORTANT TO USE GLUE WITH DOWELS. EXCESS GLUE CAN BE WIPED OFF
WITH DAMP CLOTH.
Insert Dowel at least half way by tapping lightly with a rubber mallet IF NECESSARY.
CAM LOCK SYSTEM OPERATION
HOW THE KNOCK DOWN (KD) ASSEMBLY SYSTEM WORKS
1. Screw Cam Bolt into the pre-drilled small holes on panel.
2. Connect both panels together; making sure Cam Bolt goes into pre-drilled hole on the end of panel
with Cam Lock.
3. Insert Cam Lock into pre-drilled large hole on panel. Make sure arrow on Cam Lock is pointed toward
Cam Bolt.
4. Once Cam Bolt is connected inside Cam Lock, take a Phillips screwdriver and tighten Cam Lock clockwise.
5. Plug Cam Cap into the cross slot of the Cam Locks to conceal the cam.
You are now ready to assemble the KD unit.

Model # JCS110243-I
Please call for replacement parts or assistance:
1-866-942-5362
Whalen Furniture Mfg., Inc. Page 3 Factory No. 15548
Parts and Hardware List
Please read completely through the instructions and verify that all parts listed are present before
beginning assembly.
A- Desk Top (1) B- Left Pedestal Left Side (1) C- Left Pedestal Right Side (1)
D- Left Pedestal Bottom Stretcher (2) E- Right Pedestal Left Side (1) F- Right Pedestal Right Side (1)
G- Right Pedestal Bottom Panel (1) H- Modesty Panel (1) I- Pedestal Back Panel (2)
J- Door Panel (1) K- Middle Crossbar (2) L- Bottom Front/Back Molding (4)
M- Bottom Side Molding (4) N- Adjustable Shelf (1) P- Middle Drawer Front (1)
P1- Middle Drawer Back Panel (1) P2- Middle Drawer Left Side (1) P3- Middle Drawer Right Side (1)
P4- Middle Drawer Bottom Panel (1) P5- Middle Drawer Bottom Support (1) Q- Right Drawer Front (1)

Model # JCS110243-I
Please call for replacement parts or assistance:
1-866-942-5362
Whalen Furniture Mfg., Inc. Page 4 Factory No. 15548
Parts and Hardware List
Please read completely through the instructions and verify that all parts listed are present before
beginning assembly.
Q1- Right Drawer Back Panel (1) Q2- Right Drawer Left Side (1) Q3- Right Drawer Right Side (1)
Q4- Right Drawer Bottom Panel (1) R- Left Drawer Front (2) R1- Left Drawer Box Front (1)
R2- Left Drawer Back Panel (1) R3- Left Drawer Left Side (1) R4- Left Drawer Right Side (1)
R5- Left Drawer Bottom Panel (1) S- File Drawer Front (1) S1- File Drawer Back Panel (1)
S2- File Drawer Left Side (1) S3- File Drawer Right Side (1) S4- File Drawer Bottom Panel (1)
T- Guide Rail (2) U- File Hanger (2) V- 16 inch 3-packed Slides (2)
W- 14” Ball Bearing Slides (2)
X- 16 inch 2-packed Slides (2) CL- Left Slide Track (1)
CR- Right Slide Track (1) DL- Left Slide Runner (1) DR- Right Slide Runner (1)

Model # JCS110243-I
Please call for replacement parts or assistance:
1-866-942-5362
Whalen Furniture Mfg., Inc. Page 5 Factory No. 15548
Parts and Hardware List
Please read completely through the instructions and verify that all parts listed are present before
beginning assembly.
(1) Cam Lock (2) Cam Bolt (3) Large Wood Dowel (4) Small Wood Dowel
(48+2 extra) (48+2 extra) (31+1 extra) (8+1 extra)
(5) M3.5 x 12 mm
Zinc Screw (6) M3.5 x 12 mm Screw (7) M5 x 30 mm Screw (8) M5 x 38 mm Screw
(4+1 extra) (12+1 extra) (12+1 extra) (22+1 extra)
(9
) M3.5 x 12 mm Pan Head Screw (10) M5 x 14 mm Pan Head Screw (11) M4 x 25 mm Pan Head Screw
(64+2 extra) (10+1 extra) (4+1 extra)
(12) Cam Cap (13) Shelf Pin (14) Plastic Connector (15) Large Plastic Bracket
(11+1 extra) (4+1 extra) (8) (2)
(16) Small Plastic Bracket (17) Floor Protector (18) Door Hinge (19) Drawer Handle
(2) (8+1 extra) (2) (6)
(20) Door Knob (1) (21) 22 mm Handle Bolt (9) (22) 19 mm Handle Bolt (4)
(23) Medium Plastic Bracket (2) Glue (1) Touch-up Pen (1)
Tools required: Phillips screwdriver and Hammer (not provided).

Model # JCS110243-I
Please call for replacement parts or assistance:
1-866-942-5362
Whalen Furniture Mfg., Inc. Page 6 Factory No. 15548
S2
S3
File Drawer Assembling
1. Unpack the unit and confirm that you have all the hardware and required parts listed.
2. Pick up 16 inch 3-packed Ball Bearing Slides (V) and separate the Slide Runners for later step. Extend
the Slide Runner all the way forward. Press the plastic release lever of the ball bearing slides up and
pull the Slide Runner complete out.
3. Attach the separated Slide Runners (V) to File Drawer Left and Right Side (S2 and S3) respectively
with three M3.5 x 12 mm Pan Head Screws (9) per slide runner. Ensure the closed end of Slide Runner
against the front edge of drawer side panel.
4. Using the pilot holes as a guide, attach two Large Plastic Brackets (15) onto the File Drawer Front (S)
with four M5 x 14 mm Pan Head Screws (10). Be sure the tabs of Plastic Bracket facing outward.
S

Model # JCS110243-I
Please call for replacement parts or assistance:
1-866-942-5362
Whalen Furniture Mfg., Inc. Page 7 Factory No. 15548
S
S2
S3
S4
S
S2
S3
File Drawer Assembling
5. Connect File Drawer Left and Right Side (S2 and S3) to the File Drawer Front (S) using four M3.5 x 12
mm Pan Head Screws (9). Make sure the grooves line up with each other. Tighten the screws with a
Phillips Screwdriver.
6. Slide File Drawer Bottom Panel (S4) all the way into the grooves with finished surface up.

Model # JCS110243-I
Please call for replacement parts or assistance:
1-866-942-5362
Whalen Furniture Mfg., Inc. Page 8 Factory No. 15548
File Drawer Assembling
7. Fasten the File Drawer Back Panel (S1) to File Drawer Side Panels (S2 and S3) using four M5 x 38 mm
Screw
s (8). Make sure that Drawer Bottom Panel (S4) fits securely into the groove of the Drawer Back
Panel (S1). Tighten all the screws with a Phillips Screwdriver.
8. Turn the assembled drawer upright. Position Guide Rails (T) onto the File Drawer Side Panels (S2 and
S3) with the high side facing inward.
9. Hook 2 File Hangers (U) onto the high edge of Guide Rails (T). Slide the File Hangers forward and
backward to keep hanging files organized.
10. Attach a Drawer Handle (19) to the outside of File Drawer Front (S) using two 22 mm Handle Bolts (21)
provided.
S2
S3
S4
S1
S2
S3
S1
8
8
S2/S3
S
19
S2
S3
S1
U
T
U

Model # JCS110243-I
Please call for replacement parts or assistance:
1-866-942-5362
Whalen Furniture Mfg., Inc. Page 9 Factory No. 15548
R3
R4
Left Drawer Assembling
11. Pick up 14” Ball Bearing Slides (W) and separate the Slide Runners for later step. Extend the Slide
Runner all the way forward. Press the plastic release lever of the ball bearing slides up and pull the
Slide Runner complete out.
12. Attach the separated Slide Runners (W) to Left Drawer Left and Right Side (R3 and R4) respectively
with three M3.5 x 12 mm Pan Head Screws (9) per slide runner. Ensure the closed end of Slide Runner
against the front edge of drawer side panel.
13. Attach the Drawer Handle (19) to the outside of Left Drawer Faces (R) using the 19 mm Handle Bolts
(22) provided.
R
22
R
22

Model # JCS110243-I
Please call for replacement parts or assistance:
1-866-942-5362
Whalen Furniture Mfg., Inc. Page 10 Factory No. 15548
R
R1
R4
8
8
Left Drawer Assembling
14. Using the pilot holes as a guide, fasten Left Drawer Box Front (R1) to both Left Drawer Faces (R) with
four M4 x 25 mm Pan Head Screws (11). Tighten the screws with a Phillips Screwdriver.
15. Connect Left Drawer Left and Right Side (R3 and R4) to the Left Drawer Box Front (R1) using four
M5 x 38 mm
Screws (8). Make sure the grooves line up with each other. Tighten the screws with a
Phillips Screwdriver.

Model # JCS110243-I
Please call for replacement parts or assistance:
1-866-942-5362
Whalen Furniture Mfg., Inc. Page 11 Factory No. 15548
R
R1
R4
R5
Left Drawer Assembling
16. Slide Left Drawer Bottom Panel (R5) all the way into the grooves with finished surface up.
17. Fasten the Left Drawer Back Panel (R2) to Left Drawer Side Panels (R3 and R4) using four M5 x 38
mm
Screws (8). Make sure that Drawer Bottom Panel (R5) fits securely into the groove of the Drawer
Back Panel (R2). Tighten all the screws with a Phillips Screwdriver.
R2
8
8

Model # JCS110243-I
Please call for replacement parts or assistance:
1-866-942-5362
Whalen Furniture Mfg., Inc. Page 12 Factory No. 15548
X
P2
P3
X
Middle Drawer Assembling
18. Pick up 16 inch 2-packed Slides (X) and separate the Slide Runners for later step. Extend the Slide
Runner all the way forward. Press the plastic release lever of the slides up and pull the Slide Runner
complete out.
19. Attach the separated Slide Runners (X) to Middle Drawer Left and Right Side (P2 and P3) respectively
with three M3.5 x 12 mm Pan Head Screws (9) per slide runner. Ensure the closed end of Slide Runner
against the front edge of drawer side panel.
20. Using the pilot holes as a guide, attach two Small Plastic Brackets (16) onto the Middle Drawer Front
(P) with two M5 x 14 mm Pan Head Screws (10). Be sure the tabs of Plastic Bracket point towards the
short end of drawer front vertically.
21. Screw one Cam Bolt (2) all the way into the designated small hole on Middle Drawer Front (P) as
shown in the illustration.

Model # JCS110243-I
Please call for replacement parts or assistance:
1-866-942-5362
Whalen Furniture Mfg., Inc. Page 13 Factory No. 15548
Middle Drawer Assembling
22. Connect Middle Drawer Left and Right Side (P2 and P3) to the Middle Drawer Front (P) using four
M3.5 x 12 mm Pan Head Screws (9). Make sure the grooves line up with each other. Tighten the screws
with a Phillips Screwdriver.
23. Insert one Large Wood Dowel (3) into the back large hole on Middle Drawer Front (P) as a guide. Align
and attach Middle Drawer Bottom Support (P5) to the Middle Drawer Front (P) by engaging one Cam
Lock (1) as shown. (Refer to page #2 on Cam Lock system operation supplement). Make sure that you
use a small amount of glue with both ends of all dowels.
24. Slide Middle Drawer Bottom Panel (P4) all the way into the grooves with finished surface up.
P3
P2

Model # JCS110243-I
Please call for replacement parts or assistance:
1-866-942-5362
Whalen Furniture Mfg., Inc. Page 14 Factory No. 15548
Middle Drawer Assembling
25. Fasten Middle Drawer Back Panel (P1) to the Drawer Side Panels (P2 and P3) and Drawer Bottom
Support (P5) using six M5 x 38 mm Screws (8). Make sure that Drawer Bottom Panel (P4) fits securely
into the groove of the Drawer Back Panel (P1). Tighten all the screws with a Phillips Screwdriver.
26. Turn the assembled drawer upright.
27. Attach two Drawer Handles (19) to the outside of Middle Drawer Front (P) using four 22 mm Handle
Bolts (21) provided.
P
8
8
8
P
P3

Model # JCS110243-I
Please call for replacement parts or assistance:
1-866-942-5362
Whalen Furniture Mfg., Inc. Page 15 Factory No. 15548
Right Drawer Assembling
28. Using the pilot holes as a guide, align and attach Left Slide Runner (DL) to Right Drawer Left Side (Q2)
using three M3.5 x 12 mm Screws (6). Make sure the roller end of Slide Runner facing backward.
Tightly fasten with a Phillips Screwdriver.
29. Repeat the last step to attach Right Slide Runner (DR) to Right Drawer Right Side (Q3).
30. Using the pilot holes as a guide, attach two Medium Plastic Brackets (23) onto the Right Drawer Front
(Q) with four M5 x 14 mm Pan Head Screws (10). Be sure the tabs of Plastic Bracket point towards the
short end of drawer front vertically.

Model # JCS110243-I
Please call for replacement parts or assistance:
1-866-942-5362
Whalen Furniture Mfg., Inc. Page 16 Factory No. 15548
Right Drawer Assembling
31. Connect Right Drawer Left and Right Side (Q2 and Q3) to the Right Drawer Front (Q) using four M3.5
x 12 mm Pan Head Screws (9). Make sure the grooves line up with each other. Tighten the screws with
a Phillips screwdriver.
32. Slide the Right Drawer Bottom Panel (Q4) all the way into the grooves with the finished surface up.
Q
Q2
Q3

Model # JCS110243-I
Please call for replacement parts or assistance:
1-866-942-5362
Whalen Furniture Mfg., Inc. Page 17 Factory No. 15548
Right Drawer Assembling
33. Fasten the Right Drawer Back Panel (Q1) to Right Drawer Left and Right Side (Q2 and Q3) using four
M5 x 38 mm Screws (8). Make sure that Drawer Bottom Panel (Q4) fits securely into the groove of the
Drawer Back Panel (Q1). Tighten all the screws with a Phillips Screwdriver.
34. Turn the assembled drawer upright.
35. Attach one Drawer Handle (19) to the outside of Right Drawer Front (Q) using two 22 mm Handle
Bolts (21) provided.
Q

Model # JCS110243-I
Please call for replacement parts or assistance:
1-866-942-5362
Whalen Furniture Mfg., Inc. Page 18 Factory No. 15548
C
B
W
V
A
Left Pedestal Assembling
36. Insert and screw the Cam Bolts (2) into the designated small holes on Desk Top (A) and 4 Bottom
Front/Back Moldings (L) as shown in the illustration.
37. Attach separated 16 inch 3-packed Slide Tracks (V) and 14” Slide Tracks (W) to the Left Pedestal Left
and Right Side Panels (B and C) respectively with three M3.5 x 12 mm Pan Head Screws (9) per slide
track. Ensure the opening of Slide Track facing front of the unit.
38. Insert and screw the Cam Bolts (2) into the designated small holes on Left Pedestal Left and Right Side
Panels (B and C) as shown in the illustration.

Model # JCS110243-I
Please call for replacement parts or assistance:
1-866-942-5362
Whalen Furniture Mfg., Inc. Page 19 Factory No. 15548
Left Pedestal Assembling
39. Insert two Small Wood Dowels (4) into the inner holes of one Bottom Side Molding (M) as a guide.
Make sure that you use a small amount of glue with both ends of all dowels. Fasten the Bottom Side
Molding (M) to the Left Pedestal Left Side Panel (B) using three M5 x 30 mm Screws (7). Tighten all
the screws with a Phillips Screwdriver.
40. Gently tap two Floor Protectors (17) onto the bottom of Pedestal Left Side Panel (B). Make sure the
Floor Protectors rest on the center of side panel for avoiding any damage or crack.
41. Repeat last two steps with the Left Pedestal Right Side Panel (C).
42. Insert one Large Wood Dowel (3) into the middle large hole of one Bottom Front/Back Molding (L) and
attach to one Left Pedestal Bottom Stretcher (D) using two Cam Locks (1). Ensure the Cam Locks will
face the floor. (Refer to page #2 on Cam Lock system operation supplement)
43. Repeat the same procedure to attach the other Pedestal Bottom Stretcher (D) to the other Bottom
Front/Back Molding.
B/C
M
17
B
C
M
M
4

Model # JCS110243-I
Please call for replacement parts or assistance:
1-866-942-5362
Whalen Furniture Mfg., Inc. Page 20 Factory No. 15548
I
B
Left Pedestal Assembling
44. Insert five Large Wood Dowels (3) into the designated large holes on the Left Pedestal Right Panel (C)
as a guide. Align and attach the Pedestal Back Panel (I), Middle Crossbar (K) and 2 Bottom Stretcher
assemblies to the Left Pedestal Right Panel (C) using six Cam Locks (1). Ensure the Cam Locks point
towards inside of the unit.
45. Repeat last step to attach the Left Pedestal Left Panel (B) at the opposite end.
C
I
/