Page is loading ...

anovafurnishings.com
888.535.5005 tel
TOOLS NEEDED:
• Ratchet with 1/2" socket
• Ratchet with 3/4" socket
• 1/2" Open-end or box-end wrench
• 3/4" Open-end or box-end wrench
• Level
Assembly Instructions
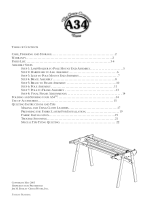
ADA Picnic Table with Single Pedestal and Surface Mount Plate
F1435 - 46" Square Table, Expanded Steel, 3-Traditional Edge Seats
D1405 - 46" Square Table, Perforated, 3-Traditional Edge Seats
F1402 - 46" Round Table, Expanded Steel, Traditional Edge Seats
TABLE COMPONENTS:
ASSEMBLY HARDWARE: All hardware is stainless steel.
(1) Table Top (1) Table Top Adapter (3) Seat Supports (1) Surface Mount Support (3) Seats
(8) 1/2" x 5 1/2"
Hex Head Bolts
(6) 1/2" x 1 1/2"
Hex Head Bolts
(16) 1/2" x 1 1/4"
Hex Head Bolts
(28) 1/2" Flat
Washers
(32) 5/16" Flat
Washers
(14) 1/2-13"
Nylock Nuts
(16) 5/16-18"
Nylock Nuts
ASSEMBLY:
Inspect the shipping container contents for damage and to
determine that all components and hardware are present.
1.
Locate the surface mount support and the tabletop adapter and
lay them out on the packaging cardboard or other so surfaced
workspace.
2.
Align the mounting holes in the tabletop adapter with the holes in
the appropriate end of the surface mount support. Install one of
the 1/2" at washers onto one of the 1/2" x 1 1/2" hex head bolts
and insert the bolt through both parts, with the bolt head on the
outside surface of the surface mount support. Install a 1/2" at
washer and 1/2" nylock nut on the inside end of the bolt. Use the
ratchet with 3/4" socket and 3/4" wrench to tighten the nuts.
3.
NOTE: Before assembling the nuts to the bolts, it is
recommended that a light oil or petroleum jelly be applied to the
screw threads.
1
The assembly is a two-person operation.
Repeat this for the other two mounting holes on the top side of
the adapter/support assembly.
Turn the assembly over and repeat for the three mounting holes
on the other side of the assembly.
1/2" Flat Washer
1/2" Flat Washer
1/2" Flat Washer
1/2" Flat Washer
1/2" Nylock Nut
1/2" Nylock Nut
1/2" x 1 1/2"
Hex Head Bolt
1/2" x 1 1/2"
Hex Head Bolt
F1402 D1405

Copyright 2018 ANOVA® Made in USA. 2
Note: Please contact Customer Care at 1-866-797-1761 when ordering replacement parts.
05/02/2018
Install the surface mount support to a prepared surface mount site.
If the support is not secured, the assembly may tip or fall during the
subsequent assembly steps.
Note: Tables must be surface mounted for stability and to comply
with warranty and Federal ADA regulations.
4.
Place one of the seats upside down on the packing cardboard or
other so work surface. Position one of the seat supports so the
mounting holes in the seat support line up with the mounting holes
in the seat frame.
Place one of the 5/16" at washers on one of the 5/16" x 1 1/4" hex
head bolts and insert the bolt through the seat support and the
seat frame mounting holes. Apply a 5/16" at washer and a 5/16"
hex nut to the end of the bolt and tighten nger tight.
5.
Position two of the seat support assemblies on opposite sides
of the surface mount support. Place a 1/2" at washer onto one
of the 1/2" x 5 1/2" hex head bolts and insert the bolt through
the mounting holes on the surface mount support and both seat
supports. Add a 1/2" at washer and 1/2" nylock nut to the end of
the bolt and tighten the nut nger tight.
6.
Position the tabletop adapter so that the mounting holes in the
frame of the tabletop align with the mounting holes in the tabletop
adapter. Place one of the 5/16" at washers on one of the 5/16" x 1
1/4" hex head bolts and insert the bolt through the tabletop fame
and the tabletop adapter mounting holes. Apply 5/16" at washer
and a 5/16" hex nut to the end of the bolt and tighten nger tight.
7.
Aer two weeks, retighten all hardware.8.
Repeat for the other three mounting holes in the seat support
assemblies. Aer all bolts are installed, use the ratchet with 3/4"
socket and 3/4" wrench to tighten the nuts.
Note: Check withe a level and adjust the seats as needed while
tightening.
Install the remaining seat support assembly in the same manner.
Repeat for the other three mounting holes. Aer all bolts are
installed, use the ratchet with 1/2" socket and 1/2" wrench to
tighten the nuts.
Attach the remaining seats to the remaining seat supports in the
same manner.
Repeat for the other three mounting holes in the tabletop and the
tabletop adapter. Aer all bolts are installed, use the ratchet with
1/2" socket and 1/2" wrench to tighten the nuts.
Note: Check with a level while tightening the hardware and adjust
the tabletop as needed while tightening.
Prepared surface
mount site
5/16" Hex Nut
5/16" Hex Nut
5/16" Hex Nut
5/16" Hex Nut
5/16" Flat Washer
5/16" Flat Washer
5/16" Flat Washer
5/16" Flat Washer
5/16" Flat Washer
5/16" Flat Washer
5/16" Flat Washer
5/16" x 1 1/4"
Hex Head Bolt
5/16" x 1 1/4"
Hex Head Bolt
5/16" x 1 1/4"
Hex Head Bolt
5/16" x 1 1/4"
Hex Head Bolt
5/16" x 1 1/4"
Hex Head Bolt
1/2" x 5 1/2"
Hex Head Bolt
1/2" Flat Washer
1/2" Flat Washer
1/2" Flat Washer
1/2" Flat Washer
1/2" Nylock Nut
1/2" Nylock Nut
1/2" Nylock Nut
1/2" Nylock Nut
1/2" x 5 1/2"
Hex Head Bolt
/