Page is loading ...

MAICO Diagnostic GmbH
MAICO Diagnostic GmbH, Salzufer 13/14, D 10587 BERLIN, Tel. ++49 30/70714650, Fax ++49 30/70714699
Operating Instructions
MAICO EROySCAN™ SCREENER

GebaEroscreenE_09a.doc 851 983/6 03/09
Operating Instructions EROxSCAN
TM
Screener
Table of Contents
1 Introduction ............................................................................................. 1
2 Important Safety Instructions .................................................................... 2
3 Purpose .................................................................................................... 5
4 Description ............................................................................................... 7
5 Setup ....................................................................................................... 9
5.1. Unpacking the System ....................................................................... 9
5.2. Connection to the optional Printer .................................................. 10
5.3. Environmental conditions ................................................................ 11
5.4 Battery Installation ........................................................................... 11
5.5 Loading Paper into the optional Printer ............................................ 12
5.6 Attaching Eartips .............................................................................. 13
6 Quick Start ............................................................................................. 14
7 Performing DPOAE and TEOAE Tests ...................................................... 15
7.1. Preparing the Patient for Testing ..................................................... 15
7.2. Control Buttons .............................................................................. 15
7.3. Turning on the Instrument .............................................................. 15
7.4. Testing in the Default Modes .......................................................... 16
7.4.1 To Begin Testing ......................................................................... 17
7.4.2. Testing children with PE Tubes .................................................. 18
7.4.3 Auto Calibration ......................................................................... 18
7.4.4 Reviewing Results ....................................................................... 19
7.4.5 Test Technique ........................................................................... 19
7.5 Remote Probe (optional) ................................................................... 20
7.5.1 Installing the Remote Probe ........................................................ 20
7.5.2 Testing with the Remote Probe ................................................... 22
7.6 Noise Sources ................................................................................... 22
7.7 Printing the Results (optional) ........................................................... 23

GebaEroscreenE_09a.doc 851 983/6 03/09
Operating Instructions EROxSCAN
TM
Screener
7.8 Setting the Clock ............................................................................. 24
8 Changing Instrument Settings ................................................................ 26
9 Interpreting Results ................................................................................. 30
10 Cleaning and Maintenance ................................................................... 34
10.1 Probe Tip Replacement ................................................................... 34
11 Troubleshooting ................................................................................... 36
12 Replacement Parts ................................................................................ 37
13 Technical Data ...................................................................................... 38
14 Warranty, Maintenance and Service ...................................................... 40
15 Safety Regulations ................................................................................ 41
16 Certificate of Conformity ...................................................................... 42
Appendix A Internal Probe Specifications ................................................... 44
Appendix A Remote Probe Specifications ................................................... 45
Appendix B Program Flowchart .................................................................. 46
Appendix B Program Flowchart .................................................................. 47
Appendix C Test Sequence ........................................................................ 48
Appendix D Pass/Refer Criteria for DPOAE ................................................. 49
Appendix D Pass/Refer Criteria for TEOAE .................................................. 51
Appendix E Preset Test Protocols ............................................................... 53
Appendix F Testing at 4 kHz ...................................................................... 54

GebaEroscreenE_09a.doc 1 851 983/6 03/09
Operating Instructions EROxSCAN
TM
Screener
1 Introduction
Thank you very much for purchasing a quality product from the MAICO family.
This automatic OAE-test system MAICO ERO•SCAN™ Screener is
manufactured to meet all quality and safety requirements, and has been
certified with the CE-symbol according to Medical Directive 93/42/EEC.
In designing the MAICO ERO•SCAN™ Screener we placed particular
importance in making it a user-friendly device, meaning its operation is simple
and easy to understand. And because all functions are software controlled,
upgrading later to new, extended measurement functions will be simple and
inexpensive. That means that you have invested in a device that will adjust to
your future needs.
This user manual should make it as easy as possible for you to become familiar
with the functions of the MAICO ERO•SCAN™ Screener. Please open out the
flap of illustrations on the last page. The description of the position (e.g.) of
controls, displays and connections, found again in the text, will make it easier
for you to learn how to operate the MAICO ERO•SCAN™ Screener.
If you have problems or have ideas for further improvements, please get in
touch with us. Simply call.
Your MAICO-Team
This manual applies to firmware version 7.67 and higher.

GebaEroscreenE_09a.doc 2 851 983/6 03/09
Operating Instructions EROxSCAN
TM
Screener
2 Important Safety Instructions
The MAICO ERO•SCAN™ Screener Otoacoustic Emission Test System should
be used only by those individuals trained to perform the testing for which it
has been designed. No person should attempt to use this instrument without
the necessary knowledge and training to understand how this equipment is to
be properly utilized and interpreted.
Precautions
READ THIS ENTIRE MANUAL BEFORE ATTEMPTING TO USE THIS SYSTEM.
Use this device only as described in this manual.
Use only the disposable eartips designed for use with this instrument.
Never insert the probe tip into the ear canal without affixing an eartip.
The eartips are disposable and for single patient use only. Do not clean or
reuse eartips.
Use only disposable 1.5v AA/UM-3/R6 Alkaline batteries for the test
instrument. Do not use rechargeable cells in this device; do not mix battery
types and do not mix old and new batteries.
Remove the batteries from the instrument if it will not be used for 4 weeks or
more.
Do not immerse the unit in any fluids. See the Cleaning section of this manual
for proper cleaning procedures.
Do not drop or otherwise cause undue impact to this device. If the instrument
is dropped or otherwise damaged, return it to the manufacturer for repair
and/or calibration. Do not use the instrument if any damage is suspected.
Use and store the instrument indoors only. Do not use this instrument or its
accessories in temperatures below 40°F (4°C) or above 100°F (38°C), or in
relative humidity of more than 90%.
Do not attempt to open or service the instrument. Return the instrument to
the manufacturer for all service. Opening the instrument case will void the
warranty.
Do not operate the printer if the power supply has a damaged cord or plug.
See the instructions on the following page.
Do not expose the printed results to sunlight or heat. Printing on thermal
paper fades with exposure to light or heat.
Photocopies of test results should be made if the records are to be kept
indefinitely.
The ERO•SCAN™ Screener Instrument probe tip must not be
inserted into an ear at any time without a disposable eartip
properly affixed.

GebaEroscreenE_09a.doc 3 851 983/6 03/09
Operating Instructions EROxSCAN
TM
Screener
Disclaimer
The MAICO ERO•SCAN™ Screener Test Instrument is designed to be a
screening device for hearing loss. Sensitivity and specificity of this type of
device are based on the test characteristics defined by the user, and may vary
depending on environmental and operating conditions. The presence of
otoacoustic emissions suggests normal outer hair cell function, which in turn
correlates to normal hearing. However, a passing result using this instrument is
not an indication that the full auditory system is normal. Thus, a PASS result
should not be allowed to override other indications that hearing is not normal.
A full audiologic evaluation should be administered if concerns about hearing
sensitivity persist. A REFER test result should not be assumed to be an indicator
of a lack of auditory function; however, it should be followed with full
audiologic diagnostic testing.
NOTICE: Under certain circumstances, especially in low-humidity environments,
common electrostatic discharge may cause this instrument to turn itself off.
This effect causes no permanent damage, and the instrument may be turned
on again by the normal procedure of holding the DOWN button.

GebaEroscreenE_09a.doc 4 851 983/6 03/09
Operating Instructions EROxSCAN
TM
Screener
READ THIS SECTION CAREFULLY BEFORE USE
Printer AC Power Source Precautions
The printer AC power source converts main voltage (120V AC or 230V AC) to
a low voltage (12V DC) for powering the printer. Use only the power source
supplied for this purpose.
This product is for indoor use only. Do not expose to water or excessive dust.
This product is not suitable for operation in the presence of flammable
anesthetic mixture with air or with nitrous oxide.
Do not cover the power source body as it may result in excessive heating. The
power source operates when the plug is inserted into an outlet. To turn it off,
remove the plug from the outlet. The outlet must be easily accessible and
located near the printer. Should a faulty condition occur, remove the plug
from the outlet immediately.
High Voltage Inside! Do not remove the power supply cover! All service or
maintenance must be done by trained personnel. Return the power supply to
the manufacturer for service.
Cleaning and Disinfecting the Unit
Wipe the surface with a cloth slightly dampened with mild detergent or
normal hospital bactericides. Do not immerse the unit. Do not clean the unit
with isopropyl alcohol or other solvents.
Optional Printer Rechargeable Battery Precautions
Do not attempt to open the battery pack. The printer battery pack contains Ni-
Mh cells. Cadmium is a potentially toxic heavy metal, and exposing the cells
increases the risk of leakage or short-circuiting.
Do not short circuit the battery contacts. This could cause burns or a fire.
Disconnect the printer power supply before removing or replacing the battery
pack.
Observe local regulations for handling, transport, and disposal of Ni-Mh cells.
Regulations in many areas prohibit the disposal of Nickel-Cadmium cells.
Complete battery packs may be returned to the manufacturer for recycling.
The battery pack must be charged for a minimum of five hours before using
the printer for the first time. Failure to fully charge the battery pack before use
may reduce the life of the battery pack.

GebaEroscreenE_09a.doc 5 851 983/6 03/09
Operating Instructions EROxSCAN
TM
Screener
3 Purpose
The purpose of the ERO•SCAN™ Screener test system is to provide a rapid
measurement and documentation of Distortion Product Otoacoustic Emissions
(DPOAEs) or Transient Evoked Otoacoustic Emissions (TEOAEs) at several
frequencies.
What Are DPOAEs?
Distortion Product Otoacoustic Emissions (DPOAEs) are acoustic signals that
can be detected in the ear canal of a person with normal outer hair cell
function, subsequent to stimulation of the auditory system with a pair of pure
tones at frequencies f
1
and f
2
. The resulting emission of interest is the
distortion product tone at the frequency 2f
1
-f
2
.
What Are TEOAEs?
Transient Evoked Otoacoustic Emissions (TEOAEs) are acoustic signals that can
be detected in the ear canal of a person with normal outer hair cell function,
subsequent to stimulation of the auditory system with a series of wideband
clicks.
What Do Otoacoustic Emissions Results Tell Us?
Available evidence suggests that otoacoustic emissions (OAEs) are generated
by the cochlea’s outer hair cells, and that the presence of OAEs is an indication
that the outer hair cells are normal. Although OAE test data provide no
indication of inner hair cell function, or of hearing ability, current research
indicates that the majority of hearing-impaired individuals will be identified by
a simple OAE test. Patients who fail to generate OAEs should be rescreened
and/or referred for additional audiological testing.
How Does the ERO•SCAN SCREENER Device Measure DPOAEs?
The ERO•SCAN SCREENER instrument generates a series of test tones, directs
them into the ear canal, and then measures the level of the DPOAE tone
generated by the cochlea. By using different test frequencies, the
ERO•SCAN™ Screener device provides an estimate of outer hair cell function
over a wide range of frequencies.
How Does the ERO•SCAN™ Screener Device Measure TEOAEs?
The ERO•SCAN™ Screener instrument generates a series of clicks, directs them
into the ear canal, and then analyzes the spectrum of the returning signal,
separating the noise and emission. By using bandpass filters, the ERO•SCAN™
Screener device provides an estimate of outer hair cell function over a wide
range of frequencies.

GebaEroscreenE_09a.doc 6 851 983/6 03/09
Operating Instructions EROxSCAN
TM
Screener
How Does the ERO•SCAN™ Screener Device Work?
The digital signal processor in the instrument generates two pure tones (f
1
and
f
2
) for DPOAEs or a series of wideband clicks for TEOAEs through a digital-to-
analog converter. These tones or clicks are presented to the ear via speaker
tubes located in the probe. A microphone in the probe measures the sound in
the ear canal and transmits the signal to the analog-to-digital converter. The
digital signal processor then uses Fast-Fourier Transforms (FFTs) to filter the
signal into narrow frequency bands, and detects any emissions present. The
level of these emissions can be compared with the level of the noise.
The SPL and frequencies of the test tones and the averaging time used to
process the signals can be determined by the tester through adjustable settings
maintained in static memory within the ERO•SCAN™ Screener instrument.
What Frequency Range of Hearing is Estimated?
DPOAEs: Approximately 1 kHz to 12 kHz (depending on the frequency range
selected). Since the health of the hair cells in the region of the f
2
test
frequency are estimated, and a) the 2f
1
-f
2
emission frequency is at about six-
tenths of the f
2
frequency, b) emissions tend to be weak below 600 Hz or so,
and c) the ambient noise tends to be highest at low frequencies, the lowest f
2
test frequency that can be routinely measured is about 1 kHz. TEOAEs:
Roughly 500 Hz to 4 kHz. TEOAEs can be reliably recorded at lower
frequencies than DPOAEs, but cannot be measured reliably above 4 kHz.

GebaEroscreenE_09a.doc 7 851 983/6 03/09
Operating Instructions EROxSCAN
TM
Screener
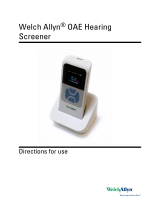
4 Description
What is the ERO•SCAN™ Screener?
The ERO•SCAN™ Screener Otoacoustic Emission test instrument is a hand-
held device designed to provide an objective test of outer hair cell function
through the measurement of Distortion Product Otoacoustic Emissions
(DPOAEs) or Transient Evoked Otoacoustic Emissions (TEOAEs). Versions with
either DPOAEs or TEOAEs or a combined instrument with both methodes are
available. The ERO•SCAN™ Screener consists of the hand-held unit, printer,
single-use eartips and other accessories. The ERO•SCAN™ Screener instrument
may be used as a screening tool, or in conjunction with conventional tests as
part of a full audiological evaluation.
The ERO•SCAN™ Screener instrument contains the hardware and software for
generating the test tones, measuring and displaying the DPOAEs or TEOAEs,
and storing the results until they are printed. The plastic housing contains
circuit boards that provide the signal processing and display the test results.
The instrument also contains four A/UM-3/R6 alkaline batteries to power the
device. The instrument uses a liquid-crystal display (LCD) and three light-
emitting diodes (LEDs) to provide a visual display of test data and test
conditions to the operator. The probe section of the instrument houses a
microphone and two speaker tubes which produce test stimuli and measure
the sound pressure level (SPL) present in the sealed ear canal. Interface of the
instrument to the ear canal is accomplished through disposable eartips made
of industrial elastomer, which fit onto the probe tip. The disposable eartips are
colour coded to facilitate easy selection by size. Four membrane-type push
buttons located on the keypad of the device allow the user to control testing
and printing, and to reset test protocols. Printing will commence upon
placement of the instrument into the cradle.
In the default test mode, the ERO•SCAN™ Screener instrument will store the
results from one patient (left and right ear) in its non-volatile memory for
subsequent printing. However, the ERO•SCAN™ Screener instrument can
store up to 50 test results. The results are displayed via the LCD on the front of
the device and are stored in the device’s internal memory. After testing is
completed, results can be printed using the printer and/or exported to a
computer. Test results are stored in the non-volatile memory so the operator
can delay printing until a later time if desired.
PC-Interface: A serial RS 232C interface for data transfer to a connected
computer is built in. A program for Windows is available as accessory.

GebaEroscreenE_09a.doc 8 851 983/6 03/09
Operating Instructions EROxSCAN
TM
Screener
How are the Results Stored and Reported?
When the ERO•SCAN™ Screener is set in its default settings, the instrument
will store the results from one patient (left and right ear) in its non-volatile
memory for subsequent printing. However, the ERO•SCAN SCREENER
instrument can store up to 50 test results. The results are displayed via the LCD
on the front of the device and are stored in the device’s internal memory.
After testing is completed, results can be printed using the printer and/or
exported to a computer. Test results are stored in the non-volatile memory so
the operator can delay printing until a later time if desired.
Power On
Green
Button
LED
Cradle
Earti
p
Probe
Probe
LEDs
Dis
p
la
y
Ke
yp
ad
Headphone
Jack
Battery Drawer
(underneath)

GebaEroscreenE_09a.doc 9 851 983/6 03/09
Operating Instructions EROxSCAN
TM
Screener
5 Setup
5.1. Unpacking the System
Your MAICO ERO•SCAN
TM
Screener is carefully inspected and packed for
shipping. However, it is a good practice to thoroughly inspect the outside of
the shipping box for signs of damage. If any damage is noted, please notify
the carrier immediately.
Carefully remove the instrument from the shipping box. Remove the plastic
bags and inspect the parts for any damage.
Notify the carrier immediately if any mechanical damage is noted. This will
assure that a proper claim is made. Save all packing material so the claim
adjuster can inspect it as well. Notify your dealer or MAICO when the adjuster
has completed the inspection.
SAVE ALL THE ORIGINAL PACKING MATERIAL AND THE SHIPPING CONTAINER
SO THE INSTRUMENT CAN BE PROPERLY PACKED IF IT NEEDS TO BE
RETURNED FOR SERVICE OR CALIBRATION.
Please check that all accessories listed below are received in good condition. If
any accessories are missing or damaged, immediately notify your dealer or
MAICO.
Standard accessories:
(1) ERO•SCAN
TM
Screener Hand-held Unit
(1) Cradle
(1) External mini probe
(1) Box of 156 Eartips (12 sizes)
(4) Probe Tips for internal probe
(4) Probe Tips for external probe
(4) AA/UM-3/R6 Alkaline Batteries
(already installed)
(1) Operating instruction manual
ERO SCAN Screener
Cradle
External mini probe
Eartips
Probe Tips

GebaEroscreenE_09a.doc 10 851 983/6 03/09
Operating Instructions EROxSCAN
TM
Screener
Installation Printer cable
5.2. Connection to the optional Printer
Connect one end of the printer cable ´ into the port ¬♦ located on the
underside of the cradle as shown in Figure 1 to the right.
After firmly pushing the broad connector end into place, turn the screws on
either side to tighten it.
Insert the cable (battery option two cables into the slot ¬♥ provided on the
bottom of the cradle.
Return the cradle to right side up.
The other end of the cable ´ should be plugged firmly into the inlet at the
rear of the printer ³. The flat side on the small connector (look for the arrow)
goes to the bottom of the printer. The cover of the connector will slide back to
ease installation of the connector.
Plug the power supply cord into the power supply and into an electrical wall
outlet.
The printer indicator light ¯ (located on the front of the printer) will shine
steady green.
If you have the optional printer with rechargeable batteries plug the additional
short end µ of the cable ´ into the external printer power supply.
Plug the power supply cord into an electrical outlet.
If you use the printer only with batteries (option) the printer indicator light ¯
(located on the front of the printer) will blink green.
The recharging time for the batteries is at least 5 hours.
See the precautions for the batteries and printer power supply at chapter 2.
NOTE for the printer with Ni-Mh rechargeable battery pack:
The printer will not run from the power supply, the power supply only charges
the battery pack. The battery pack must be charged for a minimum of five
hours before using the printer for the first time. The printer will not function
without a charged battery pack attached. Failure to fully charge the battery
pack before use may reduce the life of the battery pack.
L H
I
B C
J
I B C
K
J
Installation printer cable
(Option)

GebaEroscreenE_09a.doc 11 851 983/6 03/09
Operating Instructions EROxSCAN
TM
Screener
5.3. Environmental conditions
The MAICO ERO•SCAN
TM
Screener should be operated in a quiet room, so
that the examinations are not influenced by outside noises.
Electro-medical instruments, which emit strong electromagnetic fields (e.g.
microwaves - radiotherapy devices), can influence the function of the MAICO
ERO•SCAN
TM
Screener. Therefore the use of these instruments is not allowed
in close proximity to the ERO•SCAN
TM
Screener.
The test room must be at normal temperature, usually 15°C / 59°F to 35°C /
95°F, to guarantee precise measuring results. If the device has been cooled
down (e.g. during transport), please wait until it has warmed up.
5.4 Battery Installation
The ERO•SCAN
TM
Screener instrument uses 4 AA/UM-3/R6 Alkaline batteries.
Open the battery compartment by sliding the battery panel down and install
the batteries as indicated on the battery label. Once the batteries are correctly
in place, slide the panel back onto its tracks to close the battery compartment.

GebaEroscreenE_09a.doc 12 851 983/6 03/09
Operating Instructions EROxSCAN
TM
Screener
Figure 3
Figure 4
Paper holder lever
Paper
5.5 Loading Paper into the optional Printer
Open the cover of the printer by pulling up and back. Orient the paper roll so
that the paper will feed from the bottom of the roll (see Figures 4 and 5). Place
the roll of paper into the printer by holding the white paper-holder lever back
against the case. Allow the lever to slide back so that it fits onto the hub on
the paper roll. The paper roll should move freely on the hub. Pull the green
paper-roller release lever forward until it snaps in place to disengage the roller.
Slide the end of the paper under the roller; it will come out from the front of
the roller. Pull the paper end through the roller until it extends about 3 inches
above the roller. Push the paper-release lever back. Push the green button on
the top of the printer to advance the paper. The printer indicator light on the
front of the printer will now flash green if the paper was properly installed.
Pressing the green button twice rapidly will print a test run.

GebaEroscreenE_09a.doc 13 851 983/6 03/09
Operating Instructions EROxSCAN
TM
Screener
5.6 Attaching Eartips
The ERO•SCAN
TM
Screener instrument comes with a box of disposable eartips
that fit a variety of ear canal sizes. The probe tip must have an eartip attached
before inserting it into an ear canal. The eartip kit has 12 different size eartips
that are color-coded for easy selection. The determination of the appropriate
eartip size should be made by persons with proper training and experience.
The eartip must seal the ear canal. The best test results are obtained when the
eartip is inserted deeply into the ear canal instead of flush with the ear canal
opening. Caution must be taken, however, to ensure that the eartip does not
extend too deeply into the ear canal. Use only the eartips approved for use
with the instrument. Ordering information can be found on page 29 or inside
the eartip box. The eartips are disposable and should be replaced after each
patient. Do not attempt to clean or reuse these eartips.
After selecting an eartip, push it onto the probe tip until it is flush against the
base of the probe tip. The sound outlet tubes on the probe tip are recessed to
minimize the likelihood of clogging. If the probe tip does become plugged or
clogged, it must be replaced. See the section
Probe Tip Replacement
on for
further information. To remove the eartip, grasp the eartip at the base and
twist it while pulling it straight off the end of the probe tip.

GebaEroscreenE_09a.doc 14 851 983/6 03/09
Operating Instructions EROxSCAN
TM
Screener
109 12
Figure 1
Figure 2
6 Quick Start
These steps will allow you to quickly start using the ERO•SCAN™ Screener
OAE Test System. If you have a TEOAE instrument it will be in the TEOAE test
mode. Be sure to perform the necessary otoscopic examination prior to testing.
Read the entire manual before testing patients
.
NOTE: In order to print the test results, the printer must be charged for 5
hours.
Step 1 Place an eartip as far down as possible on the probe tip.
Step 2 Turn on the ERO•SCAN instrument by pressing the large
DOWN arrow button Ì.
Step 3 Select the test ear by pressing the ◂ left Ë or ▸ right Î
arrow key.
Step 4 Insert the eartip deeply into the patient’s ear canal to obtain a seal.
When a seal is obtained, the MAICO ERO•SCAN™ Screener
instrument will automatically begin the test by first calibrating
and then testing emissions.
The red ERROR LED Ç will illuminate if there is noise in the
environment. This flashing is normal and will often occur. Once
the testing is finished, the unit will display PASS or REFER on
the LCD display.
When testing is completed on both ears, turn the optional printer on by
pressing the green button on top and place the hand-held unit on the cradle.
The most recent test results for both ears will automatically print out.

GebaEroscreenE_09a.doc 15 851 983/6 03/09
Operating Instructions EROxSCAN
TM
Screener
7 Performing DPOAE and TEOAE Tests
7.1. Preparing the Patient for Testing
Otoscopic examination of the patient’s ear canals should be performed prior to
testing. Excessive cerumen or vernix in the ear canals may interfere with the
test and give invalid or incomplete results. Patients with excessive cerumen,
debris, or foreign bodies in the ear canals should be referred to an audiologist
or physician for removal of the blockage prior to testing.
Place the patient in a position that will allow the ERO•SCAN
TM
Screener
instrument to be held steady while testing is in progress. The patient should
remain still and quiet while the test is being performed.
7.2. Control Buttons
The ERO•SCAN
TM
Screener instrument uses 4 buttons to control all functions
of the instrument. These buttons are arranged in a directional cursor format.
The arrows on the keys (← LEFT, → RIGHT, ↑ UP, ↓ DOWN) correspond to the
arrows that are used on the screen. The screen will indicate which button to
push by showing the appropriate arrow.
NOTE: The UP key will always bring the instrument back to either the previous
menu or the main menu. The UP key will also turn the unit off when the
instrument is at the Main Menu.
7.3. Turning on the Instrument
To turn on the ERO•SCAN
TM
Screener instrument, press the large DOWN key
located below the instrument’s display screen. Three small lights (red, yellow
and green) will appear briefly just above the display screen. The green ready
light will remain on. Figure 6 shown below will quickly appear. This display will
indicate the type of instrument, software version, serial number, and operating
mode (DP, TE, DP custom or TE custom).
If the batteries have sufficient power, the ERO•SCAN
TM
Screener instrument
will automatically check the date and time settings. If there are no date/time
errors detected, the Main Menu (Figure 7) will appear on the display.
NOTE: If this is the first time the ERO•SCAN
TM
Screener instrument is being
used, or if you wish to change the date or time, see
Setting the Clock
for
instructions on setting the correct date and time.

GebaEroscreenE_09a.doc 16 851 983/6 03/09
Operating Instructions EROxSCAN
TM
Screener
Automatic Shutdown
The ERO•SCAN
TM
Screener instrument has an automatic “shutdown” feature,
designed to prolong battery life.
The unit will automatically shut down after 1 minute (default) of inactivity. To
turn it back on, simply press the large DOWN key. This feature can be re-
programmed for various periods of inactivity before “shut-down.” (See the
Changing Instrument Settings – Auto-Shutdown Time
section for further
information on this feature.)
7.4. Testing in the Default Modes
For either DPOAEs or TEOAEs there are a default test protocol and a user
definable protocol called a “custom”setting. The default protocols will be used
unless a custom protocol is selected by the user. See
Changing Instrument
Settings - Test Mode
. Appendix E contains information on custom protocols,
and the Advanced Options for DPOAE Testing or TEOAEs allow the user to
change test protocols.
The settings for testing in the default DP protocol are as follows:
Number of Frequencies Tested = 4 Averaging Time = 4 Seconds
Frequency Range = 2 kHz to 5 kHz Pass SNR (Signal-to-Noise Ratio) = 6 dB
P1 (Intensity of F1 in dB SPL) = 65 Number of Passing Frequencies for Overall
Test Pass = 3
P2 (Intensity of F2 in dB SPL) = 55
The settings for testing in the default TE protocol are as follows:
Number of Bands Reported = 6 Averaging Time = 64 Seconds
Figure 4
Main Menu
Fi
g
ure 3

GebaEroscreenE_09a.doc 17 851 983/6 03/09
Operating Instructions EROxSCAN
TM
Screener
Frequency Range = 1.5 kHz to 4 kHz Pass SNR (Signal-to-Noise Ratio) = 4
dB
Click Presentation Level = 83 dB Number of Passing Frequencies for Overall
Test Pass = 3
SPL Peak Equivalent
7.4.1 To Begin Testing
To begin testing, place an eartip as far down as
possible on the probe tip, turn on the ERO•SCAN
TM
Screener instrument by pressing the down button and
select either the LEFT or RIGHT arrow key to indicate
which ear will be tested. After the test ear is selected,
Figure 8 will be shown. This display shows two horizontal bar graphs
representing the environmental noise (NOISE) and the ear canal volume
(VOLUME).
When both bars fill the screen from left to right, the
environmental noise is high and the ear canal volume
is large. As the unit is inserted into the ear canal,
both horizontal bars should decrease from right to
left indicating a decrease in environmental noise and
ear canal volume. To obtain a seal and measure
emissions, gently insert the eartip into the patient’s
ear canal. It should fit snugly and comfortably.
The best test results are obtained when an eartip is inserted deeply into the ear
canal instead of flush with the ear canal opening (See Appendix F). The NOISE
and VOLUME bar readings should be used as an indication that the unit is
sealing the ear canal. If the VOLUME and NOISE bars continue to fill the
screen, the unit is not sealing the ear canal, and appropriate adjustments
should be made until a decrease in these bars is seen.
Note that for an adult, the VOLUME bar will decrease
to about half (Figure 9), while for a newborn or child,
the VOLUME bar will decrease further to the left
(Figure 10). The NOISE bar will show a decrease from
the original reading. When a seal is obtained, the unit
will automatically begin testing (autostart) and the
yellow test LED will illuminate throughout the test.
Figure 5
Figure 6
Figure 7
/