Page is loading ...

MIC-6
Instruction Manual
Multi-Instrument Calibrator
119189-00 • 16May2022


Thermo Scientific MIC-6 Instruction Manual iii
Contents
Introduction ........................................................................................................ 1-1
Theory of Operation ........................................................................... 1-2
Specifications ...................................................................................... 1-3
Dimensions ......................................................................................... 1-4
Installation and Setup ...................................................................................... 2-1
Unpacking and Inspection .................................................................. 2-1
Cover Removing and Replacing .......................................................... 2-2
LCD Viewing Position ........................................................................ 2-3
Setup Procedure .................................................................................. 2-4
Startup ................................................................................................ 2-5
Operation ............................................................................................................ 3-1
Main Menus and Keypads ................................................................ 3-3
Numeric Keypad ........................................................................... 3-5
Alphanumeric Keypad ................................................................... 3-6
Calibration .......................................................................................... 3-8
Auto Calibration .............................................................................. 3-9
Start ............................................................................................ 3-11
Valve State Display ..................................................................... 3-14
Calibration Sequence Setup ......................................................... 3-15
Manual Calibration ........................................................................ 3-16
Calibration Precision ...................................................................... 3-18
Drift Check ....................................................................................... 3-23
User ID: ...................................................................................... 3-25
Valve State Display ..................................................................... 3-26
View Data ................................................................................... 3-27
Settings ............................................................................................. 3-28
Gas Port Association ...................................................................... 3-30
Input Cylinder Setup ..................................................................... 3-32
Calibration Sequence Setup ............................................................ 3-34
Instrument Settings ........................................................................ 3-35
Clock .......................................................................................... 3-36
Display Setup .............................................................................. 3-43
Health Check ................................................................................. 3-44
Status and Alarms........................................................................ 3-45
TVA Status ................................................................................. 3-49
File Sharing and Support ............................................................. 3-50
Chapter 1
Chapter 2
Chapter 3

Contents
iv MIC-6 Instruction Manual Thermo Scientific
iQ360 ......................................................................................... 3-51
Communications............................................................................ 3-54
Wired TCP/DHCP .................................................................... 3-55
Email Server (SMTP) .................................................................. 3-57
Security Access Levels ..................................................................... 3-58
Change Security to View Only Access ......................................... 3-60
Change Full Access Security Password ......................................... 3-61
Change Instrument Password ...................................................... 3-63
Reset Instrument Password ......................................................... 3-65
User Contact Information .............................................................. 3-66
Update Bootloader ......................................................................... 3-67
USB Drive ..................................................................................... 3-68
Firmware Update Via USB Drive ................................................ 3-69
Download Data To USB Drive ................................................... 3-73
Change USB Password ................................................................ 3-77
Reset USB Password .................................................................... 3-79
Maintenance ...................................................................................................... 4-1
Safety Precautions ............................................................................... 4-1
Leak Test ............................................................................................ 4-1
Flow Test ............................................................................................ 4-3
Troubleshooting ................................................................................................. 5-1
Safety Precautions ............................................................................... 5-1
Troubleshooting Guide ....................................................................... 5-1
Servicing ............................................................................................................. 6-1
Safety Precautions ............................................................................... 6-1
Firmware Updates ............................................................................... 6-3
Replacement Parts List ........................................................................ 6-3
Fuse Replacement ............................................................................... 6-6
Filter Replacement .............................................................................. 6-7
Fan Replacement ................................................................................. 6-8
LCD Module Replacement ............................................................... 6-10
LCD Board Replacement .................................................................. 6-12
Peripherals Support Board and System Controller Board
Replacement ..................................................................................... 6-13
Power Supply Replacement ............................................................... 6-14
Step POL Board Replacement ........................................................... 6-16
Replacing Valves on the Manifold .................................................. 6-20
USB Hub Replacement .................................................................. 6-23
Optional Equipment ........................................................................................... 7-1
Bluetooth ............................................................................................ 7-1
Chapter 4
Chapter 5
Chapter 6
Chapter 7

Contents
Thermo Scientific MIC-6 Instruction Manual v
Safety, Warranty, and WEEE .......................................................................... A-1
Safety .................................................................................................. A-1
Safety and Equipment Damage Alerts .............................................. A-1
Warranty ............................................................................................. A-2
WEEE Compliance ............................................................................. A-4
WEEE Symbol ................................................................................. A-4
Quick Reference .............................................................................................. B-1
List of Figures ..................................................................................... B-1
List of Tables....................................................................................... B-2
GNU Lesser General Public License ............................................................. C-1
GNU Lesser General Public License ................................................... C-1
Data File Formats ............................................................................................. D-1
Calibration Gas Cylinder Table.......................................................... D-1
Calibration Data Table ...................................................................... D-2
Calibration Precision Data File Format .............................................. D-4
Appendix A
Appendix B
Appendix C
Appendix D


Thermo Scientific MIC-6 Instruction Manual 1-1
Chapter 1
Introduction
The Thermo Scientific™ MIC-6 Multi Instrument Calibrator is designed
specifically to assist with EPA mandated Leak Detection and Repair
(LDAR) compliance monitoring. It has been optimized to calibrate the
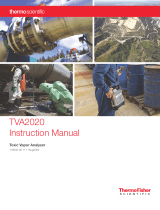
TVA2020 Toxic Vapor Analyzer with minimal user interaction. It can also
be used in a manual mode to calibrate the legacy TVA1000B or similar
instruments.
Figure 1–1. MIC-6 Front

Introduction
Theory of Operation
1-2 MIC-6 Instruction Manual Thermo Scientific
The purpose of the MIC-6, Multi Instrument Calibrator, is to
simultaneously calibrate, in approximately 15 minutes, up to six TVA2020
instruments, with zero air and up to 5 different span concentrations at a
preset flow rate to each instrument of approximately 2 LPM. The calibrator
design and data storage are optimized for LDAR compliance monitoring.
The MIC-6 has two calibration modes, manual and auto. Auto mode is
designed specifically for the TVA2020. Manual mode can be used to
calibrate up to six legacy TVA1000B or other similar instruments
eliminating the need for Tedlar bags or similar gas delivery systems. In auto
mode, the calibrator will communicate with the TVA2020 through the
USB connection eliminating the need for user interaction during the
calibration. During the calibration, each span gas, starting with zero air, is
delivered to the instruments in increasing concentration. Immediately after
calibration the gases are reintroduced to the instruments to confirm the
calibration and set the reference point for the drift check.
The calibrator can also perform a manual or automatic drift check of the
instruments. In auto drift check mode the calibrator compares the most
recent calibration data to the current instrument reading and reports the
percent difference. Manual drift check mode, like the calibration mode, can
be used with TVA1000B or similar instruments.
The calibration gas tank information must be entered into the calibrator to
perform the automated features. The MIC-6 will use the tank information,
specifically the expiration date, to alert the user that the tank is due to
expire within a month of the expiration date.
The MIC-6 also contains a Calibration Precision feature that automatically
performs a calibration precision test for the TVA2020. The MIC-6 will
calculate the average concentration and response time based on the data
obtained. The data is available for download via USB or Bluetooth. Only
one instrument at a time can be attached to the MIC-6 via the USB cable
to activate this feature.
The MIC-6 has sufficient memory to store 6 years’ worth of daily
calibration and drift data on over 100 instruments. The number of
individual instruments that can be calibrated on a daily basis is only limited
by the amount of time available. The data is stored in the order it is
received in memory thereby eliminating the possibility of postdating
entries. If this were attempted by altering the calibrator’s date and time the
downloaded data file would contain non-sequentially dated data.
The data stored in the internal memory can be downloaded via a USB
memory device or through a user supplied Bluetooth connection. In either
case the file is in a .CSV format.
Theory of
Operation

Introduction
Specifications
Thermo Scientific MIC-6 Instruction Manual 1-3
Table 1–1 lists the specifications for the MIC-6.
Table 1–1. MIC-6 Specifications
Approvals and
Certifications
CE/UKCA, TUV-SUD Safety
Input Pressure
(Zero and 5 Span
Gases)
15 to 25 psi (40 psi max)
Flow Rate 1 instrument – approximately 2.5 LPM @ 25 psi
6 instruments – approximately 1.5 LPM/instrument @ 25 psi
Operating
Temperature
0–40 °C
Physical Dimensions 24 in (D) x 16.75 in (W) x 8.72 in (H) [609 mm (D) 425.45 mm (W)
x 221.48 mm (H)]
Weight 15 lbs
Mounting Options Table top (Tilt feet allow 30° viewing angle)
Rear Panel VESA mount pattern (bracket user supplied)
Power Requirements
100- -- 240 VAC 50/60 Hz
50 W
Storage Temperature -20 to 60 °C
Specifications

Introduction
Dimensions
1-4 MIC-6 Instruction Manual Thermo Scientific
Figure 1–2. MIC-6 Appearance and Dimensions
Dimensions

Thermo Scientific MIC-6 Instruction Manual 2-1
Chapter 2
Installation and Setup
Installation of the MIC-6 includes unpacking the instrument, wall
mounting if needed, connecting the gas supply lines, connecting the output
gas line and attachment to suitable AC power.
Equipment Damage Do not attempt to lift the instrument by the cover or
other external fittings. ▲
The MIC-6 is shipped in one container. If there is obvious damage to the
shipping container when you receive the instrument, notify the carrier
immediately and hold for his inspection. The carrier is responsible for any
damage incurred during shipment. Use the following procedure to unpack
and inspect the instrument.
1. Remove the instrument from the shipping container and set it on a
table or bench that allows easy access to both the front and rear.
2. Remove the cover to expose the internal components. (See “Figure 2–
1” on page 2-2.)
3. Check for possible damage during shipment.
4. Check that all connectors and circuit boards are firmly attached.
5. Re-install the cover.
6. Remove any protective plastic material from the case exterior.
Unpacking and
Inspection

Installation and Setup
Cover Removing and Replacing
2-2 MIC-6 Instruction Manual Thermo Scientific
Use the following procedure to remove and replace the cover.
Equipment required:
Phillips screwdriver, #2
1. Unfasten the six 8-32 screws securing the cover.
2. List cover upwards.
Figure 2–1. Removing the Cover
Cover Removing
and Replacing

Installation and Setup
LCD Viewing Position
Thermo Scientific MIC-6 Instruction Manual 2-3
The instrument can be installed in the following configurations:
● Closed position, LCD viewed parallel
● Angled position, LCD viewed angled
● Extract front legs outwards for angled position
Figure 2–2. Installing Feet
LCD Viewing
Position

Installation and Setup
Setup Procedure
2-4 MIC-6 Instruction Manual Thermo Scientific
Use the following procedure to assemble the instrument.
1. Determine where the instrument will be located and wall mount first, if
desired, before attaching plumbing lines.
2. Locate the 6 quick connect mating connectors shipped with the
instrument.
3. Attach a suitable tubing capable of withstanding the 25 psi supply
pressure to the quick connect fittings. Heavy wall 1/8-inch ID Tygon
tubing is recommended.
4. For simplicity, the span concentrations should increase from Span 1 to
Span 5 however this is not necessary as the span concentrations for each
connection must be entered into the instrument (see the Input
Cylinder Setup procedure in the Operation section). In the auto mode,
the instrument will apply the span gases in increasing order of
concentration, thereby opening the correct valve in the appropriate
sequence.
5. Plug the AC line cord into an appropriate power source. The unit will
accommodate all voltages 115–240 VAC.
The MIC-6 is supplied with a three-wire grounding cord. Under no
circumstances should this grounding system be defeated. ▲
Setup Procedure
Icon Here

Installation and Setup
Startup
Thermo Scientific MIC-6 Instruction Manual 2-5
Use the following procedure when starting the instrument.
1. Toggle the front panel power switch.
2. The pressure in the supply lines should be set @ 15-25 psi (max). The
components can withstand up to 40 psi but the flow will be more than
required resulting in excessive gas usage.
3. Enter the calibration gas cylinder information in the Input Cylinder
Setup menu located in Settings>Input Cylinder Setup. For more
information about this menu, see the “Operation” chapter.
4. Connect the TVA2020, or other instruments, as needed for the desired
operation (Auto Calibration, Manual Calibration, Calibration Precision
or Drift Check). For more information about connecting instruments,
see the “Operation” chapter.
5. Perform the required calibration or drift check, for more information
about these features (Auto Calibration, Manual Calibration,
Calibration Precision or Drift Check), see the corresponding section of
the “Operation” chapter.
Startup


Thermo Scientific MIC-6 Instruction Manual 3-1
Chapter 3
Operation
This chapter describes the functionality of the touchscreen user interface.
The Instrument Display consists of a Title Bar, a User Interface, and a
Status Bar. The Title Bar, located at the top, includes the Home button,
instrument name, instrument mode, and Help button. The User Interface,
located in the middle, is where the Home Screen and all other screens are
accessed. The Home Screen has three Main Menu buttons, located on the
left side, which include Calibration, Drift Check, and Settings, while the
user interface to the right of the buttons displays the current test status of
connected instruments. The Status Bar, located at the bottom, includes the
Back button, Access Levels, Health Check, Favorites, Date and Time, and
Contact Information.
Home Screen
Title Bar
User Interface
Status Bar

Operation
Startup
3-2 MIC-6 Instruction Manual Thermo Scientific
The Instrument Display contains the following information:
● Title Bar:
● Home button: When pressed, it brings you to the Home Screen.
● Title Text: Displays instrument name and operation status in all
screens.
● Help button: When pressed, brings you to the help screens.
● User Interface:
● Calibration button: Allows the user to choose between automatic
and manual calibration modes.
● Drift Check Button: Allows the user to begin a drift check of
previously calibrated instruments.
● Settings button: Shows real-time status and alarms, also predictive
diagnostics and maintenance history. Contains controls for
operating the instrument, communications, and sets instrument
options.
● Unit 1-6: Displays the TVA2020 serial number(s) connected to the
USB port(s).
● Status Bar:
● Back button: When pressed, it displays the previous screen.
● Access Levels button: Allows the user to set security access levels, and
allows/restricts access to functionality depending on the selected
access level.
● Health Check button: Brings the user to the Health Check screen.
● Favorites button: Allows user-selectable favorite buttons. To add to
the favorites screen, user presses the desired screen button for 2
seconds. The user will be directed to the favorites screen where the
user chooses the button position. To remove a favorite button from
the favorites screen, press and hold button for 2 seconds.
● Clock: Displays current date and time.
● Thermo Scientific Information button: Shows contact information.

Operation
Startup
Thermo Scientific MIC-6 Instruction Manual 3-3
The Main Menu buttons, located on the Home Screen, contains three
submenus. Each submenu contains related instrument settings. This
chapter describes each submenu and screen in detail. Refer to the
appropriate sections for more information.
Note Features not implemented yet are greyed out. ▲
Main Menus and
Keypads

Operation
Startup
3-4 MIC-6 Instruction Manual Thermo Scientific
Calibration Drift Check Settings
Calibration Precision Instrument Settings
• Clock
• Display Setup
• Language
• Reboot Instrument
Input Cylinder Setup
Communications
Security Access Levels
Manual Calibration
• Start
• Input Gas
• Output 1—6
Gas Port Association
Auto Calibration
• User ID Start
• Valve State Display
• Calibration Sequence Setup
• Purge
USB Dr ive
• Firmware Update Via USB
Drive
• Download Data to USB Drive
• Change USB Password
• Reset USB Password
User ID:
Start
Valve State Display
• Input Gas
• Output 1—6
User Contact Information
Update Bootloader
Calibration Sequence Setup
• Zero
• Span 1—5
Heal th Check
• Status and Alarms
• Predictive Diagnostics
• Maintenance
• File Sharing and Support
• iQ360
• Firmware Version
Drift Check Limit
View Data
Acceptance Method
• Av er age
• Single Reading
/